- Overview
- Deploying a Policy
- Setting up Groups of Interest and Traffic Rules
- Applying and Activating the Policy
- Verification
Overview
The Cisco SD-WAN solution builds a full mesh topology by default and there isn’t any traffic engineering that is in place out of the box. The ability to steer application traffic per the network requirements via a specific path is something that can be achieved via data policies. We can leverage data policies to match specific traffic and send it via the preferred transport. To verify current functionality:
-
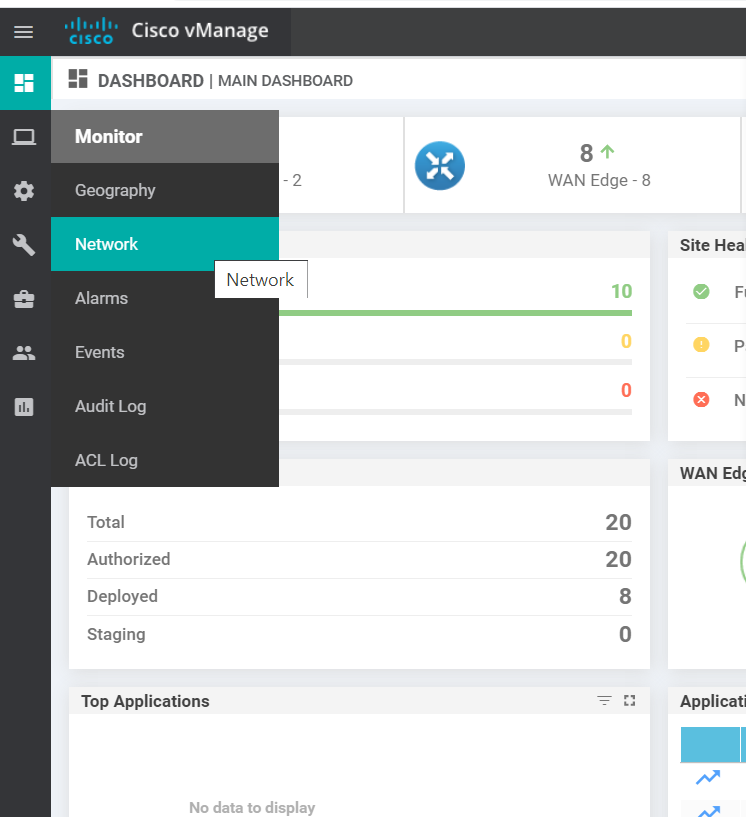
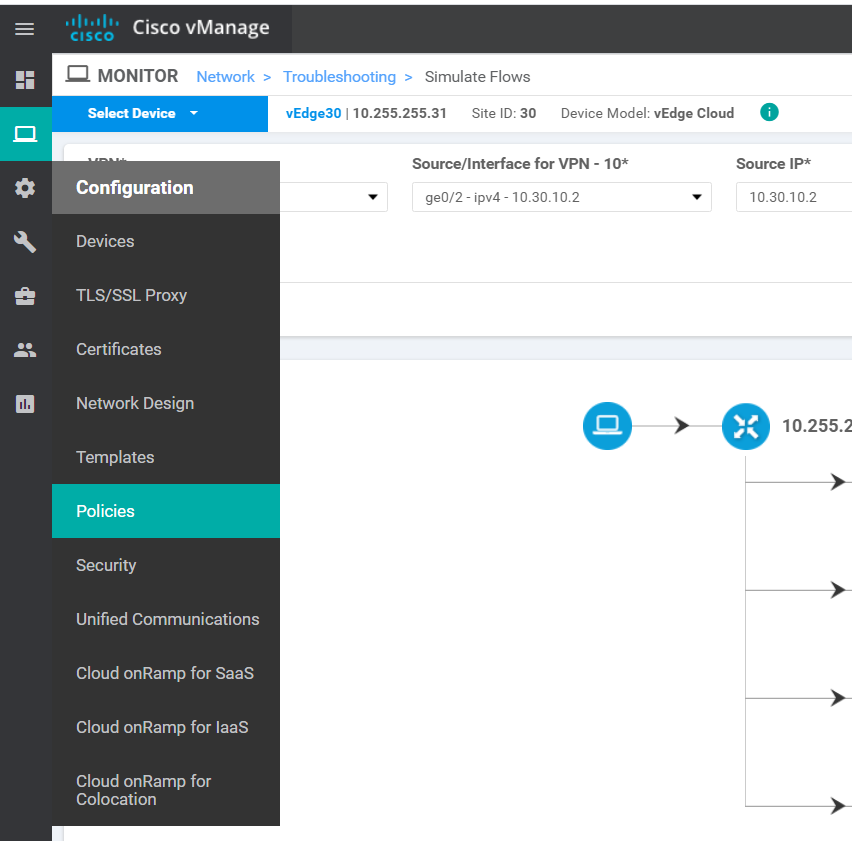
Log in to the vManage GUI and navigate to Monitor => Network
-
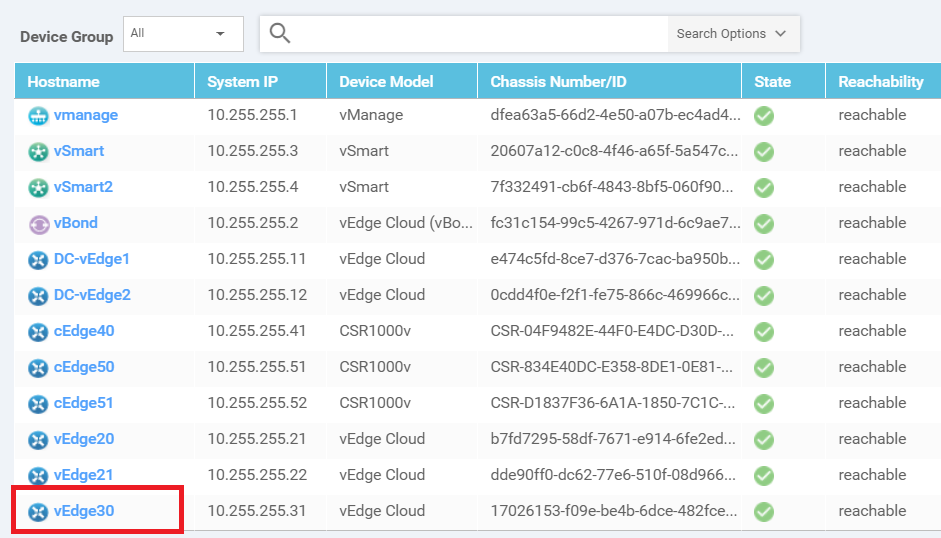
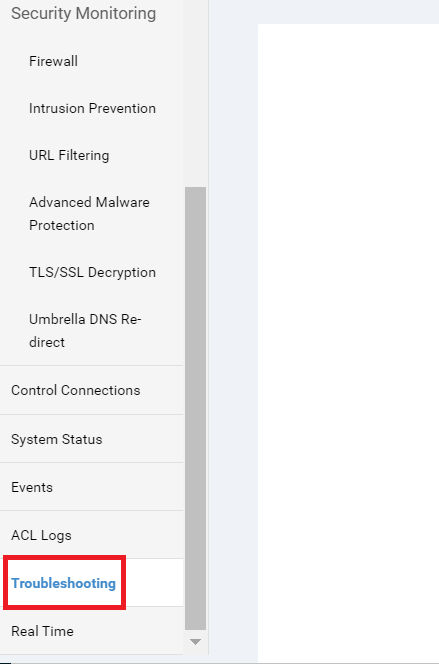
Click on vEdge30 and scroll down the list on the left-hand side to Troubleshooting
-
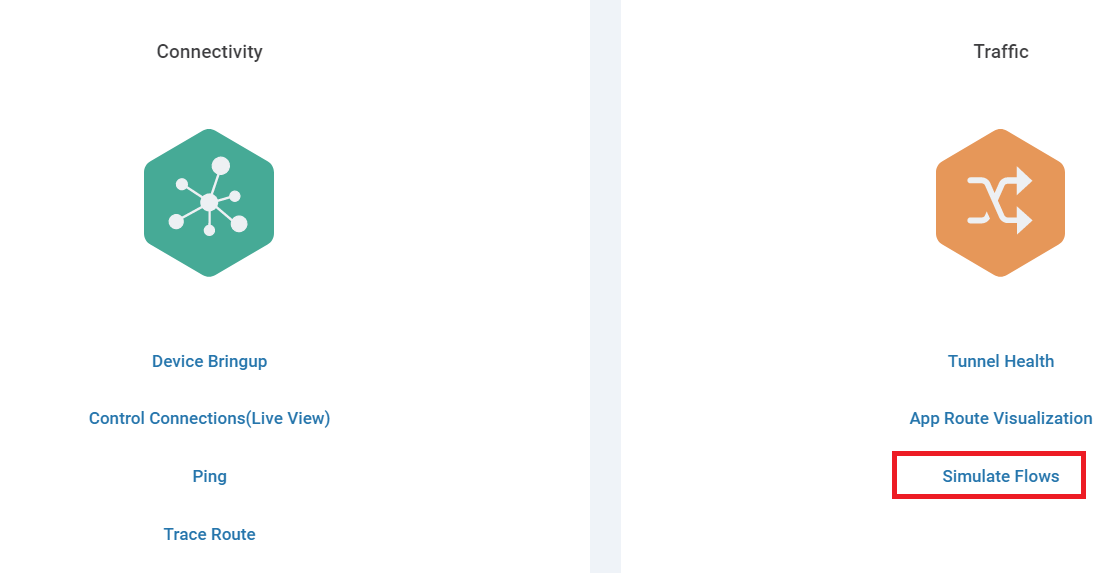
Click on Simulate Flows
-
Enter VPN - 10 as the VPN, ge0/2 as the Source/Interface and 10.0.0.1 as the Destination IP. Click on Simulate
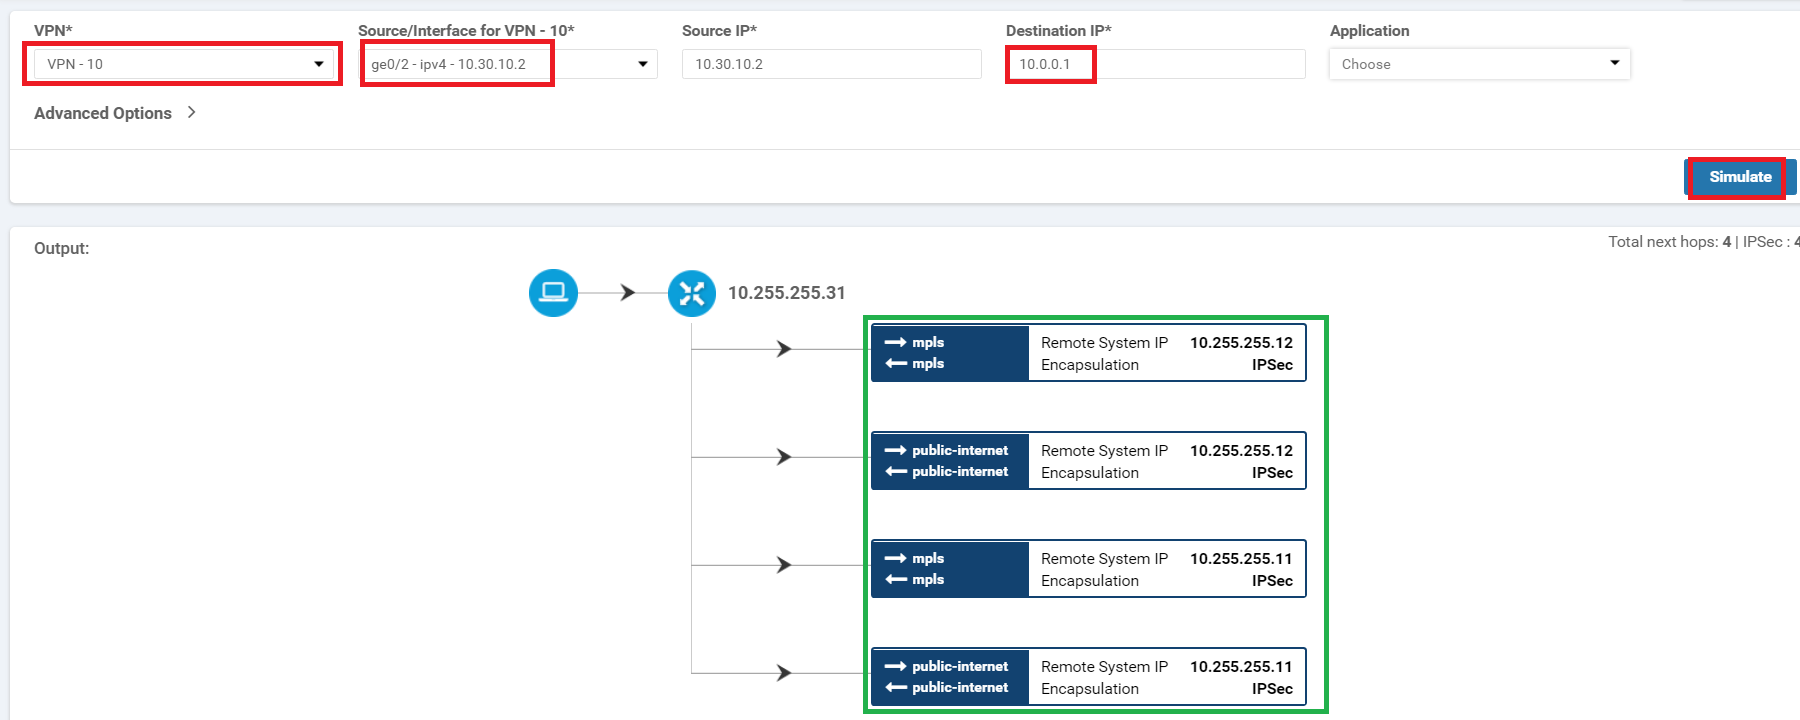
We find that general traffic uses all possible available transports to send data to the other side.
-
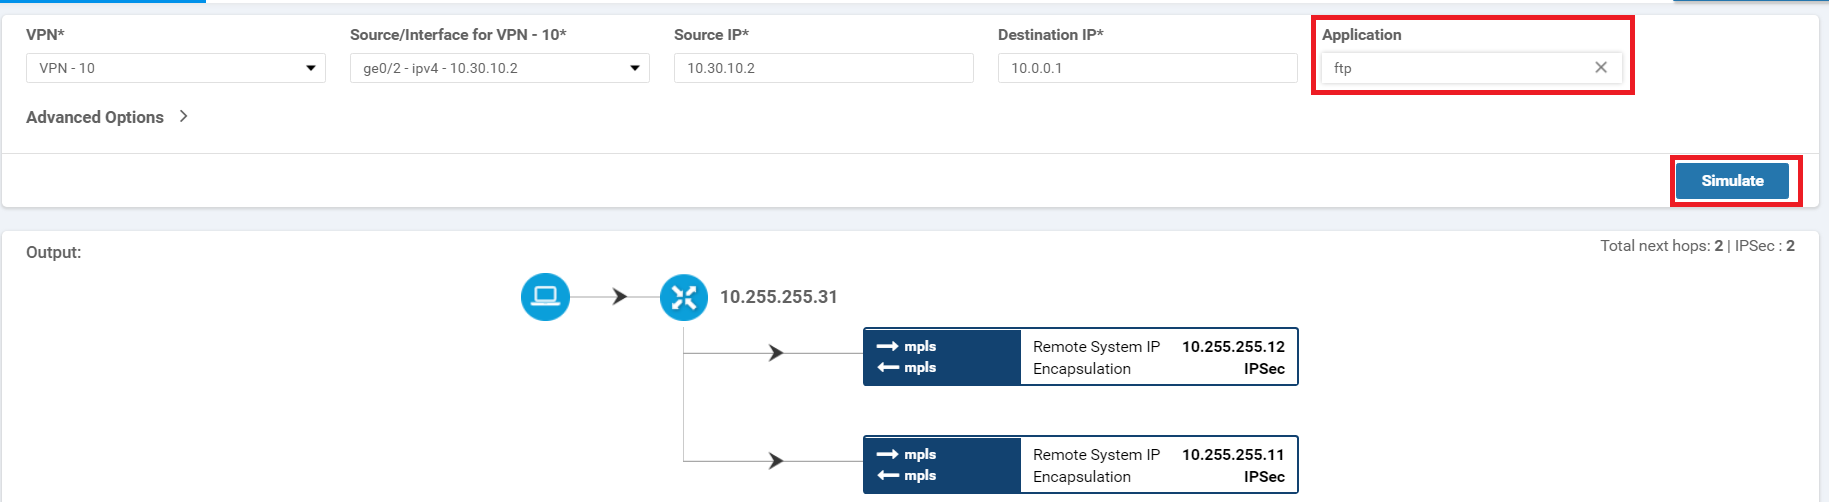
Keep all details the same, but this time choose ftp under Application. Click Simulate
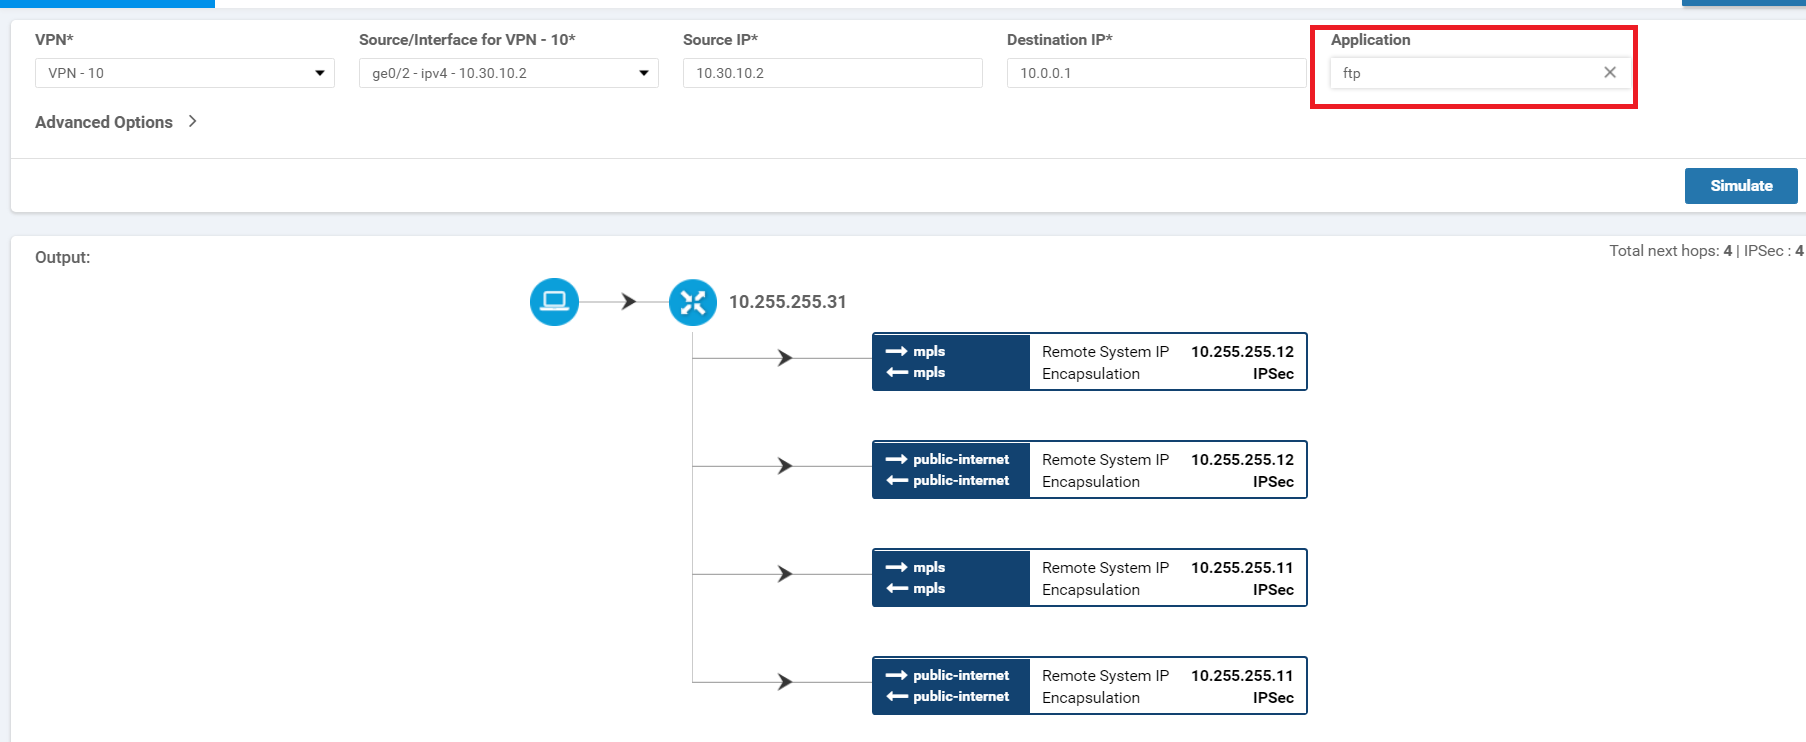
Once again, ftp traffic is also attempting to take all possible transports.
In our example, we will assume that the requirement is to send FTP traffic over the MPLS link (preferred).
-
- Deploying a Policy
- Setting up Groups of Interest and Traffic Rules
- Applying and Activating the Policy
- Verification
Deploying a Policy
We begin by creating a Policy and identifying Groups of Interest (or interesting traffic). The policy is then expanded to encompass a Data Policy.
Setting up Groups of Interest and Traffic Rules
-
On the vManage GUI, navigate to Configuration => Policies.
-
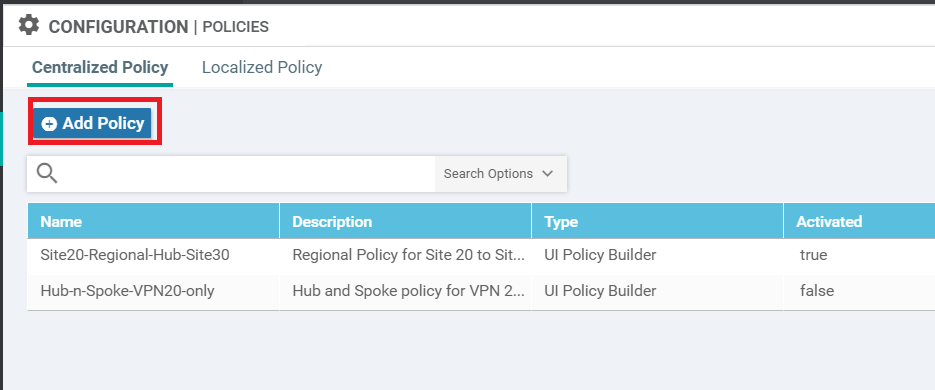
Under Centralized Policy, click on Add Policy to create a new Policy
-
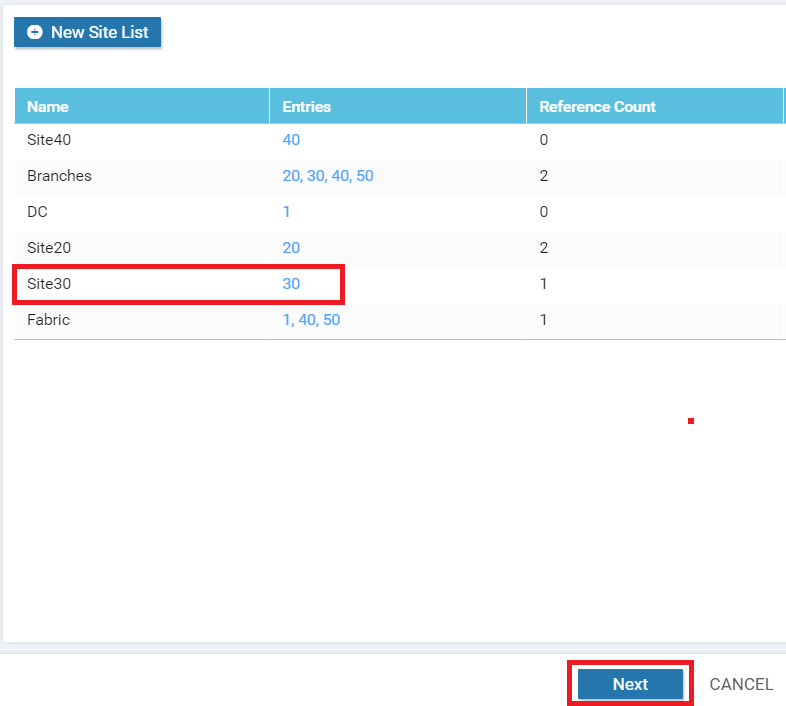
We will be making use of the Site30 Site List created before. Click on Next two times
-
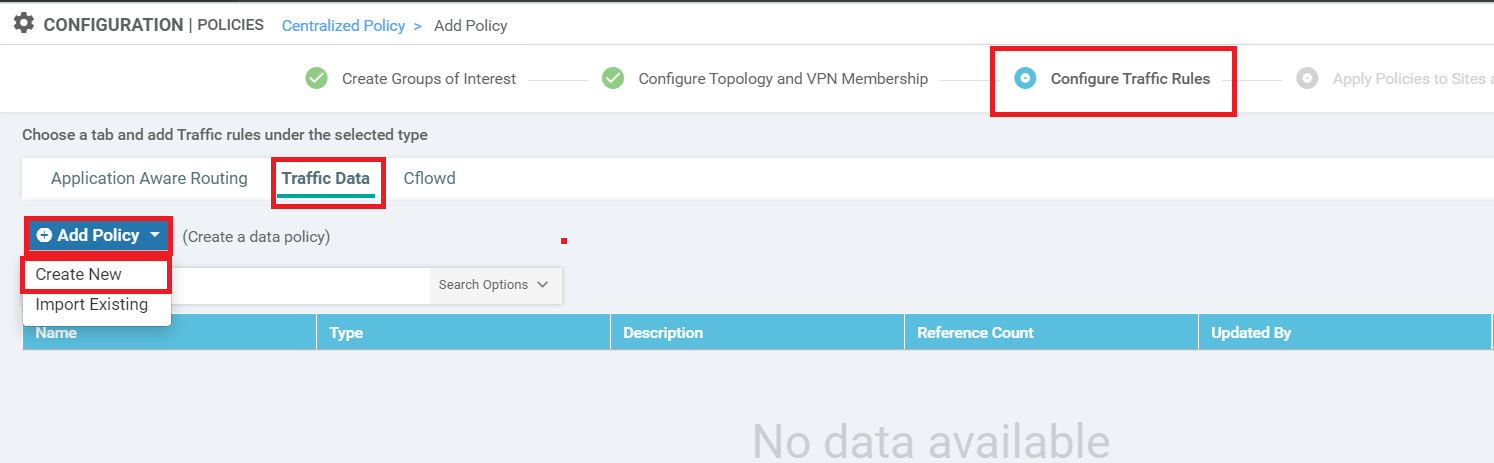
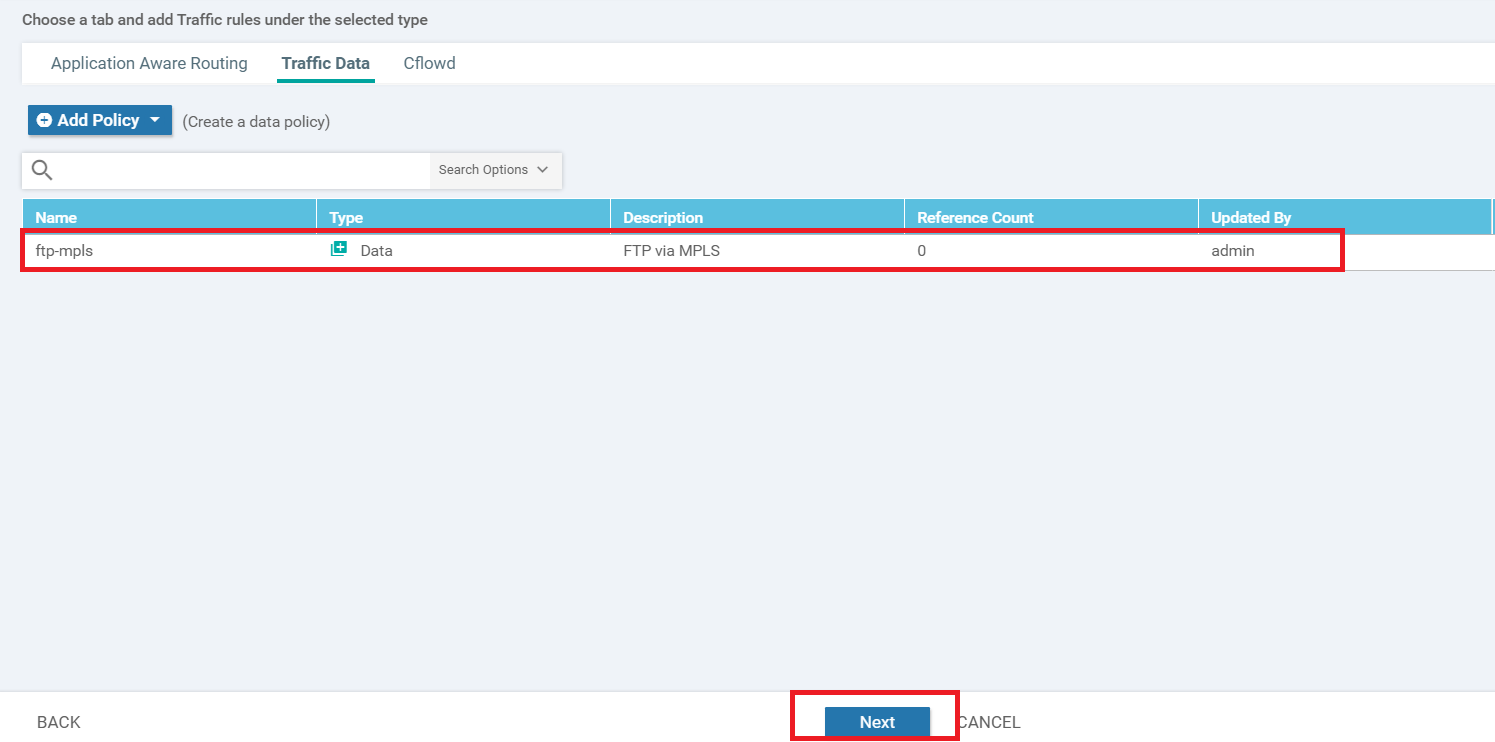
Make sure you are under Configure Traffic Rules. Click on the Traffic Data tab and choose to Add Policy. Click on Create New
-
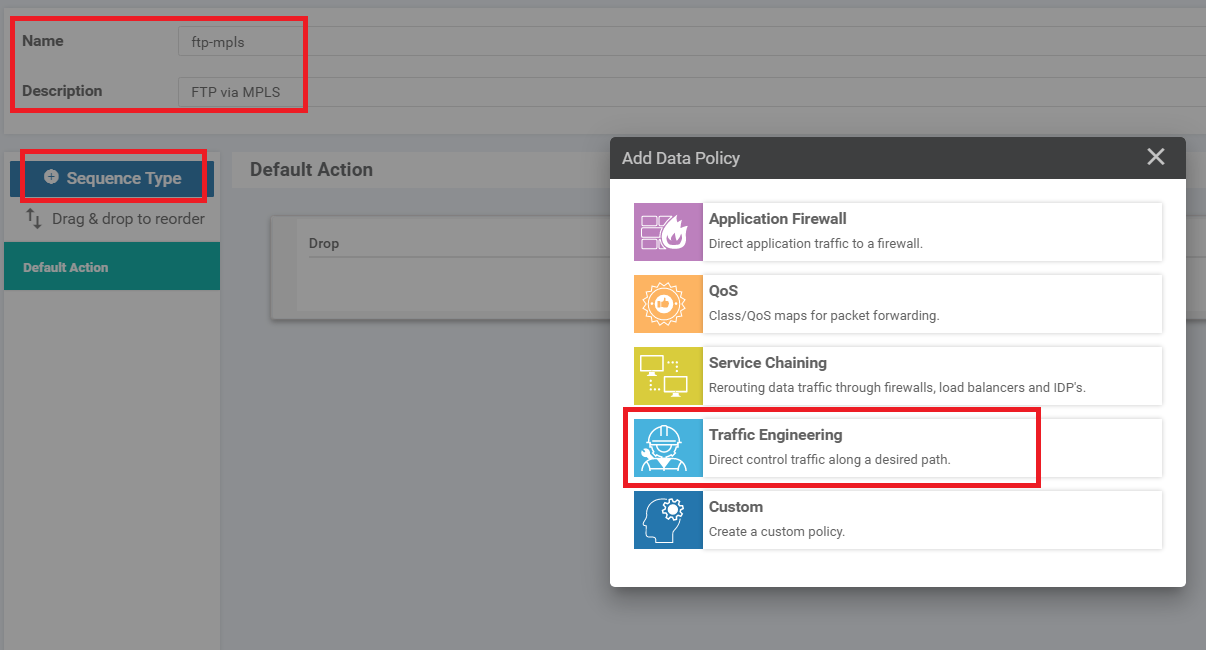
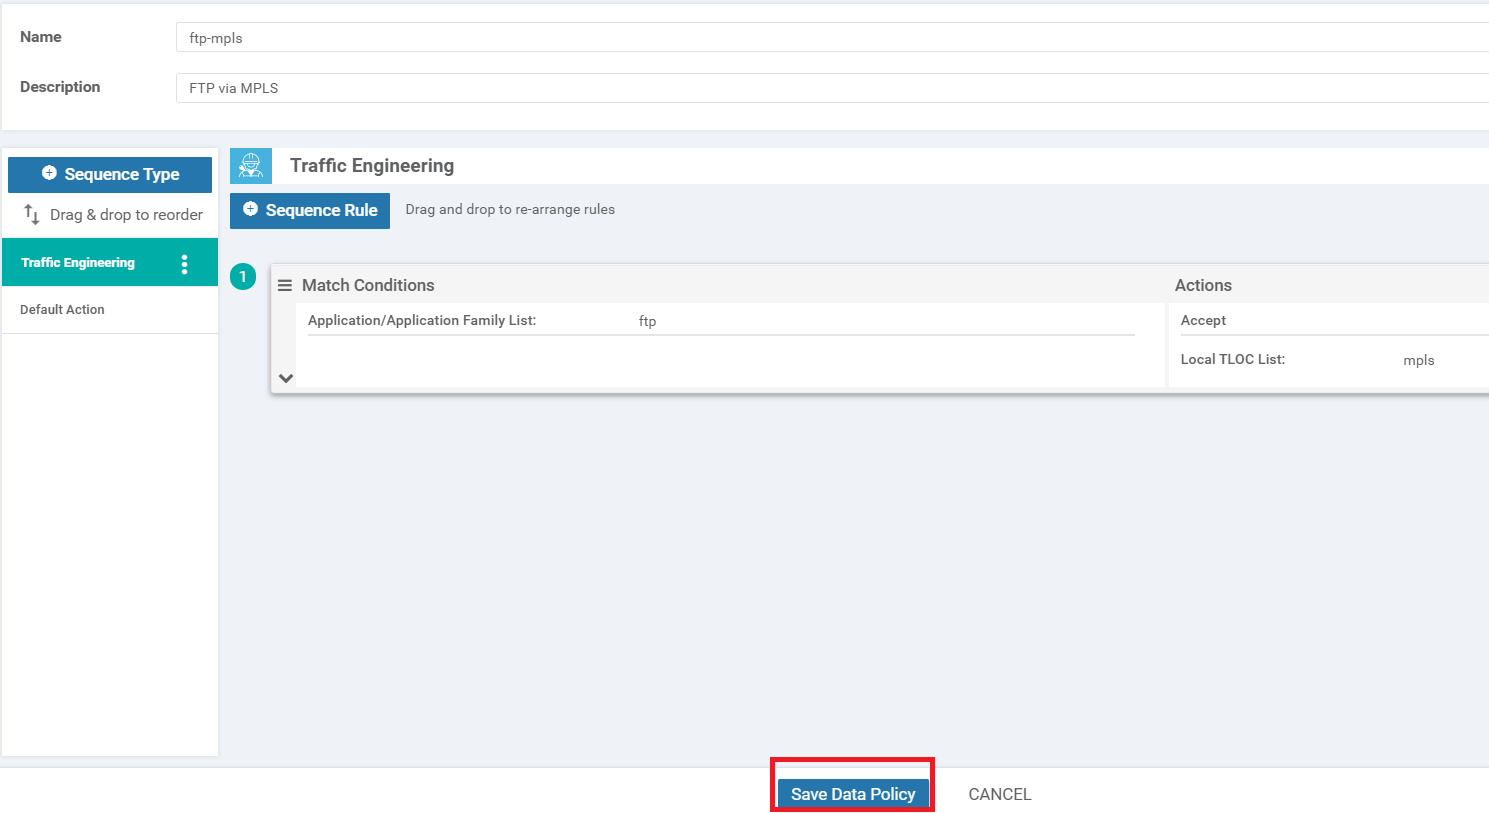
Given the policy a name of ftp-mpls and a description of FTP via MPLS. Click on Sequence Type and choose Traffic Engineering as the Data Policy
-
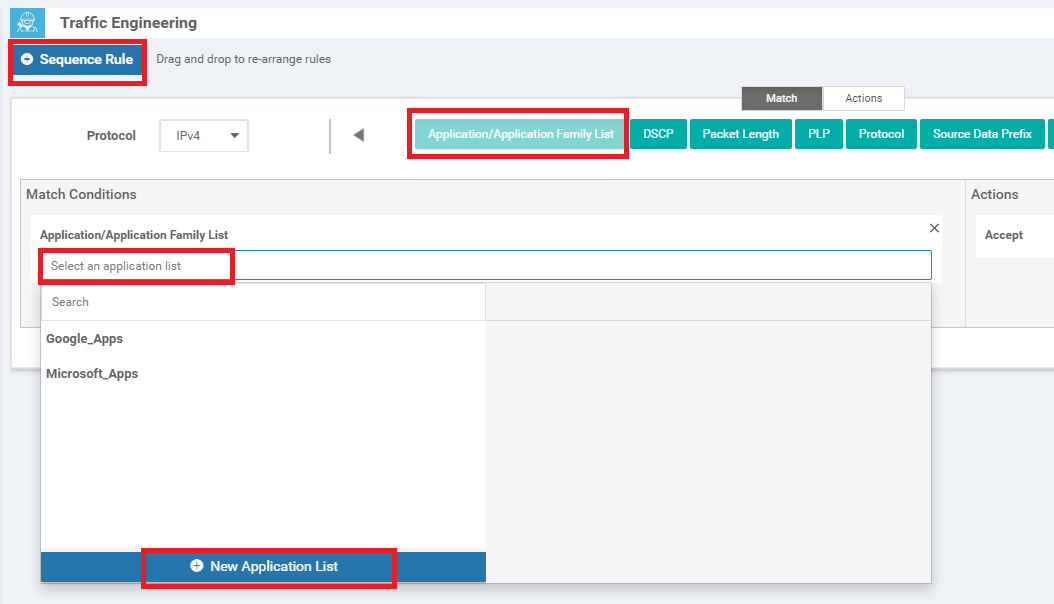
Click on Sequence Rule and choose Application/Application Family List as the match condition. Click on the drop-down for the Application/Application Family List and click on New Application List
-
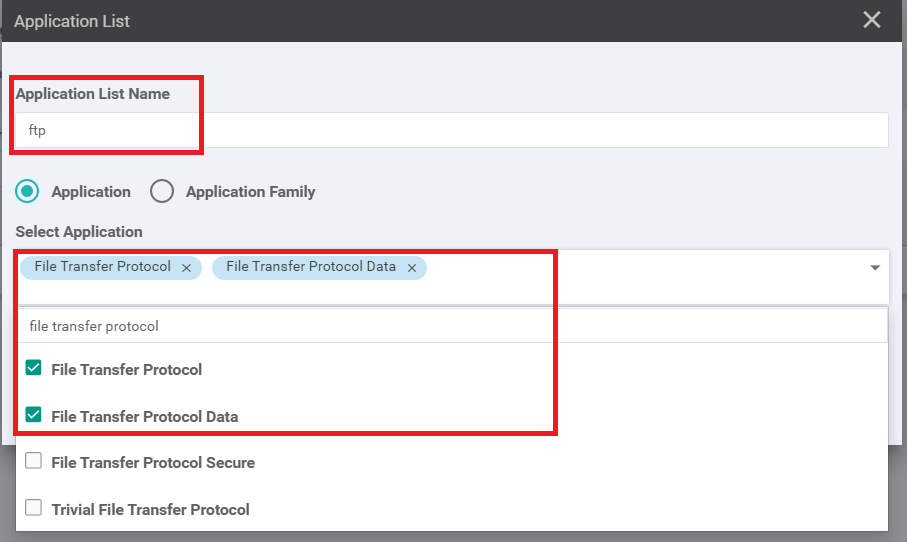
Give the Application List Name as ftp and select File Transfer Protocol and File Transfer Protocol Data under the Select Application drop down
-
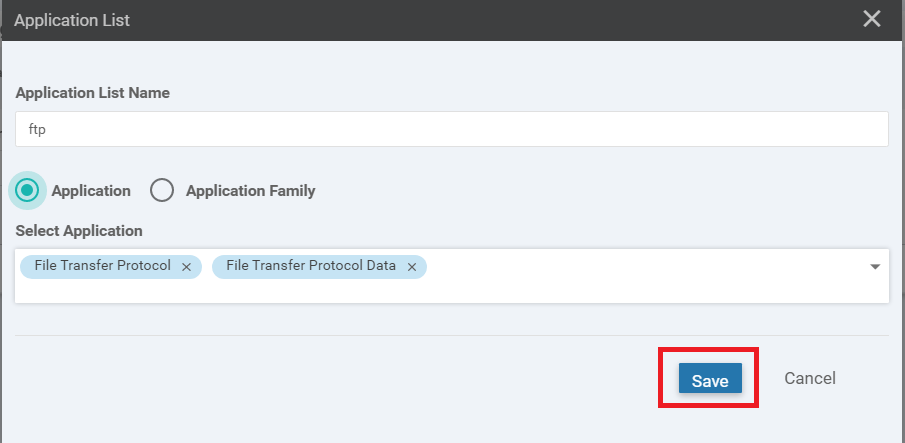
Make sure the Application List looks like the image below and click on Save. We are defining the interesting traffic over here via this Application List
-
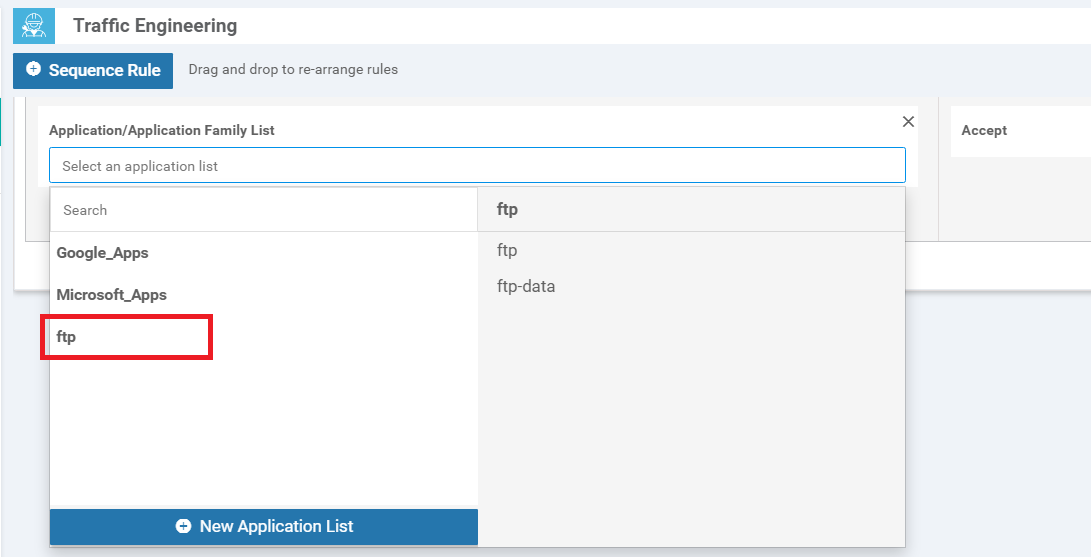
From the Application/Application Family List drop down, choose the ftp Application List we just created
-
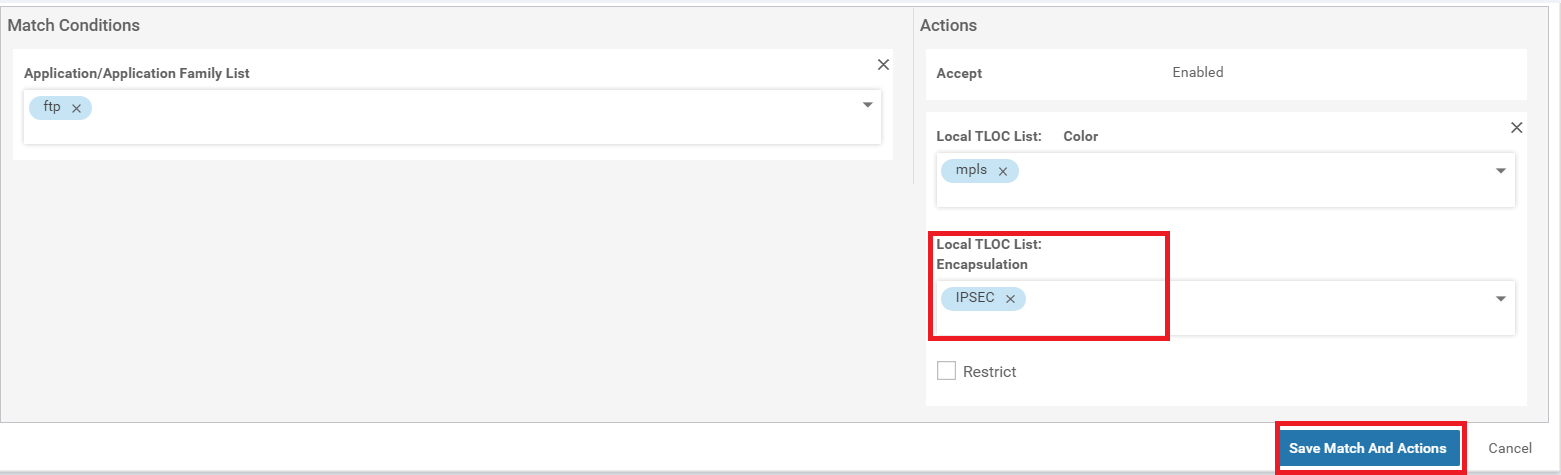
Click on the Actions tab and choose Accept. Select Local TLOC and choose the Local TLOC List: Color as mpls. Set the Local TLOC List: Encapsulation to IPSEC. Click on Save Match and Actions
-
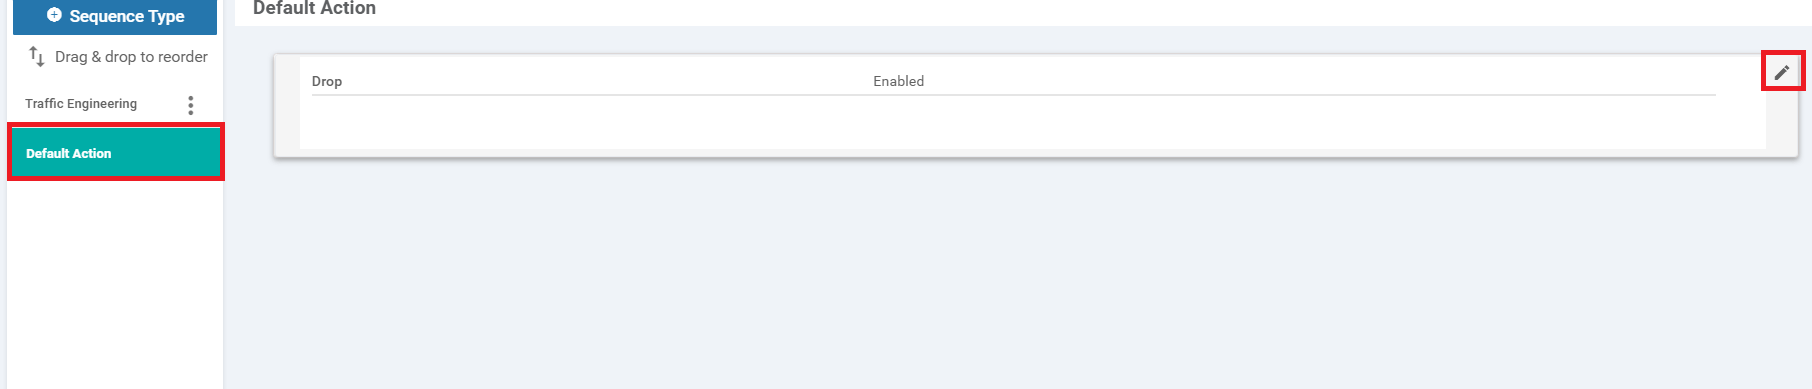
Choose Default Action on the left-hand side and click on the pencil icon to edit the default action
-
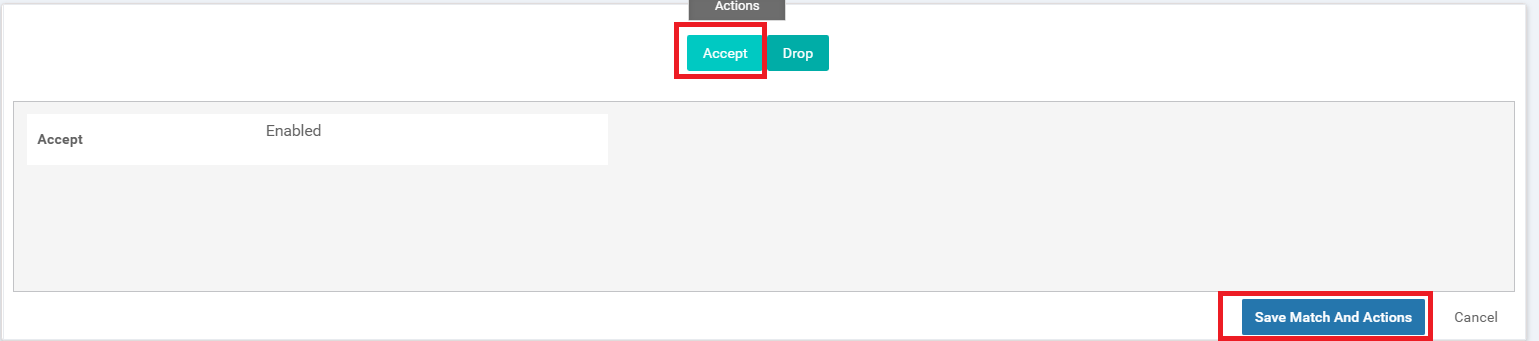
Select Accept and click on Save Match and Actions
-
Back at the Data Policy window, click on Save Data Policy
-
At the main Policy window, click on Next
Continue to the steps in the next section.
-
- Deploying a Policy
-
- Applying and Activating the Policy
- Verification
Applying and Activating the Policy
Continuing from the Setting up Groups of Interest and Traffic Rules, we will now finalize our policy and activate it.
-
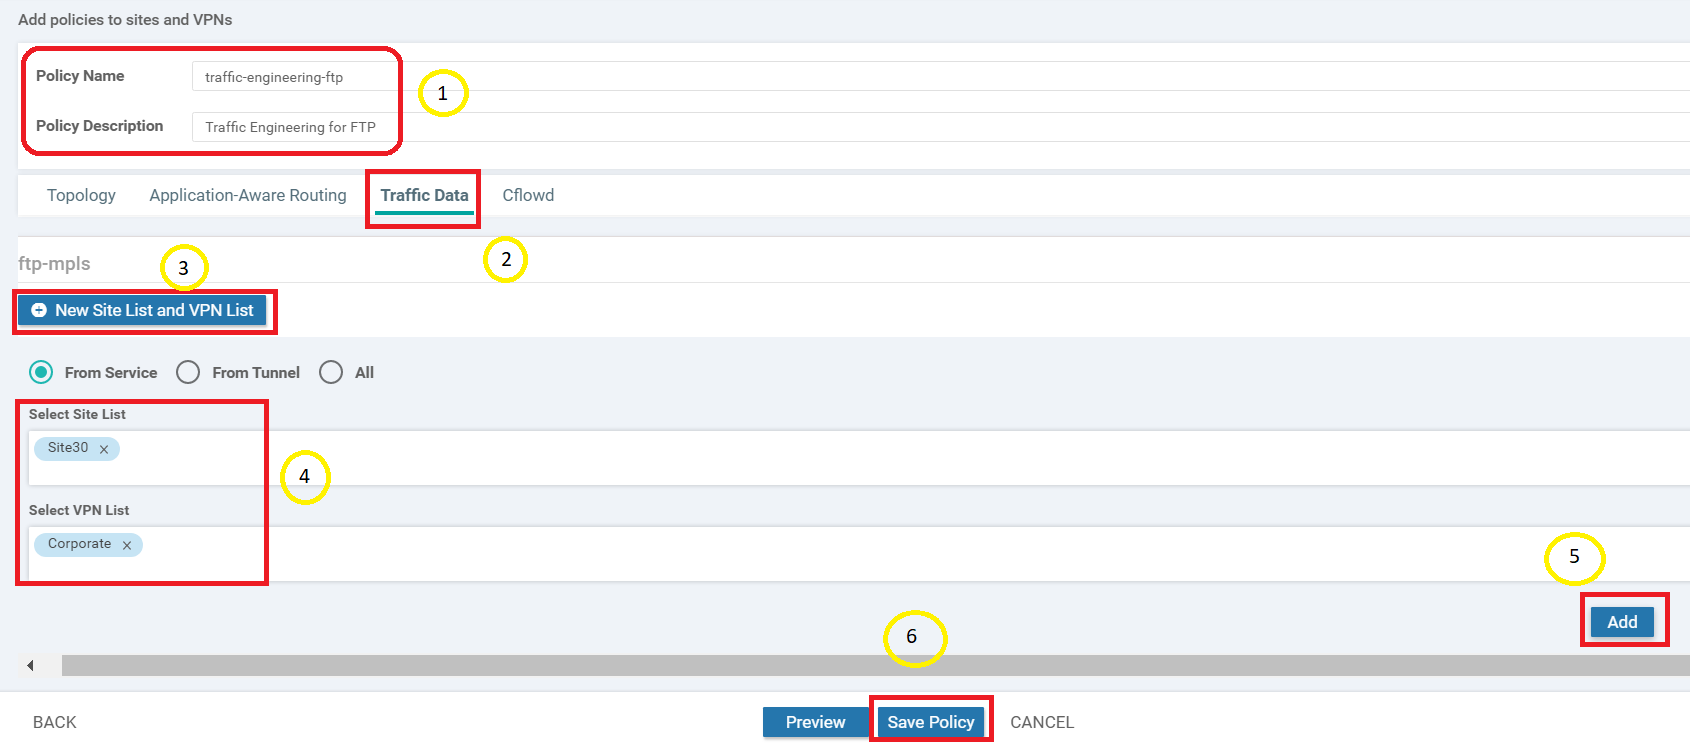
Give the Policy a name of traffic-engineering-ftp and a description of Traffic Engineering for FTP. Click on the Traffic Data tab and click on New Site List and VPN List. Leave the From Service radio button selected and populate Site30 in Select Site List and Corporate in the Select VPN List. Click on Add and then click on Save Policy
-
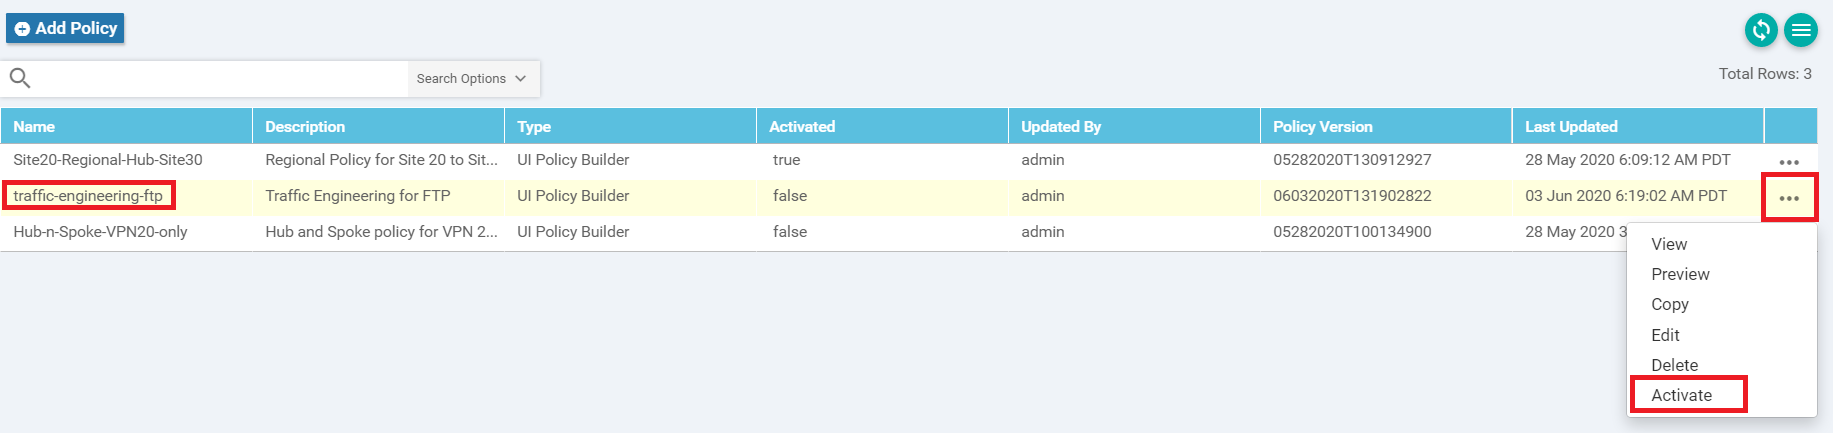
This should create our traffic-engineering-ftp policy. Click on the three dots next to it and choose Activate
 Tip: At this point we have created multiple policies and are activating them as we go along. However, this is not a standard practice. At a time, only one policy can be active so all our Policy requirements are generally concatenated into a single policy. Separate policies have been created in the lab for simplicity.
 -
Click on Activate
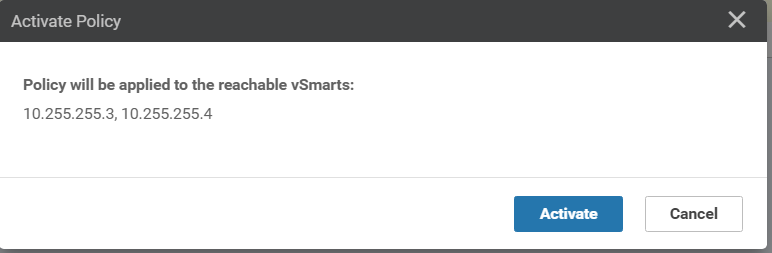
We have now deployed our Policy.
-
-
-
-
- Verification
Verification
In order to verify that traffic flows have changed, we will be comparing the output in the Overview section to out put which will be taken here.
-
On the vManage GUI, go to Monitor => Network and select vEdge30. Scroll down to Troubleshooting on the left-hand side and click on Simulate Flows
-
Enter VPN - 10 for the VPN and ge0/2 for the Source/Interface. The Destination IP will be 10.0.0.1. Click on Simulate
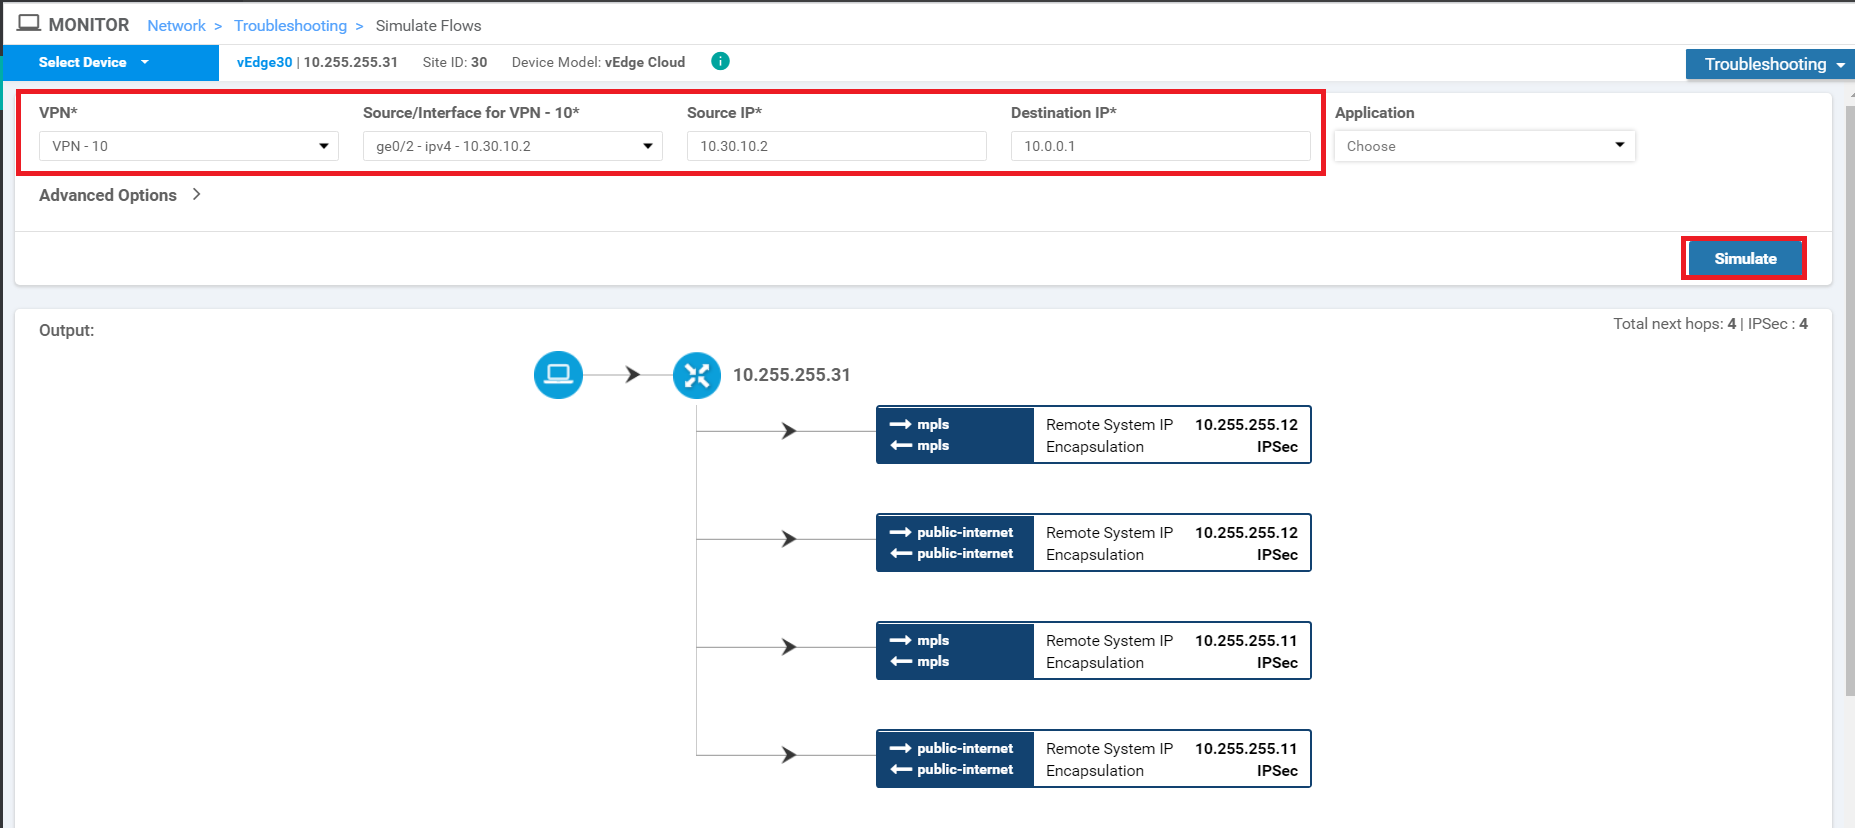
We can see that general traffic is still attempting to use all possible transports.
-
Set the Application to ftp and click on Simulate
FTP Traffic now flows via the MPLS transport, as per our requirement.
This completes the verification activity for this section.