- Overview
- Prerequisite configuration for Cloud OnRamp
- Configuring Cloud OnRamp for SaaS
- Verification and Testing
Overview
With the changing network landscape, the way in which applications are consumed has also undergone a massive overhaul. Applications being hosted in the cloud (Public/Private) are a common occurrence, rather than the exception.
Cloud OnRamp for SaaS monitors widely used Cloud Applications and arrives at a vQoE score (Viptela Quality of Experience). Loss and latency are used to calculate the vQoE score and based on this, the solution routes traffic to the Cloud Application via the optimal path. The vQoE value is calculated periodically to ensure persistent optimal application performance.
-
- Prerequisite configuration for Cloud OnRamp
- Configuring Cloud OnRamp for SaaS
- Verification and Testing
Prerequisite configuration for Cloud OnRamp
-
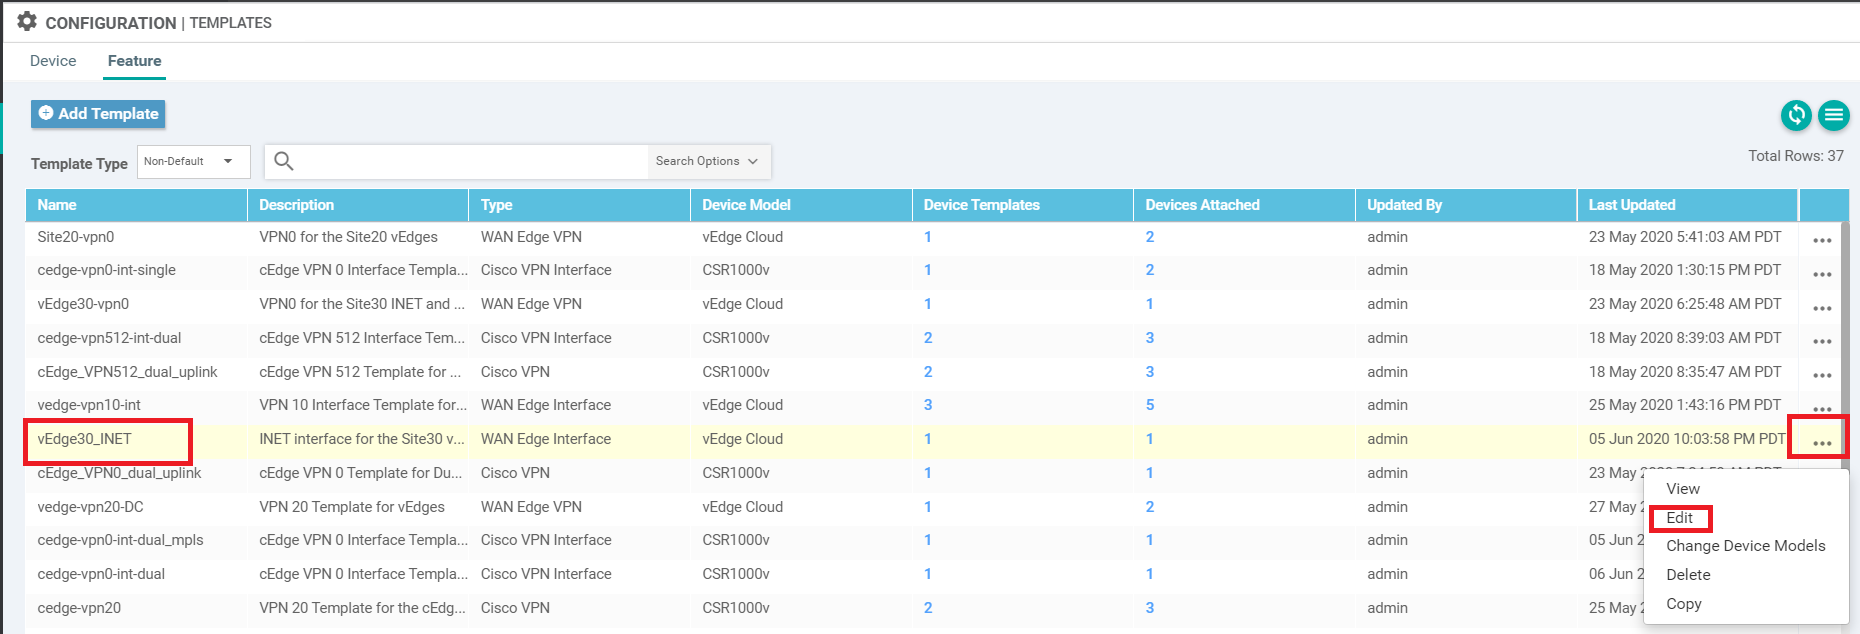
On the vManage GUI, navigate to Configuration => Templates => Feature Tab. Locate the vEdge30_INET template and click on the three dots next to it. Choose to Edit the template
-
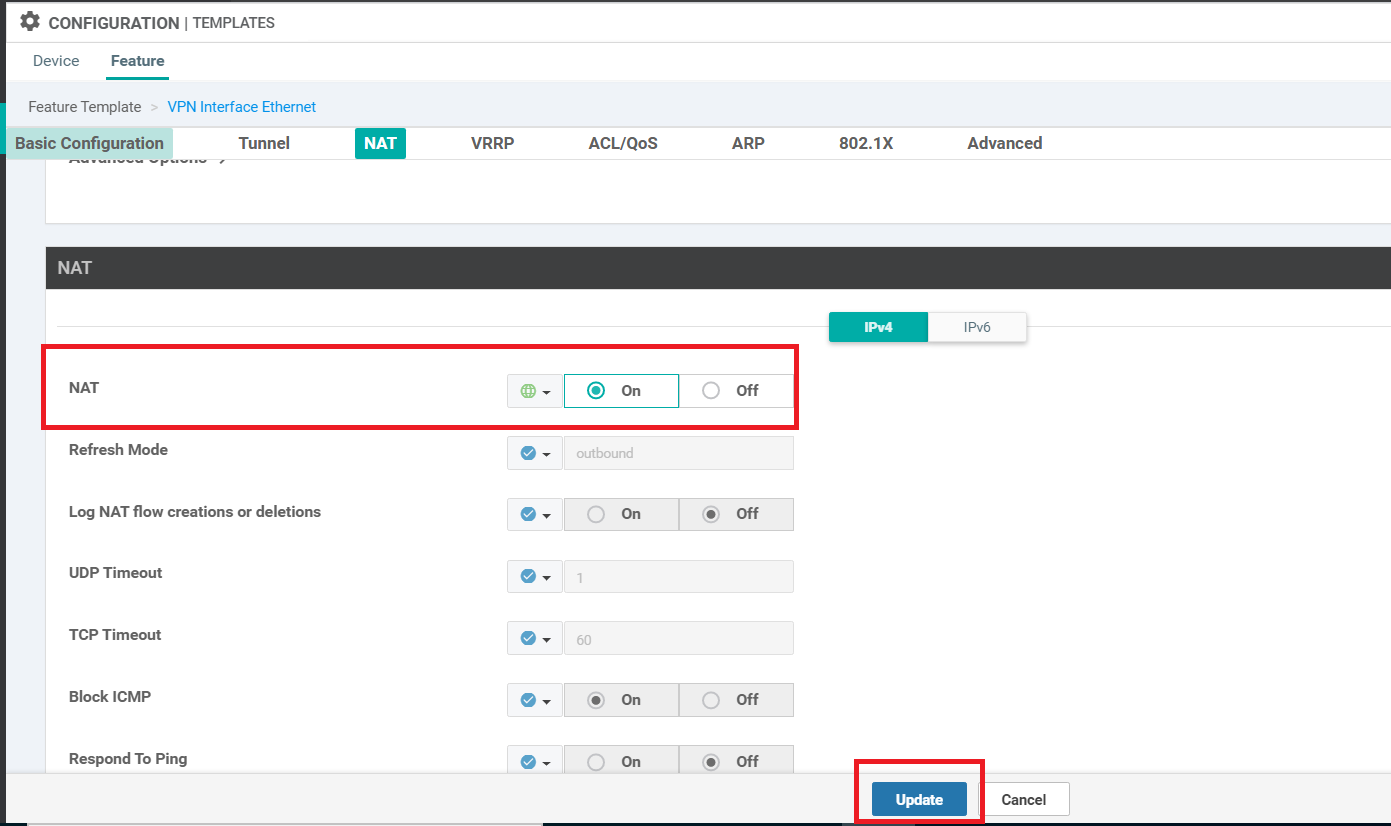
Scroll down to the NAT section and set NAT to a global value of On. Click on Update
-
Click on Next and Configure Device. There are no changes to be made here since we are simply enabling NAT on the interface.
-
On the vManage GUI, go to Configuration => Templates => Feature Tab. Locate the DC-vEdge_INET template and click on the three dots next to it. Choose to Edit the template
Note: This step is not required if you have gone through the WAAS Integration. Please skip to the next section if WAAS integration has been done.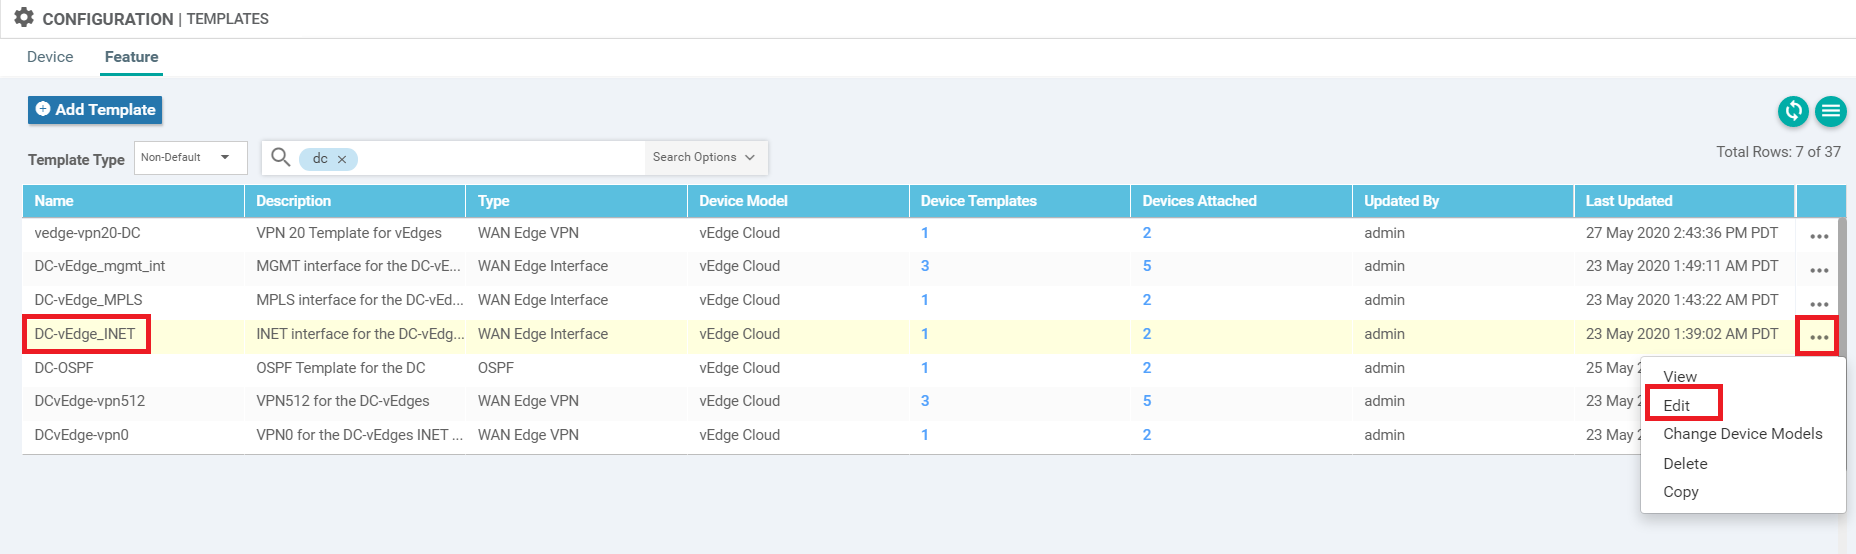
-
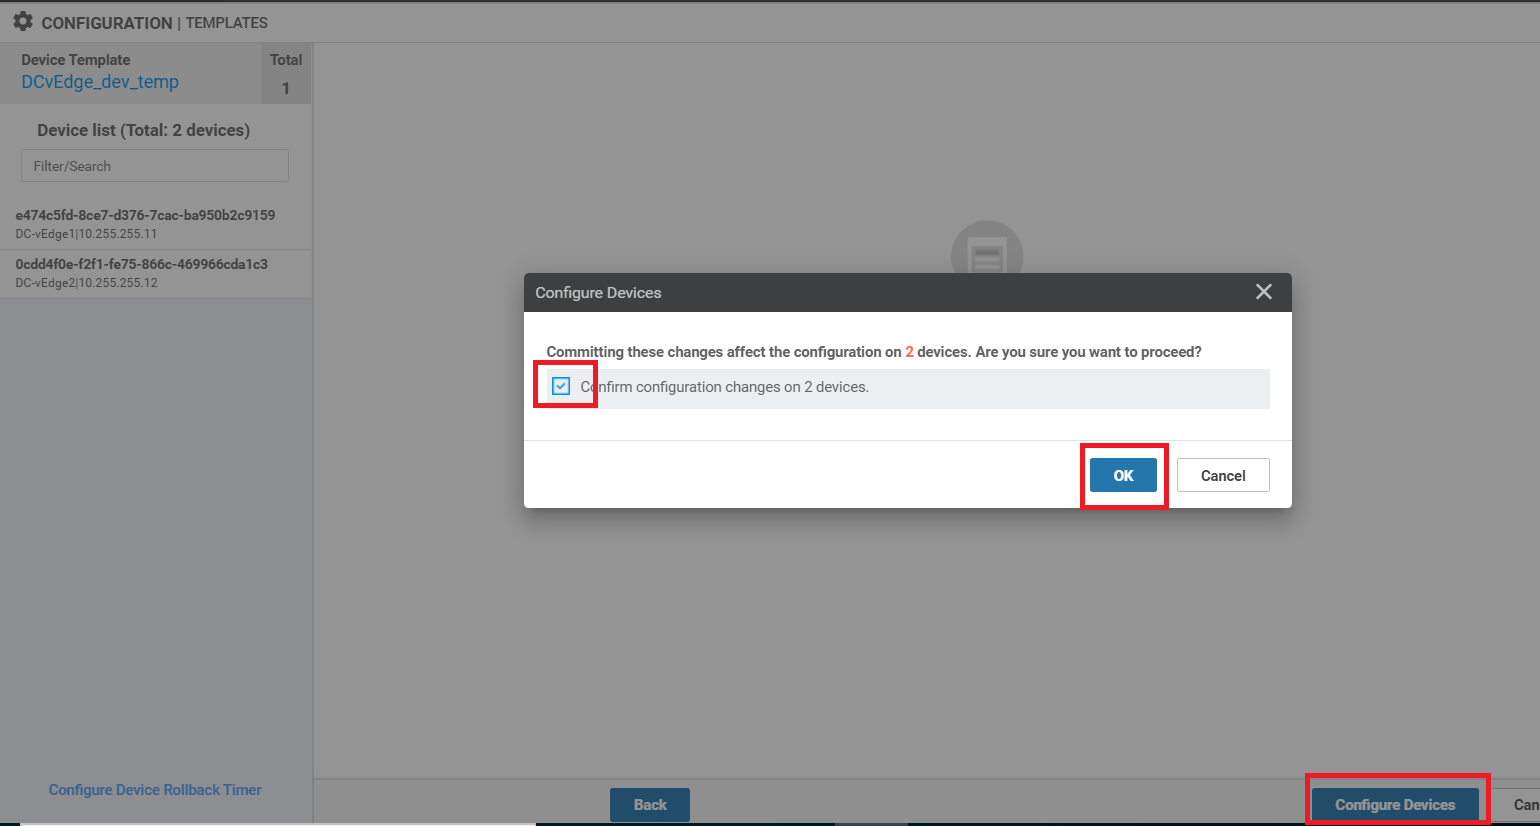
Scroll down to the NAT section and set NAT to a Global value of On. Click on Update. Click Next/Configure Devices to finish the update to the devices. Confirm the change on two devices and click OK
Note: This step is not required if you have gone through the WAAS Integration. Please skip to the next section if WAAS integration has been done.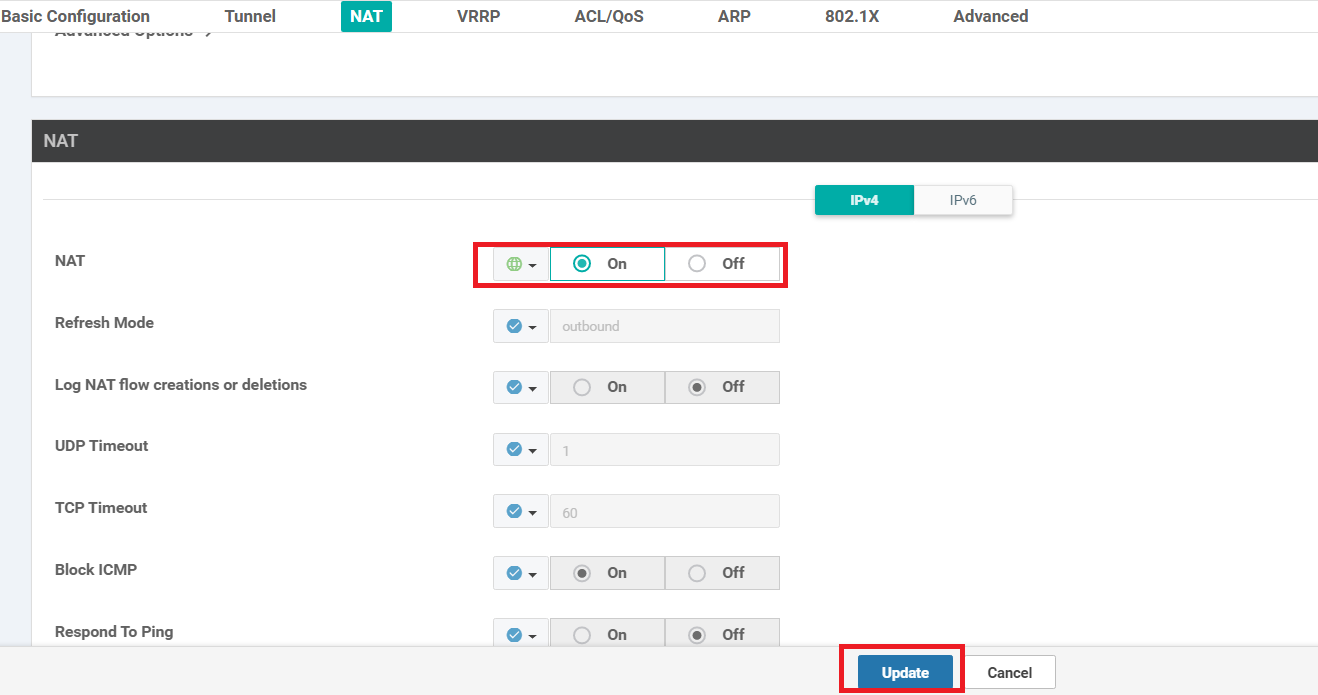
We have enabled NAT on all the interfaces that will be communicating directly with the SaaS applications. There are other prerequisites that need to be taken into consideration while deploying this in production (a few examples are devices should be in vManage mode, DNS server details populated in VPN 0 etc.) but these have been fulfilled in our SD-WAN Network.
-
-
- Configuring Cloud OnRamp for SaaS
- Verification and Testing
Configuring Cloud OnRamp for SaaS
Go through the following steps in order to configure Cloud OnRamp for SaaS in our SD-WAN network.
-
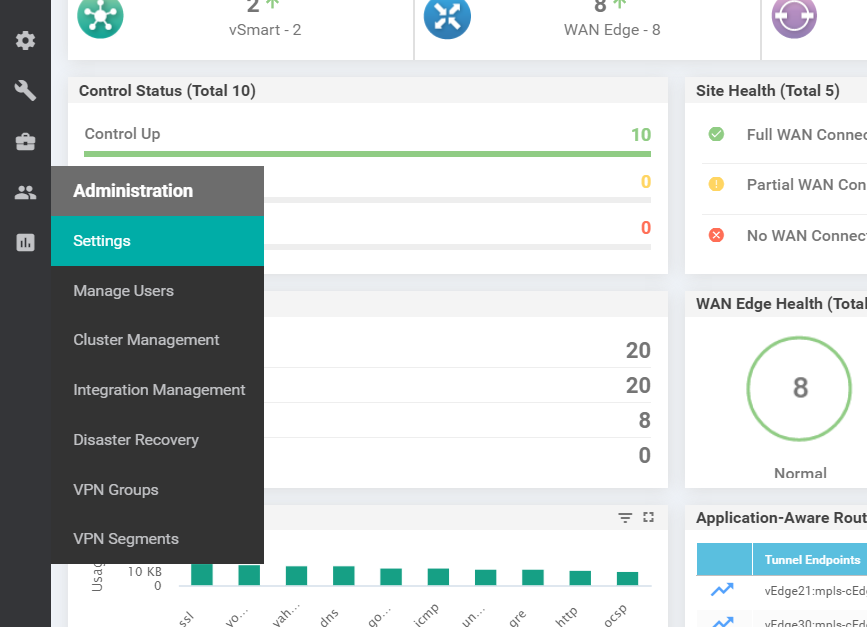
On the vManage GUI, navigate to Administration => Settings
-
Locate the Cloud onRamp for SaaS section and click on Edit. Set the radio button to Enabled and click on Save. Cloud OnRamp for SaaS needs to be enabled system wide before it can be used

-
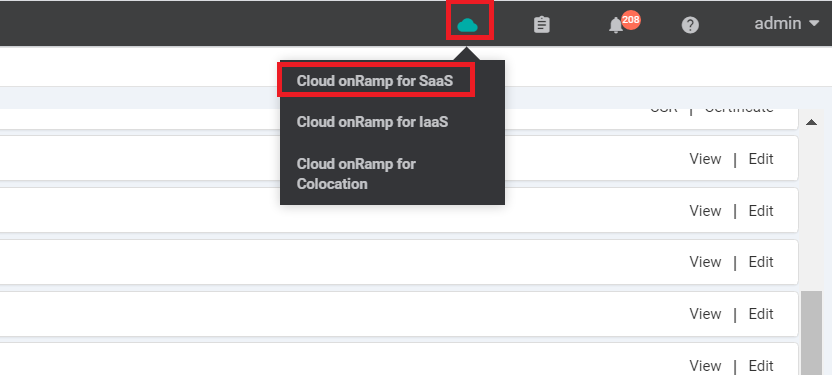
Once enabled, click on the Cloud icon in the top right-hand of the screen and click on Cloud onRamp for SaaS
-
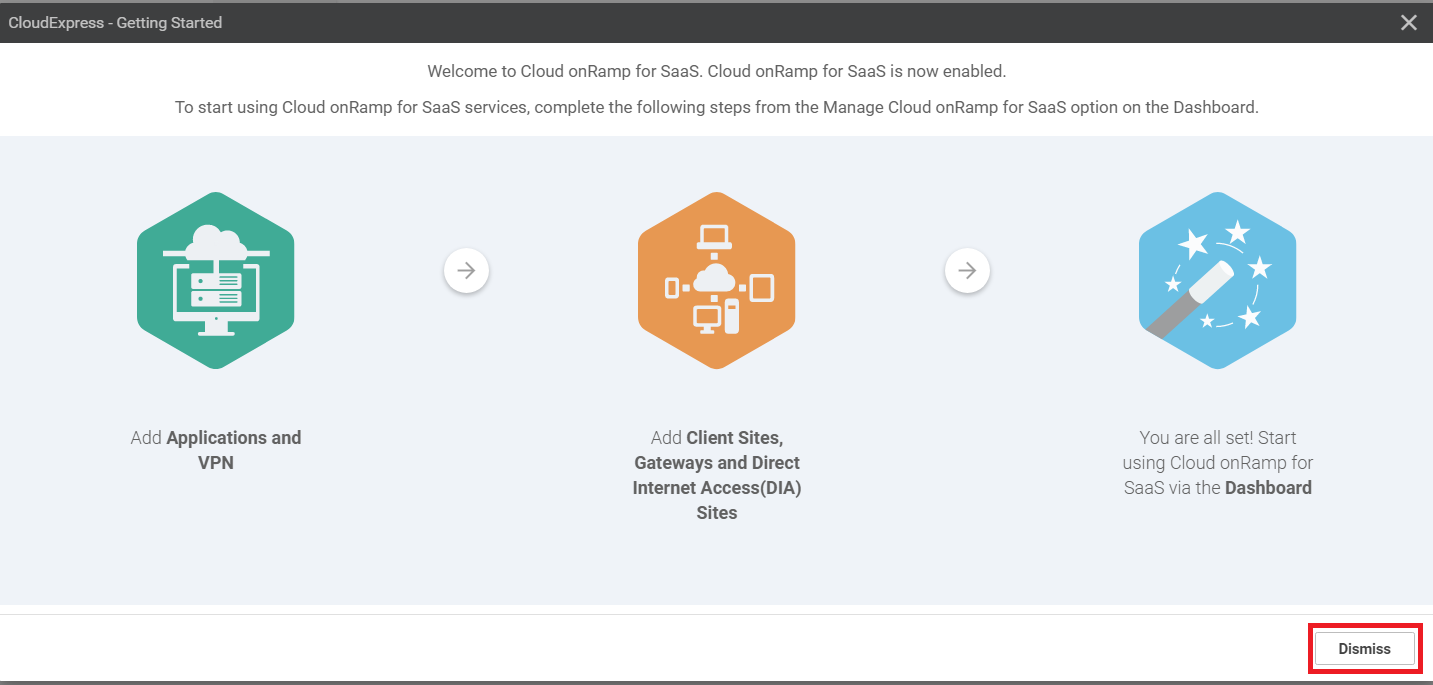
Click on Dismiss
-
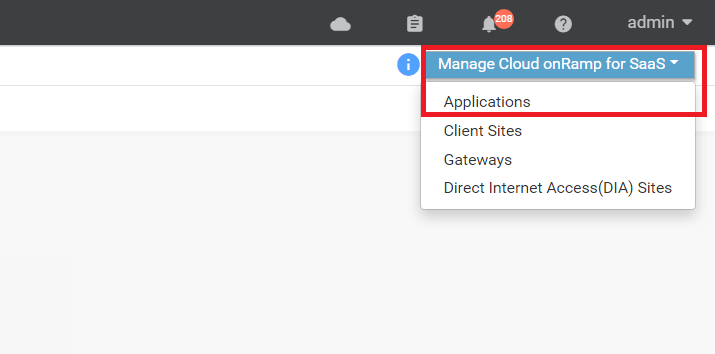
Click on Manage Cloud onRamp for SaaS (top right-hand corner) and click on Applications
-
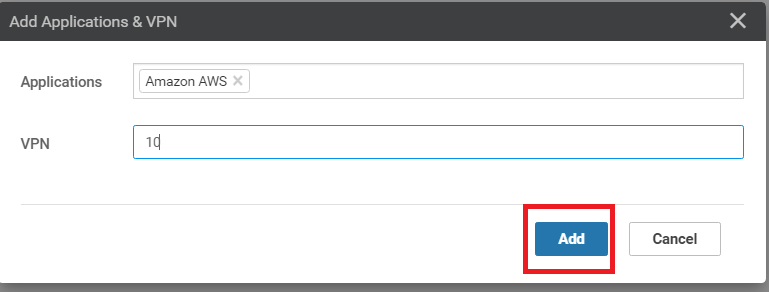
Specify a random application (example shows Amazon AWS, but you can choose something else like Oracle or Google Apps) and populate a VPN of 10
-
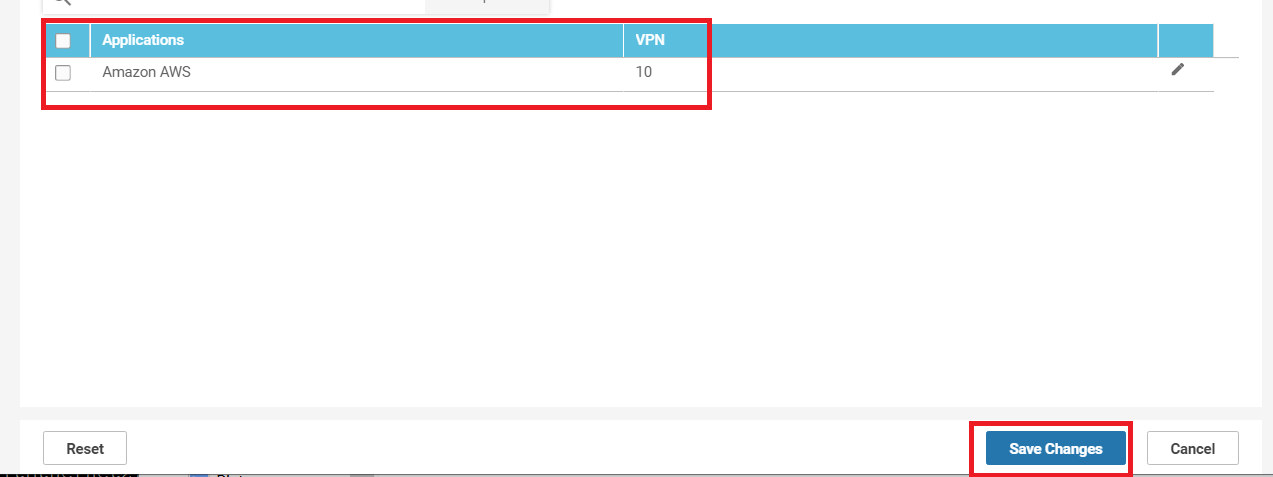
Make sure the chosen Application shows up and click on Save Changes
-
Click on Cloud onRamp for SaaS (top right-hand corner) again and click on Direct Internet Access (DIA) Sites

-
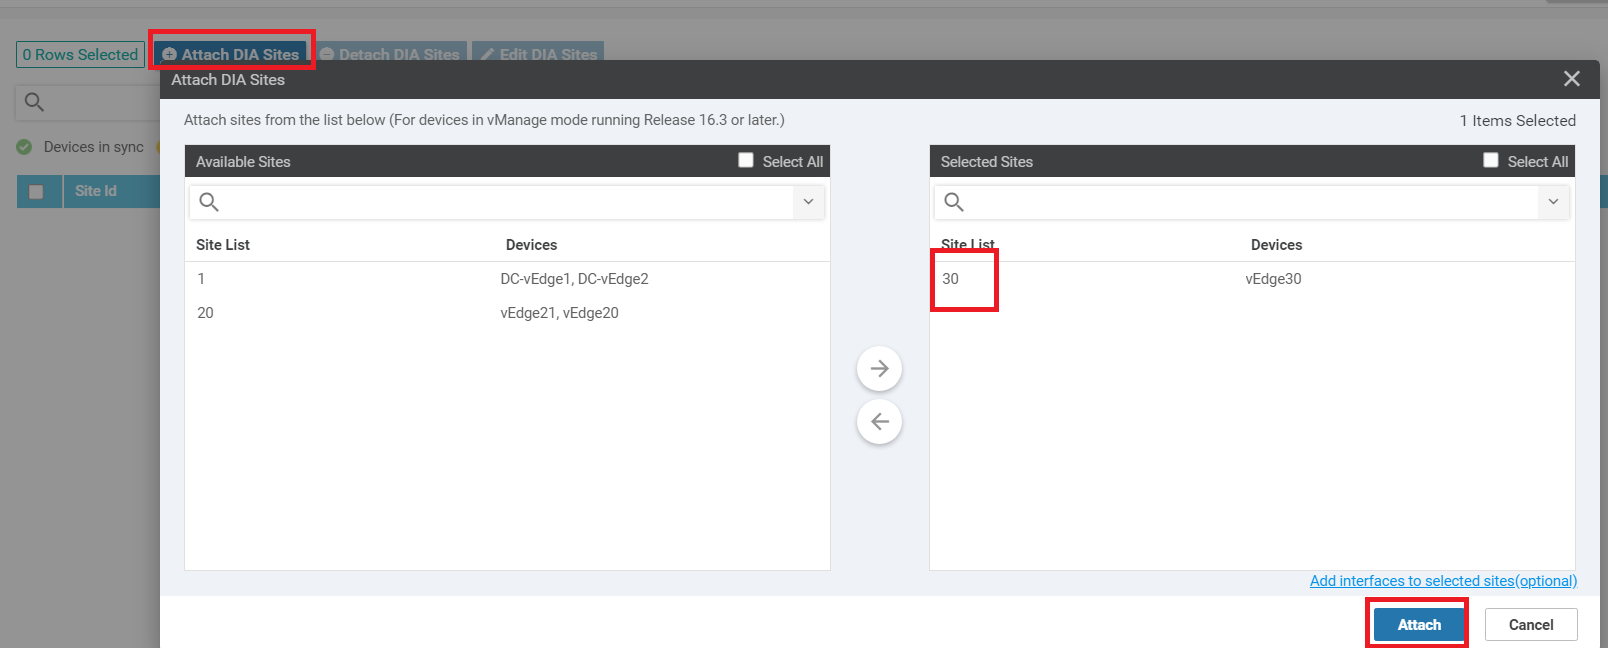
Click on Attach DIA Sites and move Site 30 to the Selected Sites section. Click on Attach
-
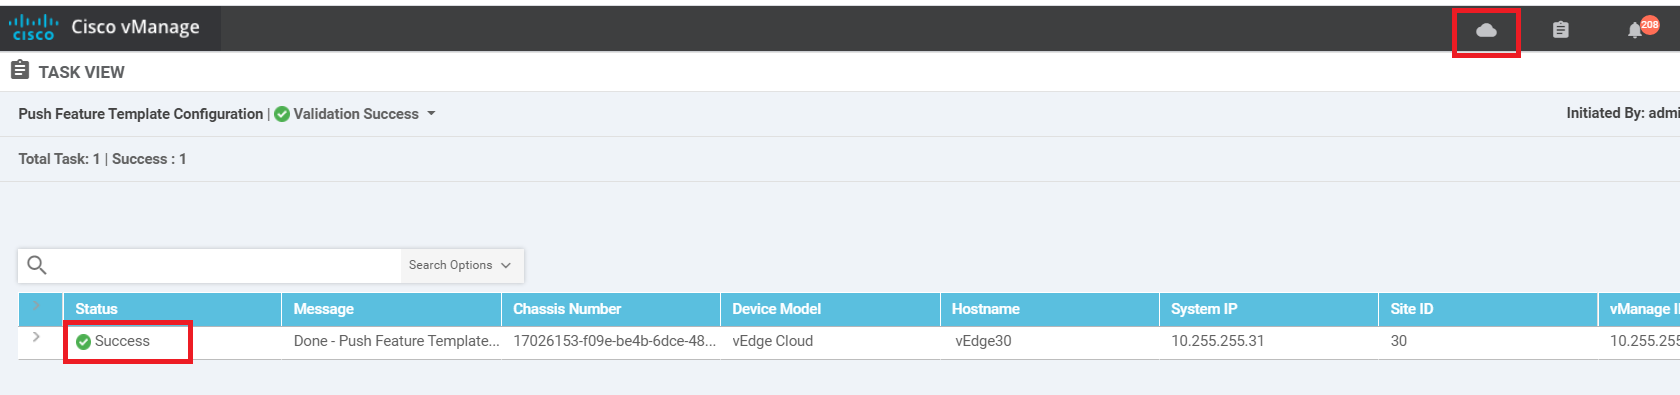
Wait for the task to go through successfully. Once it is done, click on the Cloud icon in the top right corner and click Cloud onRamp for SaaS
-
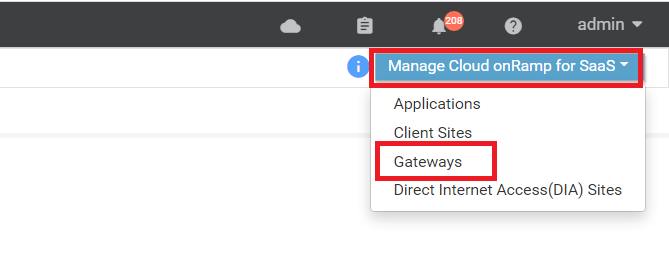
Click on Manage Cloud onRamp for SaaS and choose Gateways
-
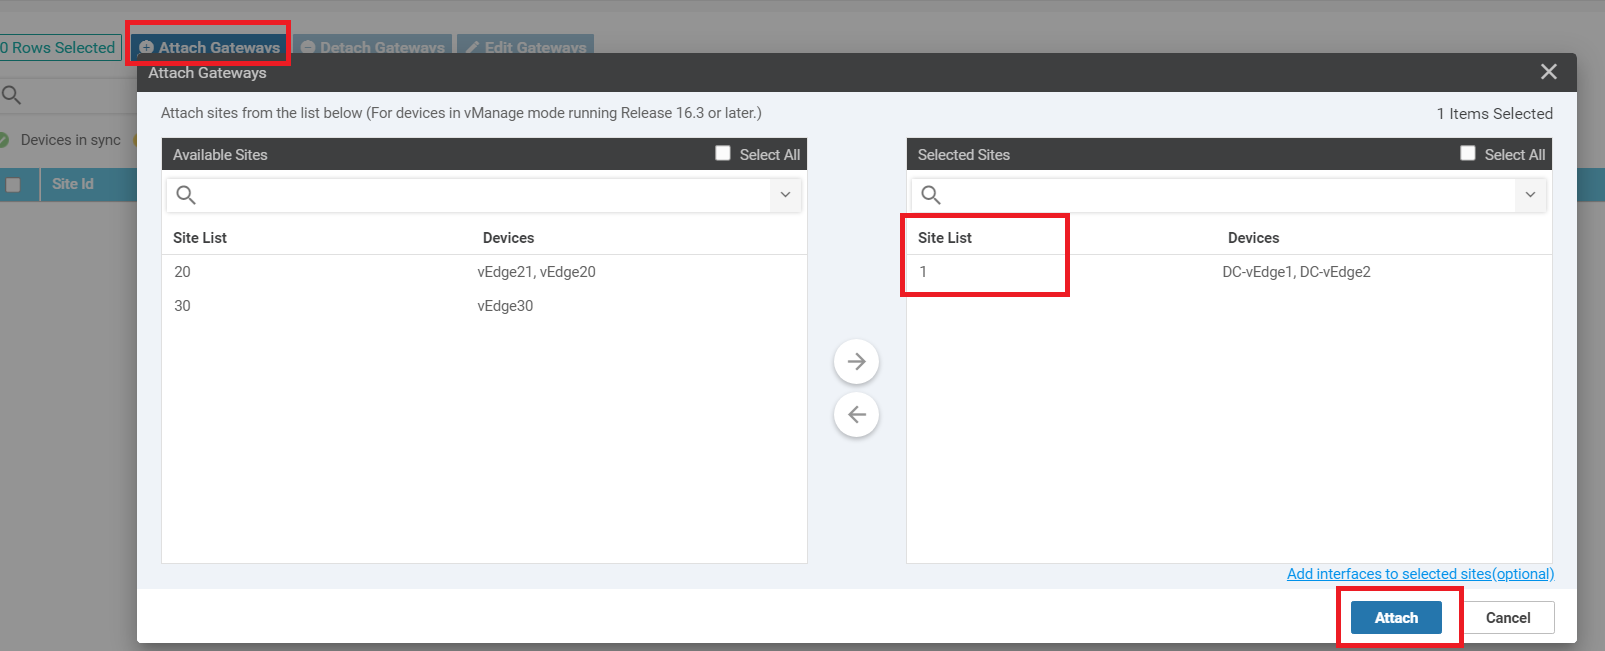
Click on Attach Gateways and move Site 1 to the Selected Sites. Click on Attach
-
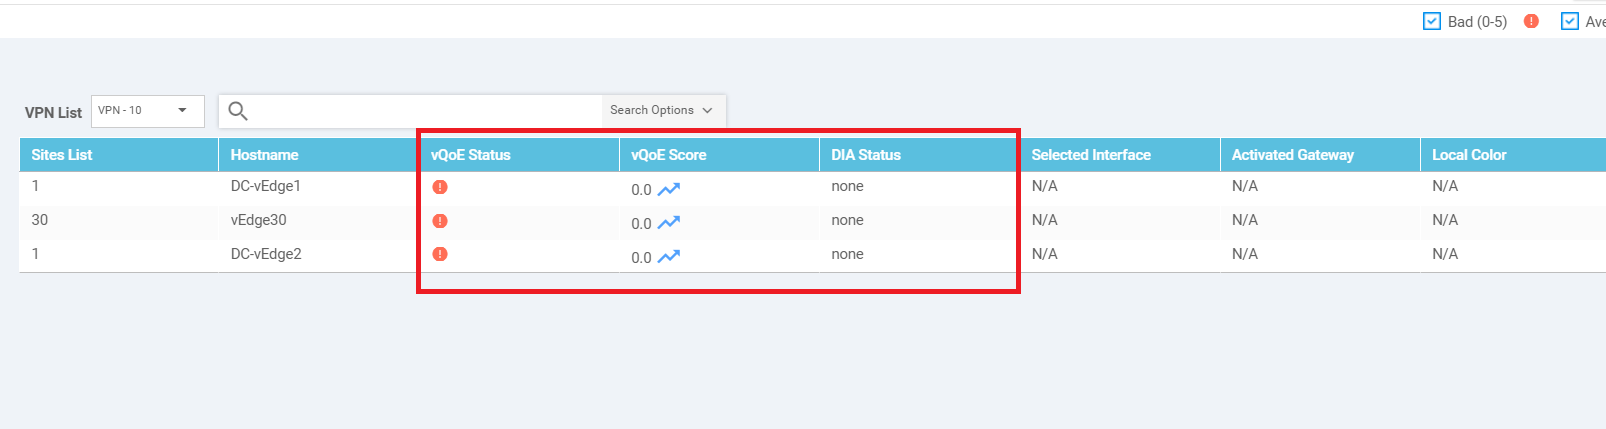
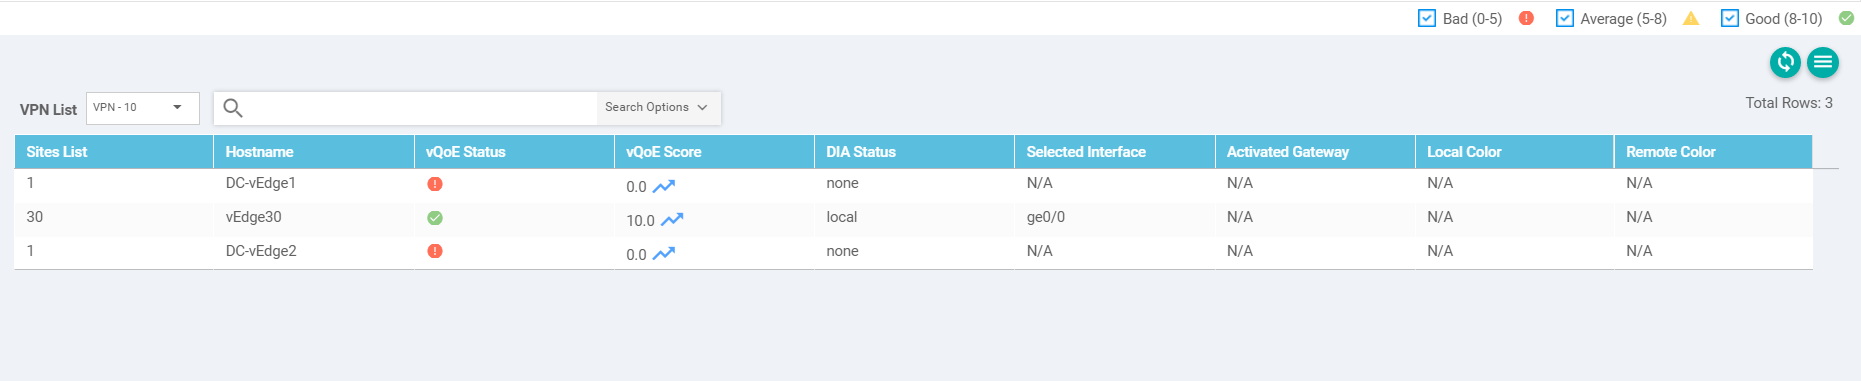
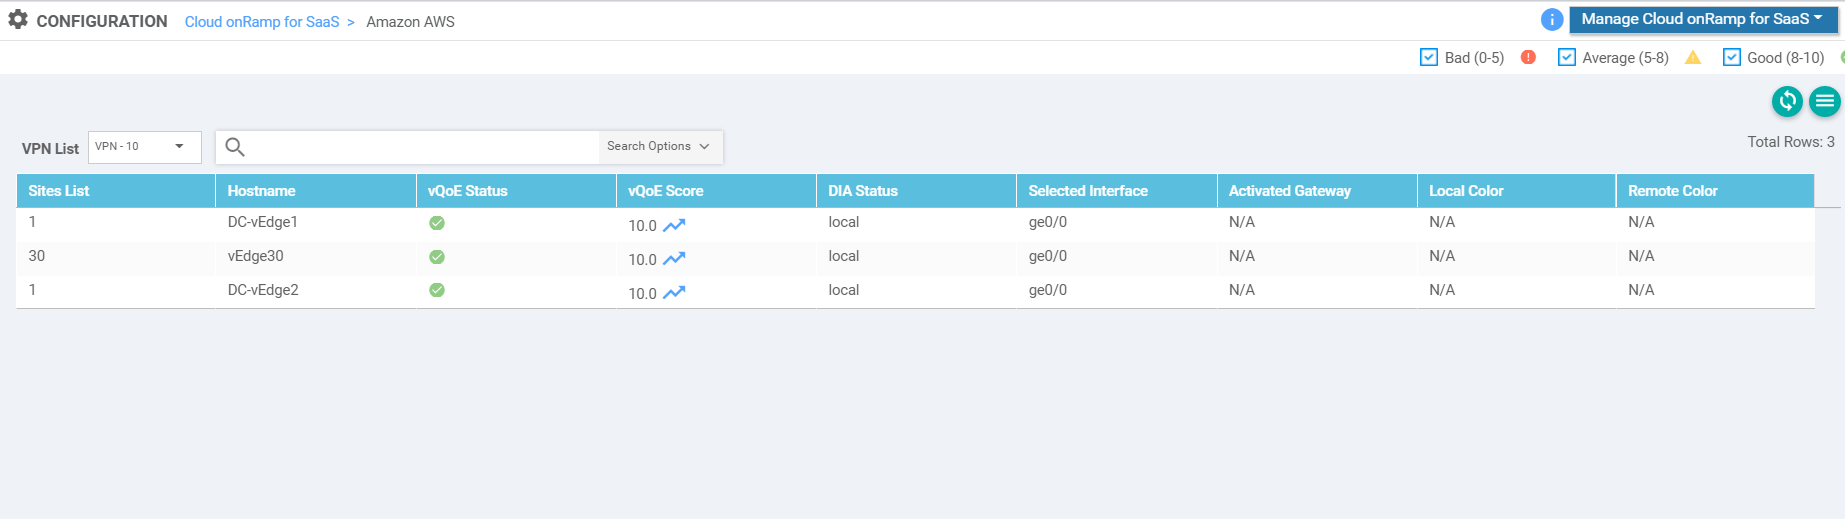
If you go to Configuration => Cloud OnRamp for SaaS (or click the Cloud icon and go to Cloud onRamp for SaaS), you should see the selected Application with 3 Devices attached to it. Click on the Application and the three Devices should be tagged with a vQoE Status of Bad. Their vQoE score is 0.0, indicating that information hasn’t been collected to arrive at a score. We will need to wait for some time (another tea/coffee?)
-
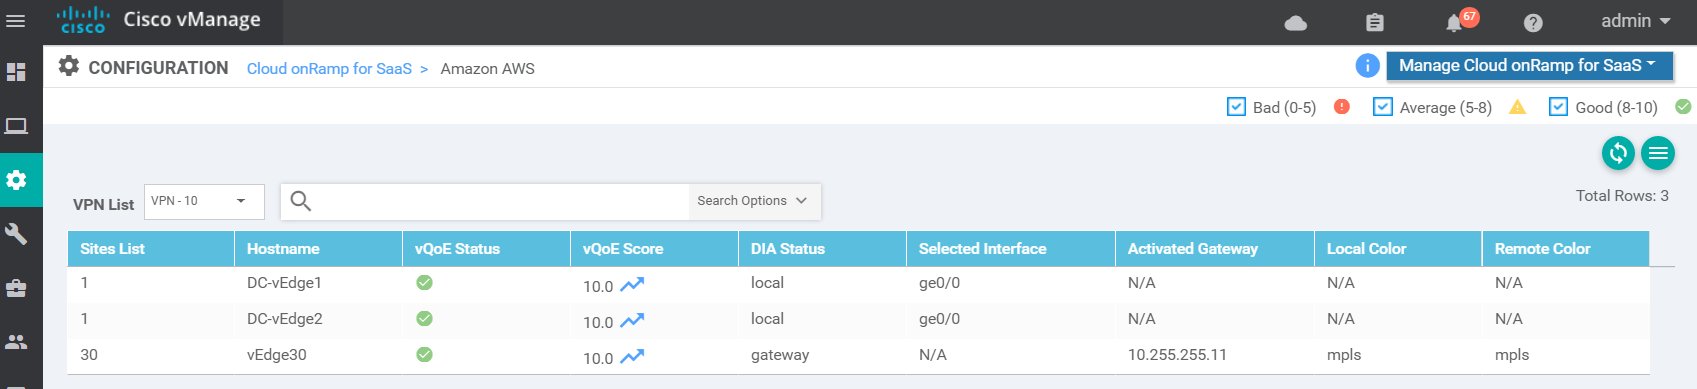
If you refresh the screen, you should notice devices gradually showing up with their vQoE score. Notice that vEdge30 is selecting a local path to the selected Application
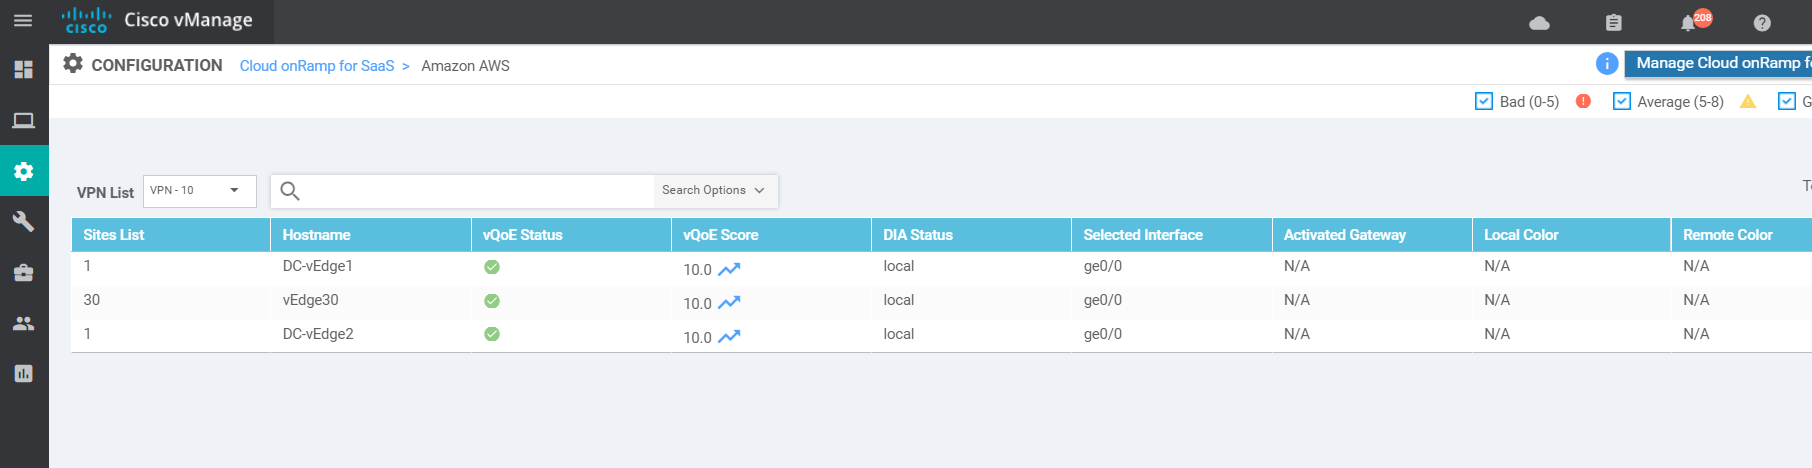
Through the DIA configuration, we have provided vEdge30 with a local breakout to the Application and by adding Site 1 as the Gateway, traffic can be punted over the MPLS link to the DC site and sent out the Internet breakout there, in the event of the local Site30 Internet breakout facing issues.
-
-
-
- Verification and Testing
Verification and Testing
-
Navigate to Configuration => Template => Feature Tab and locate the vEdge30_INET template. Click on the three dots next to it and choose to Edit

-
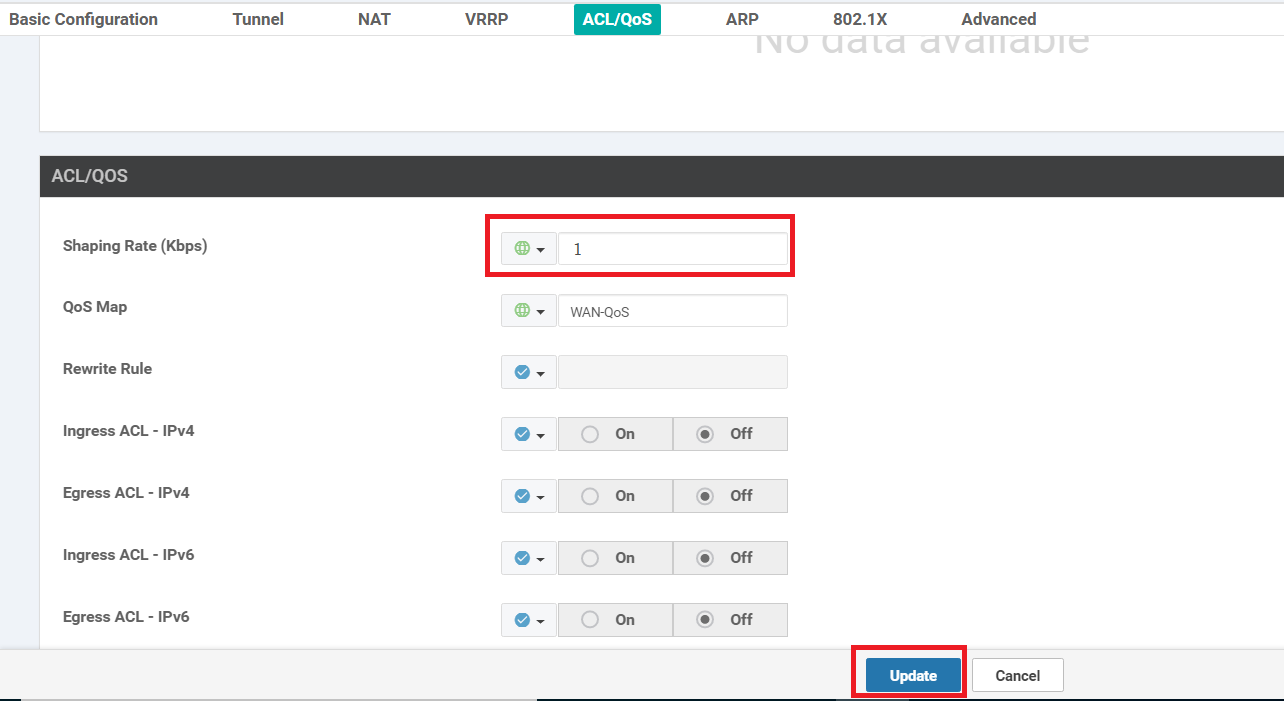
Scroll down to the ACL/QOS section and specify a Shaping Rate (Kbps) of 1. This will inject delay on our INET link connected to vEdge30. Click on Update
-
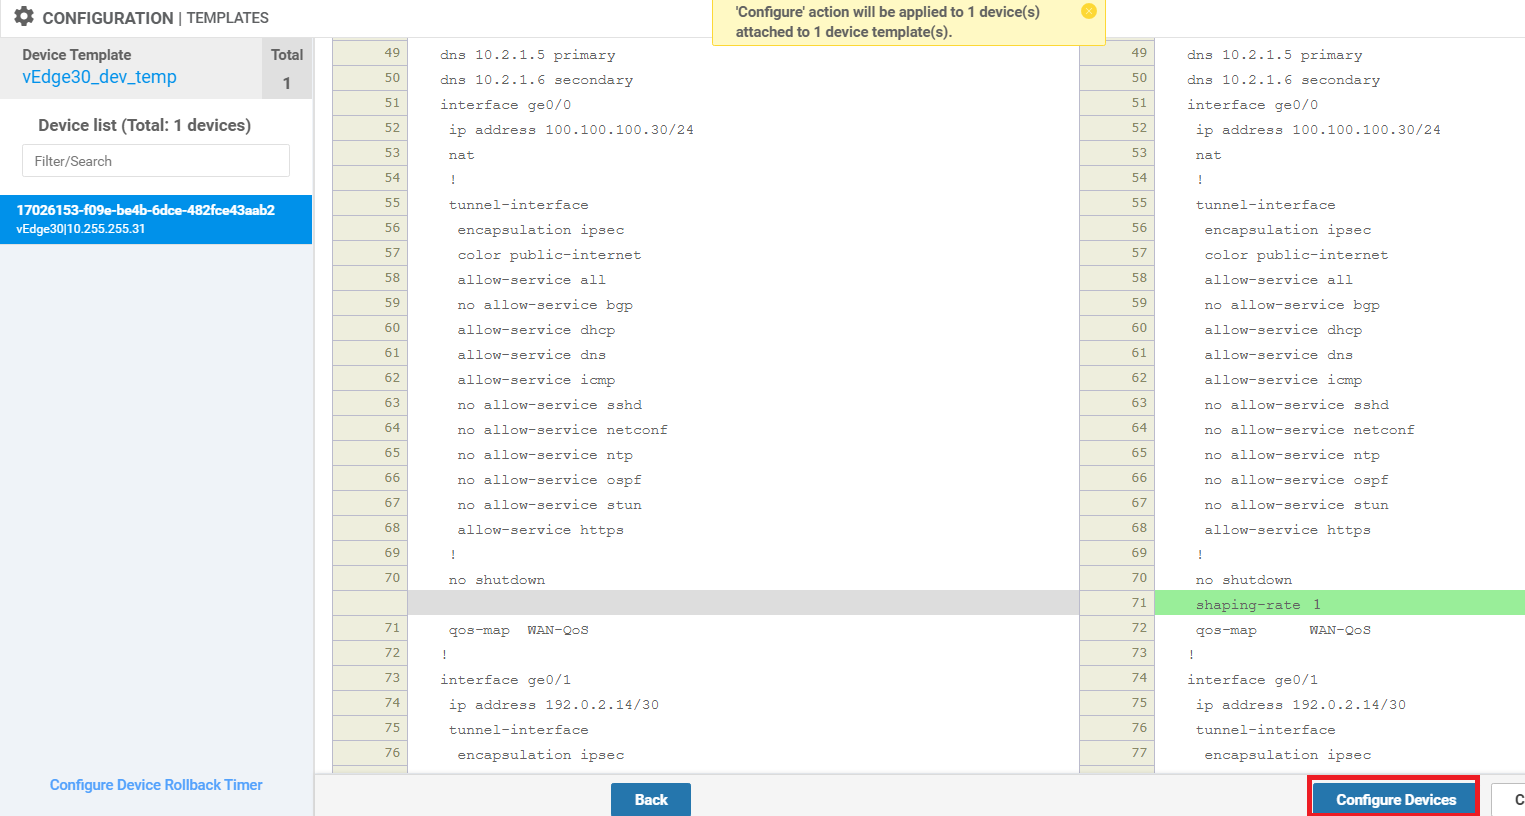
Click on Next/Configure Devices. You can check the side-by-side configuration to see that the shaping rate is applied to interface ge0/0
-
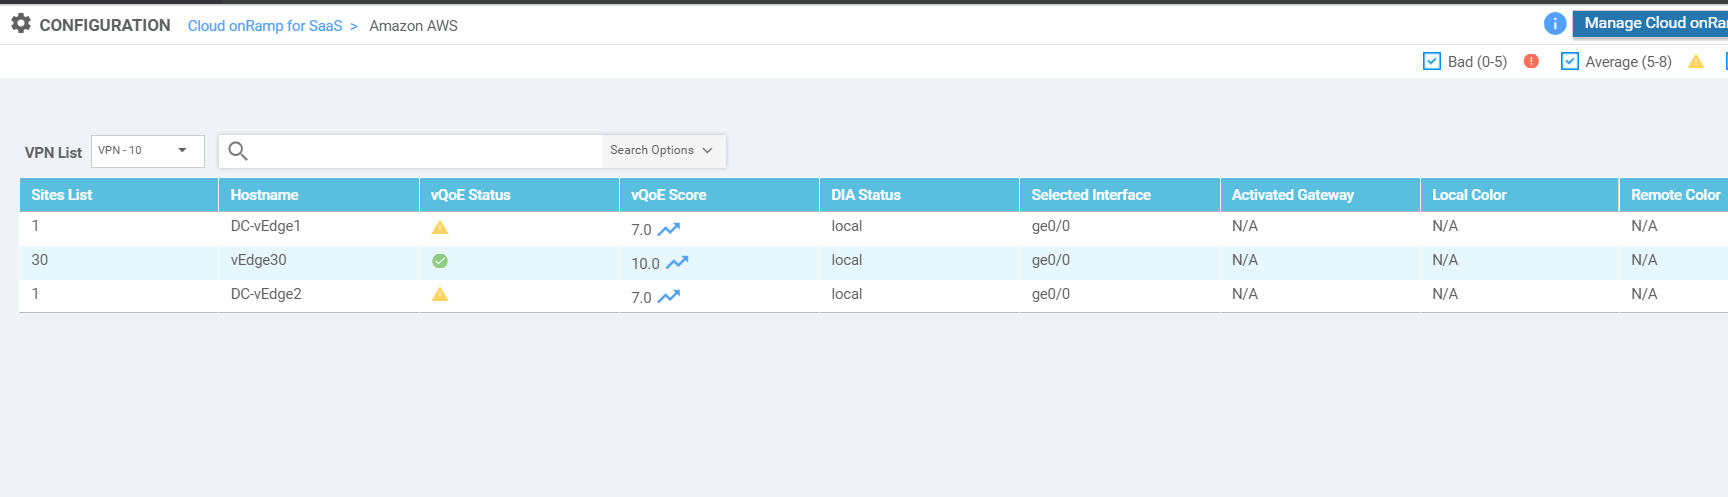
Wait for some time and traffic to the chosen Application from vEdge30 (check via Cloud icon => Cloud onRamp for SaaS => click on the Application) should have a DIA status of gateway, indicating that the DC Gateway is being used to contact Amazon AWS (in this example). The local/remote color is mpls with the system-ip of the gateway being used
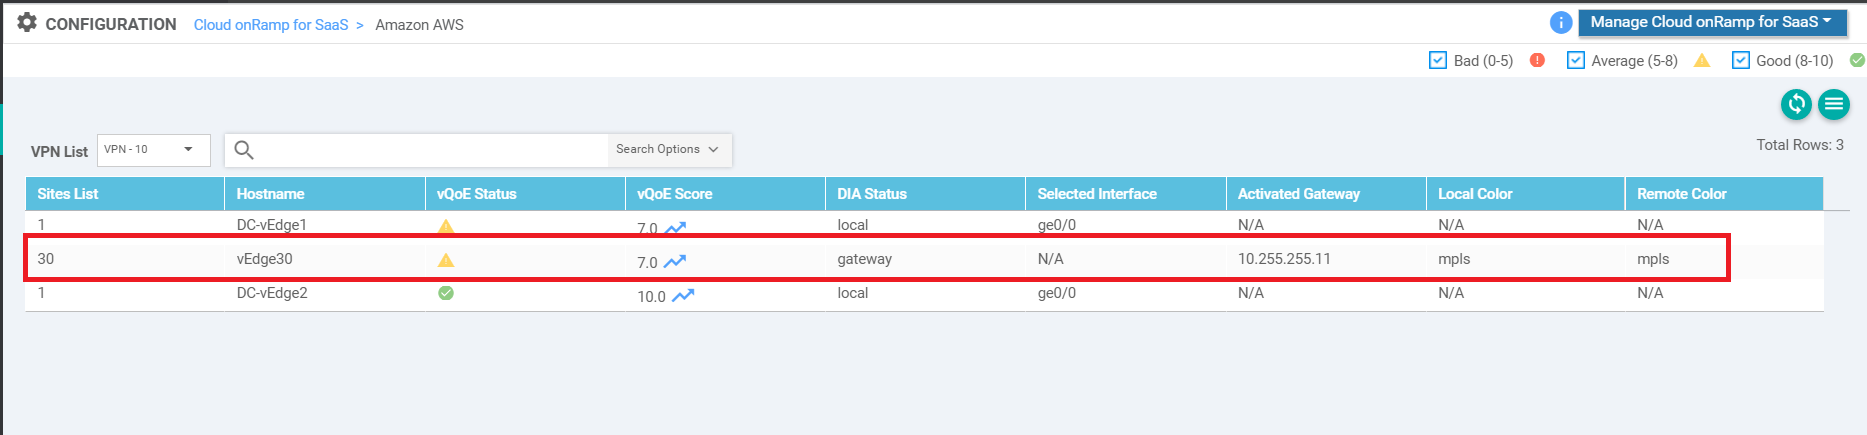
The vQoE score might vary, as shown in the image below (it usually takes approximately 15 to 20 minutes for the expected results to show up)
-
Go back to the vEdge30-INET Feature template (refer to Steps 1 and 2 of this section) and set the Shaping Rate (Kbps) to the Default value. Click on Update. Click on Next/Configure Devices

-
Navigate to Monitor => Network and click on Tunnel. Make sure all the public-internet Tunnel Endpoints are selected. You should see the latency on the link drop
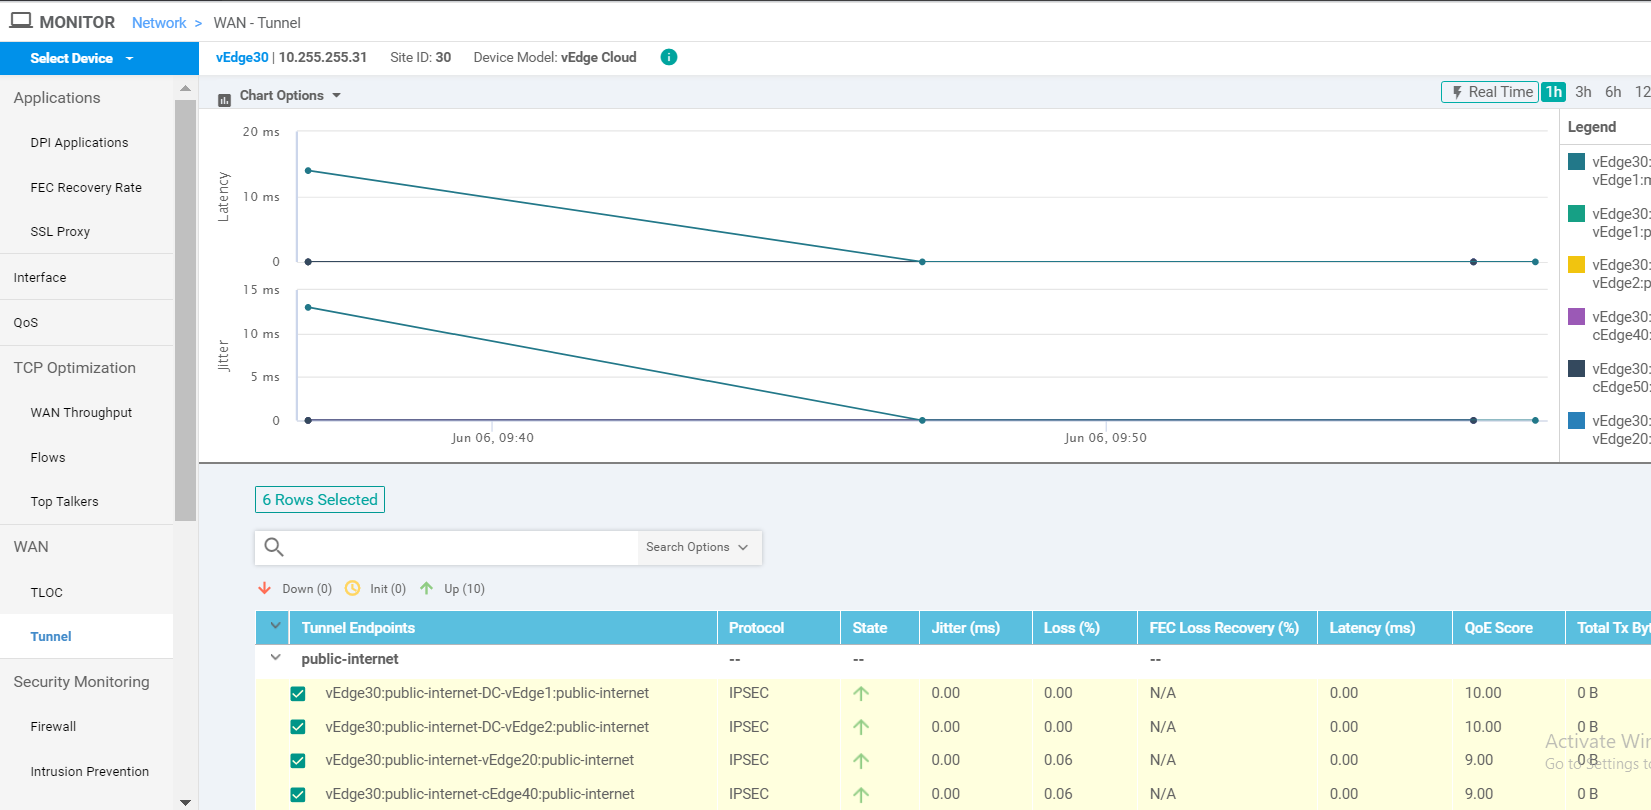
-
Cloud OnRamp for SaaS takes a few minutes to converge, so monitor the Cloud icon => Cloud onRamp for SaaS => Application page - in time, you should see vEdge30 sending data via the local internet breakout
This completes the Cloud OnRamp for SaaS lab.