- Overview
- Setting up Lists
- Configuring Zones
- Configuring an Application List
- Creating a Security Policy
- Applying the Policy and Verification
Overview
Since we have users on the Guest network accessing the Internet through the DIA VPN, we might want to lock down what they can/cannot access. Cisco SD-WAN has an in-built Zone Based Firewall which can perform Deep Packet Inspection, allowing and/or blocking/inspecting traffic as need be. While this is a slightly stripped down version of a ZBF, it is quite robust in functionality and offers an intuitive GUI (in the form of vManage) for deploying Firewall Rules.
In this section we will be configuring and deploying a Zone Based Firewall in our network. Guest users will be able to access most Web content but they won’t be able to access Web based emails (like Gmail). We will see the corresponding activity on the ZBF in the CLI and on the GUI.
-
- Setting up Lists
- Configuring Zones
- Configuring an Application List
- Creating a Security Policy
- Applying the Policy and Verification
Setting up Lists
We start off by configuring a few Lists that form the building blocks of our ZBF. The following lists will be created
- Zone List for identifying the Guest and Outside zones
- Application List for identifying webmail traffic and allowing all other TCP traffic to ports 80 and 443
Configuring Zones
-
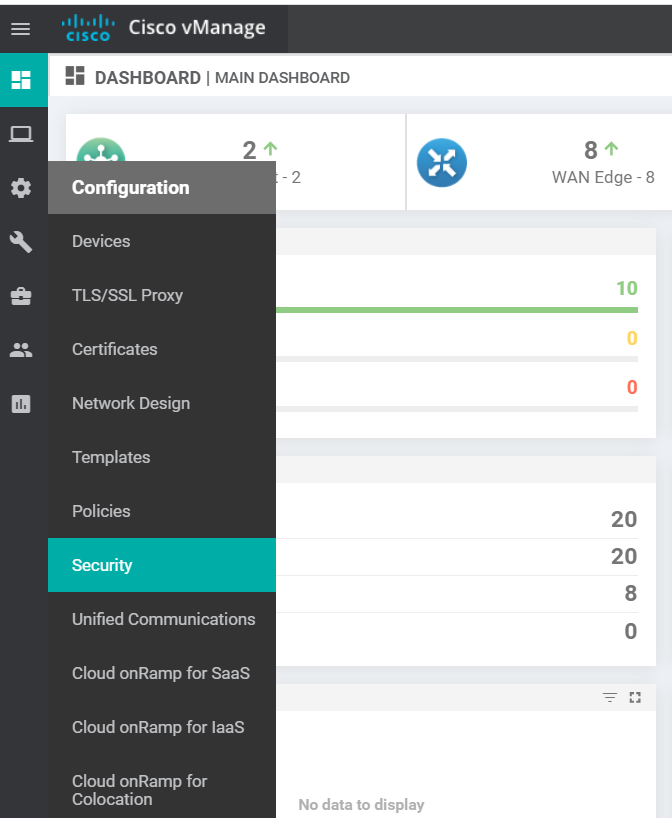
On the vManage GUI, go to Configuration => Security
-
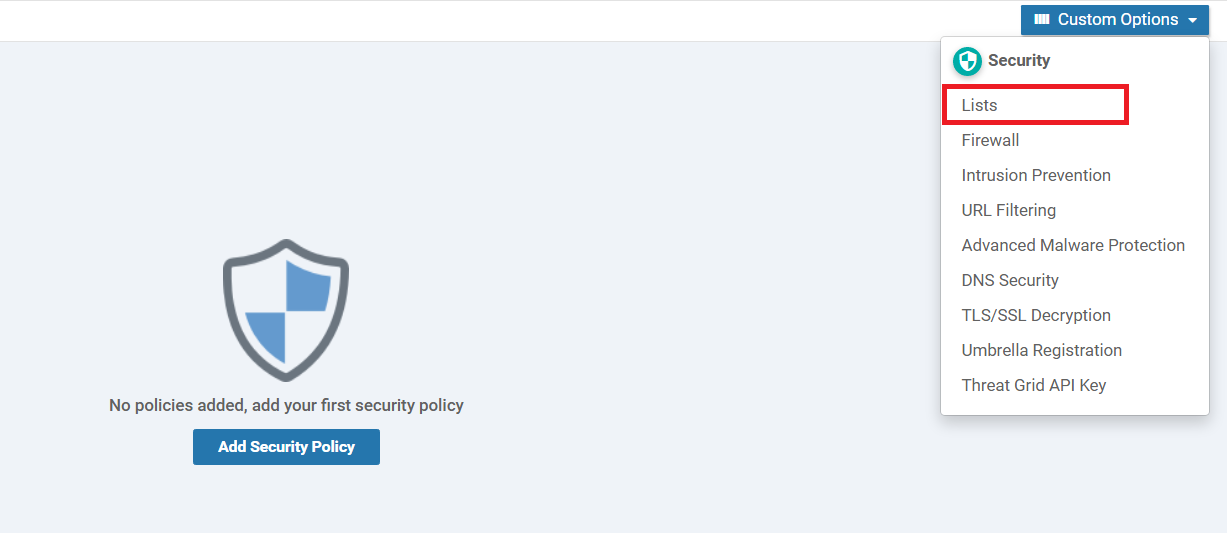
Click on Custom Options in the top right corner of the screen and click on Lists
-
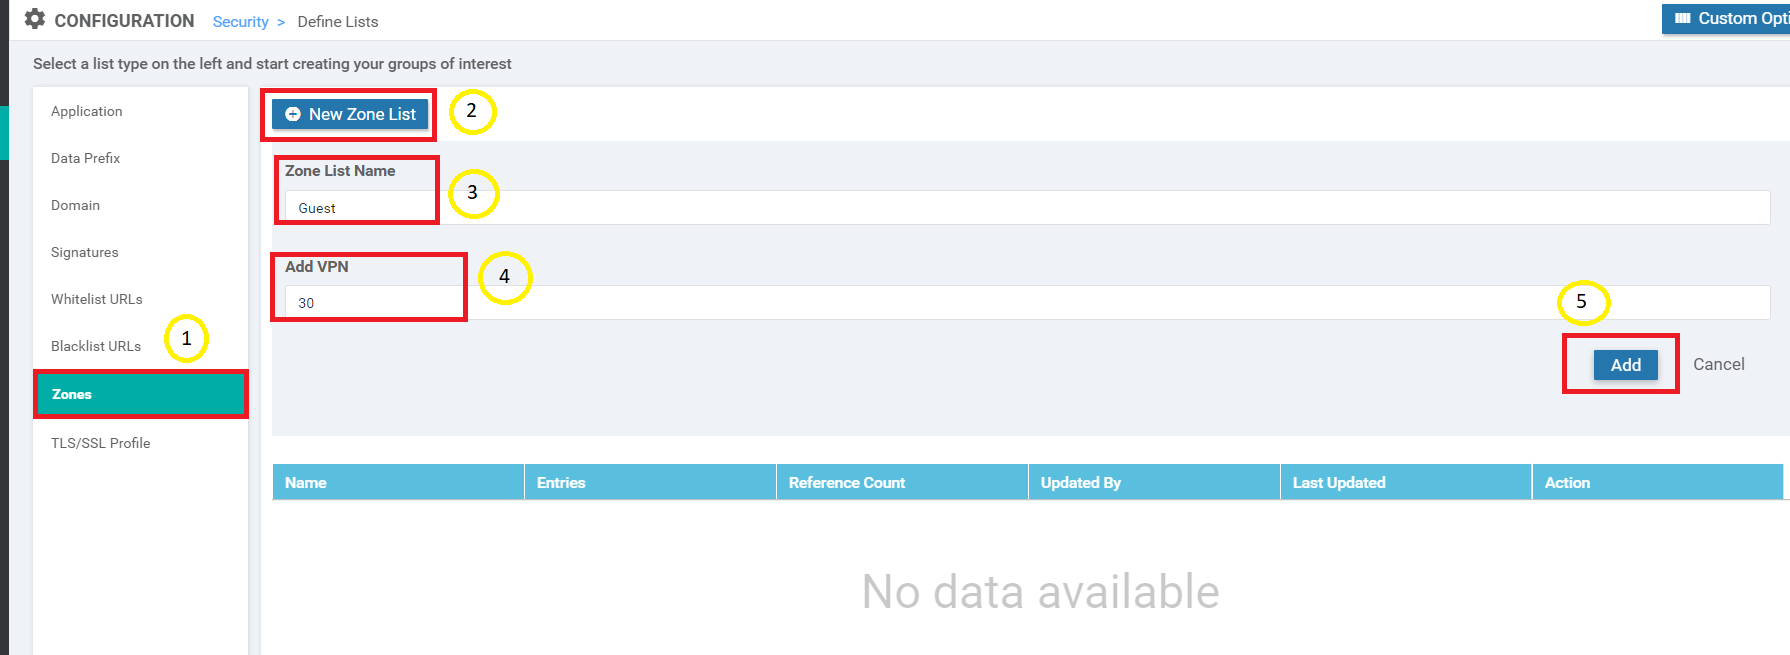
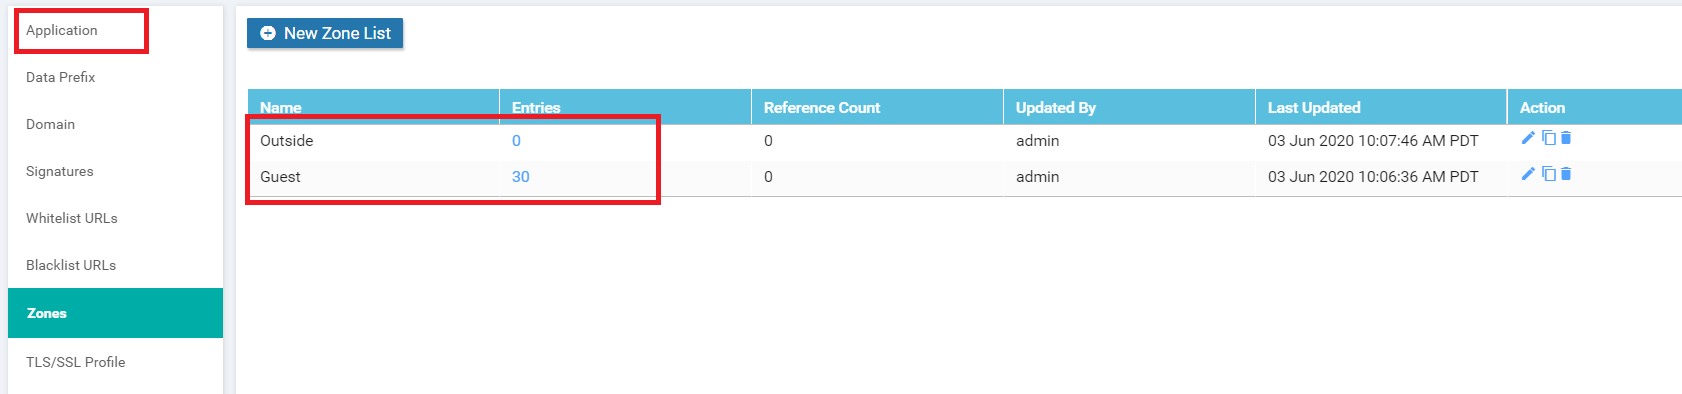
Click on Zones on the left-hand side and choose to create a New Zone List. Give the Zone List Name as Guest and Add VPN as 30. Click on Add
-
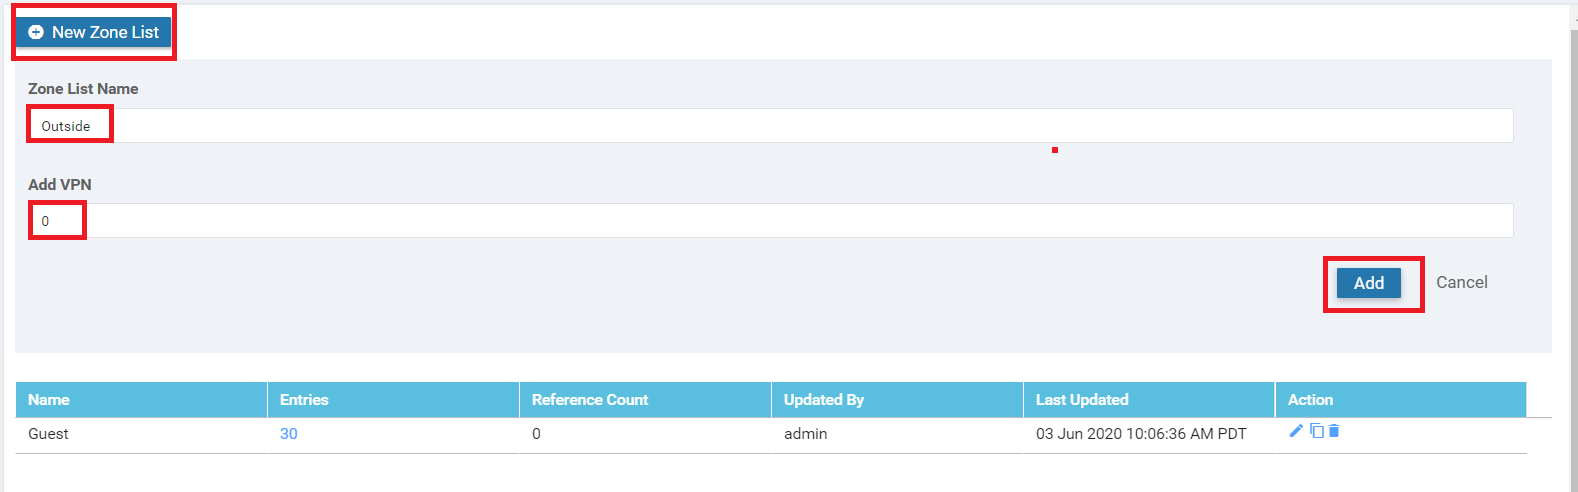
Click on New Zone List again and give the Zone List Name as Outside. Specify the Add VPN as 0. Click on Add
-
Make sure that there are two Zone Lists in the configuration and move to the next section of the guide (while staying on the same page)
-
- Setting up Lists
-
- Configuring an Application List
- Creating a Security Policy
- Applying the Policy and Verification
Configuring an Application List
-
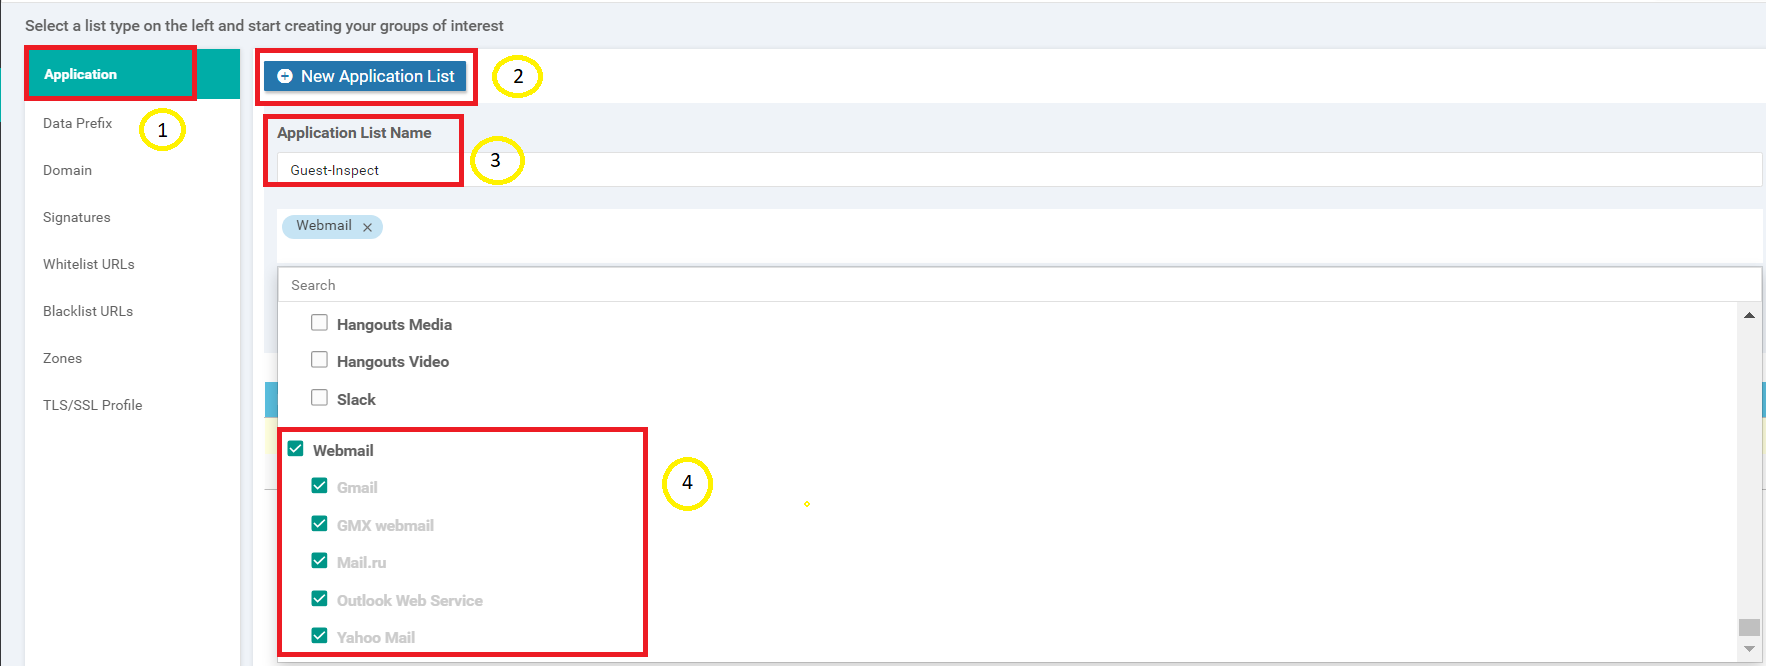
From the previous section, click on Application in the top left corner of the screen after verifying that both the Zone Lists are visible
-
Once Application is selected, click on New Application List and give the Application List Name of Guest-Inspect. Choose Webmail from the drop down, making sure all the sub-items under webmail are selected as well
-
Click on Add to add this Application List
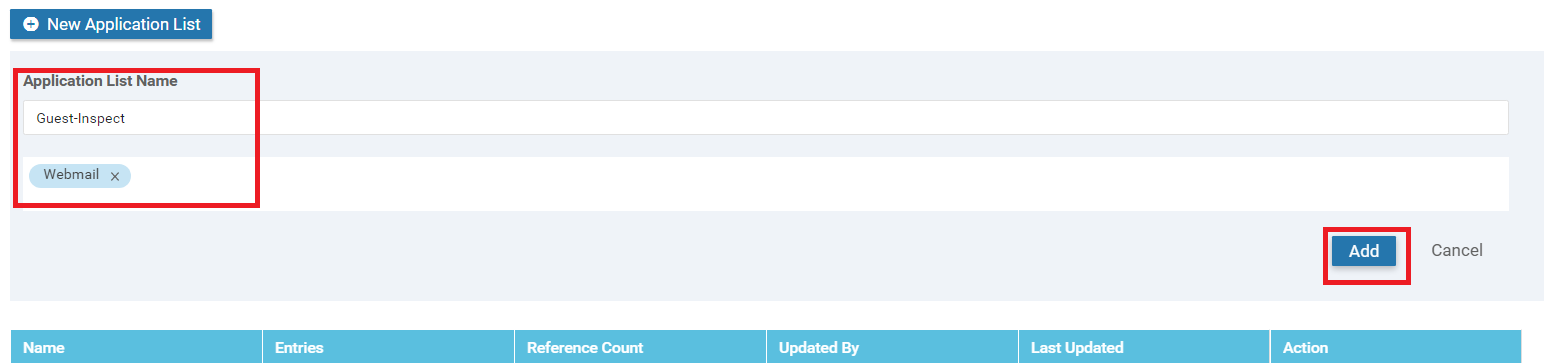
We have created an Application List which can potentially identify Gmail, Mail.ru etc. traffic. We will now create our policy.
-
-
-
-
- Creating a Security Policy
- Applying the Policy and Verification
Creating a Security Policy
-
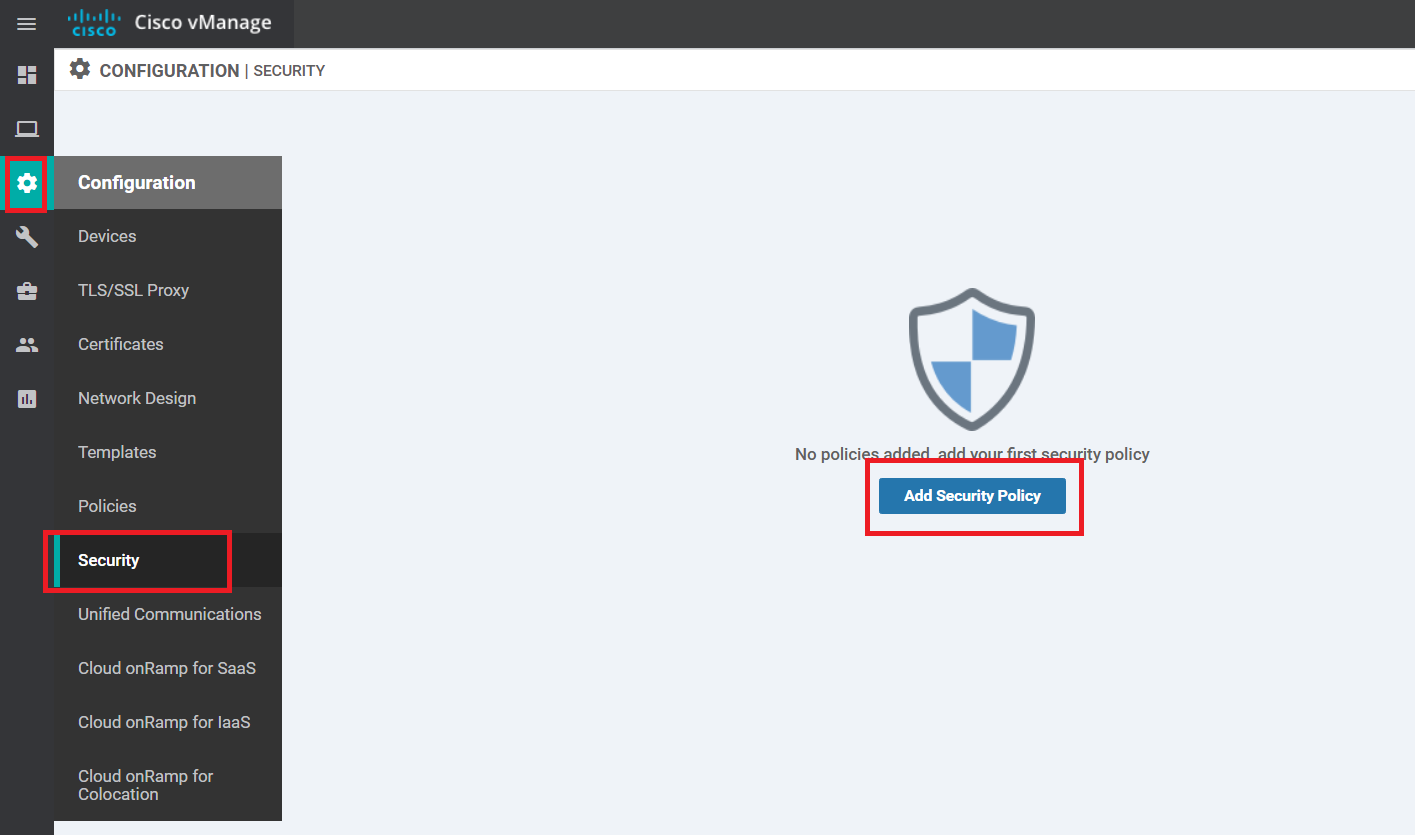
On the vManage GUI, navigate to Configuration => Security and click on Add Security Policy
-
Choose Guest Access and click on Proceed

-
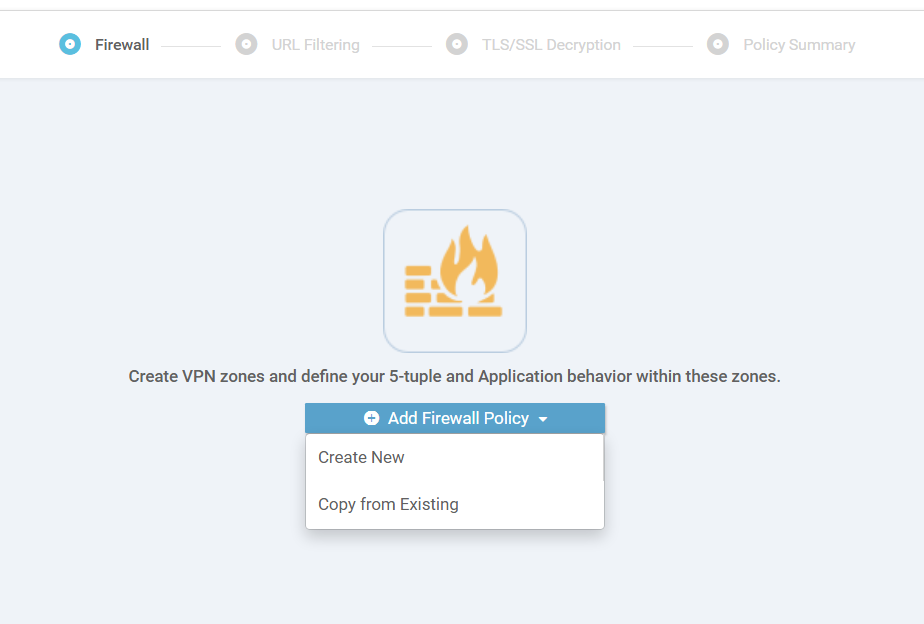
Under Firewall, choose to Add Firewall Policy. Click on Create New
-
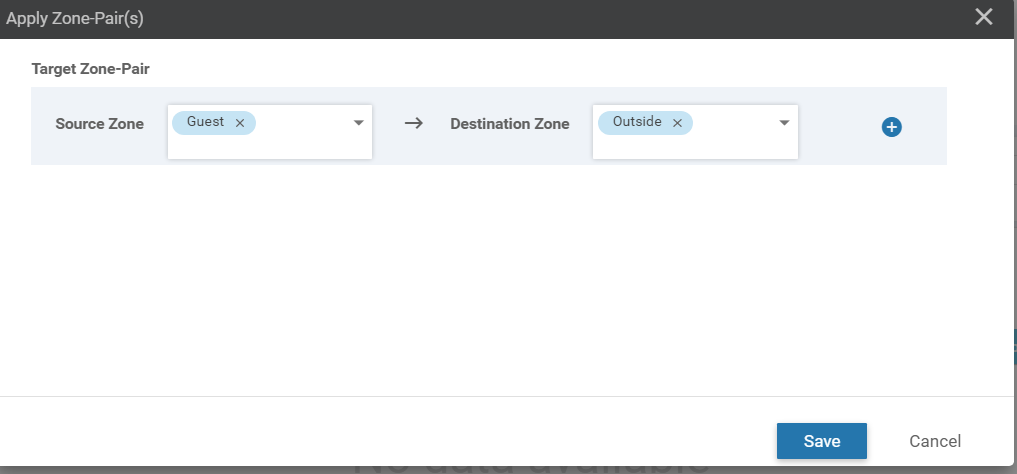
Click on Apply Zone Pairs

-
Set the Source Zone as Guest and the Destination Zone as Outside. Click on Save
-
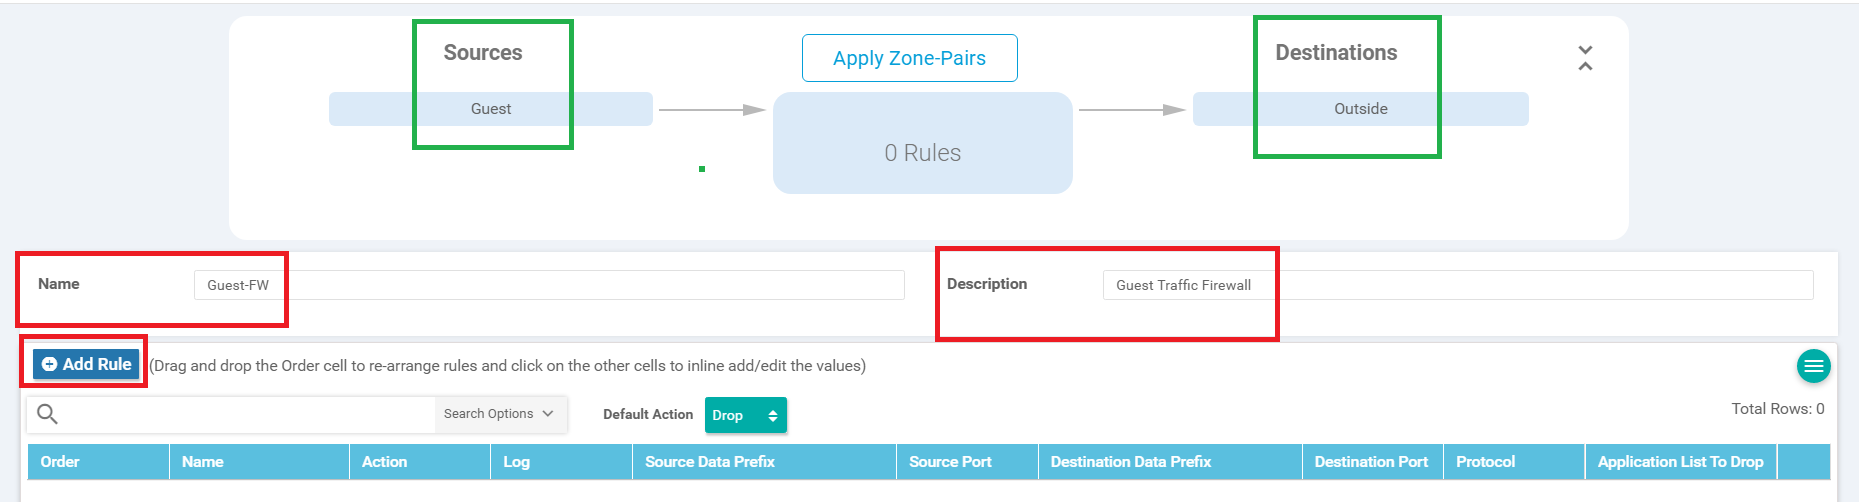
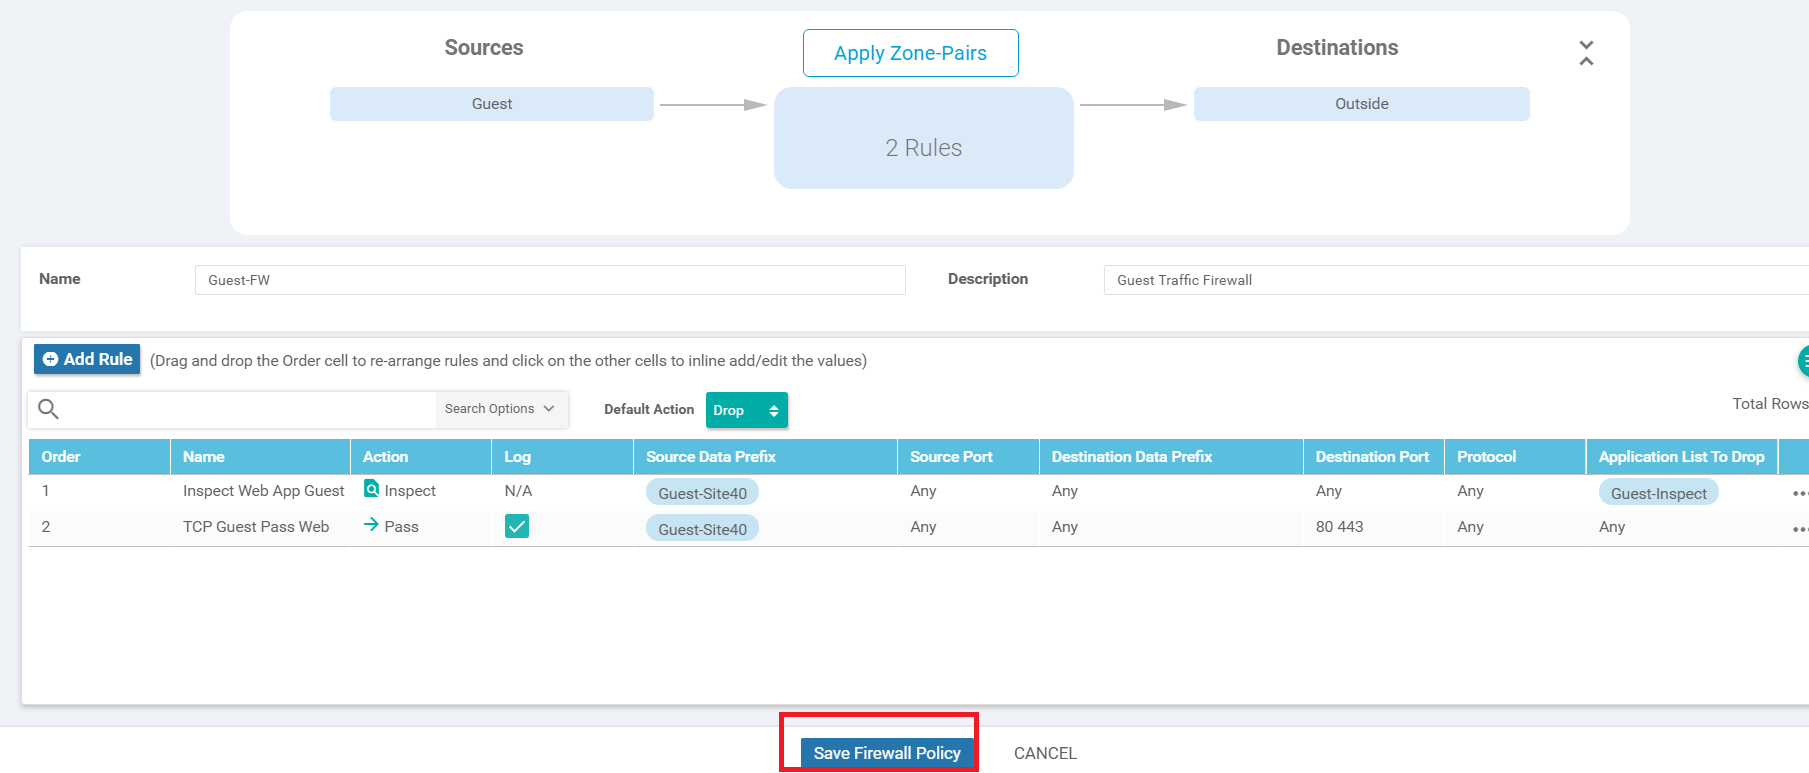
Ensure that Guest appears under Sources and Outside appears under Destinations. Give the Policy a name of Guest-FW and a Description of Guest Traffic Firewall. Click on Add Rule
-
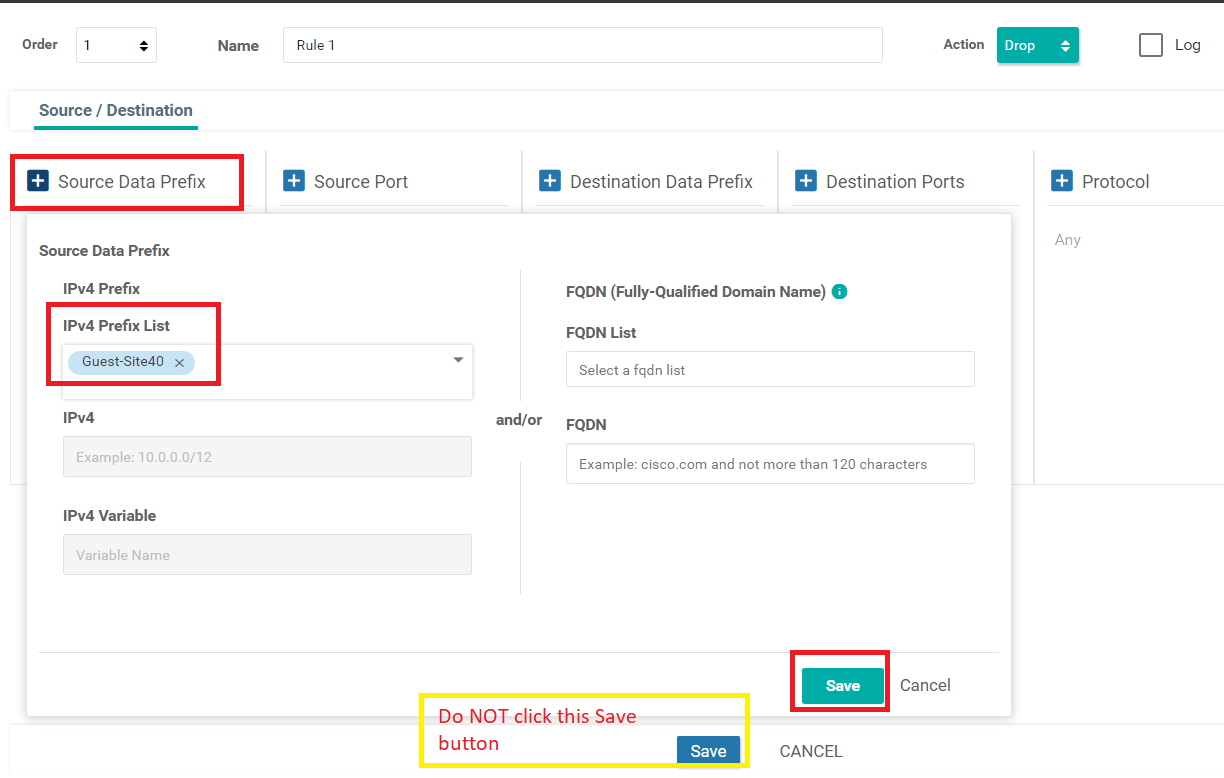
Click on Source Data Prefix and choose Guest-Site40 as the IPv4 Prefix List. Click on the Green Save button (be careful, don’t click on the Blue Save button)
-
Click on Application List and select the Guest-Inspect list we created. Click on the Green Save button (again, please don’t click on the Blue Save button)
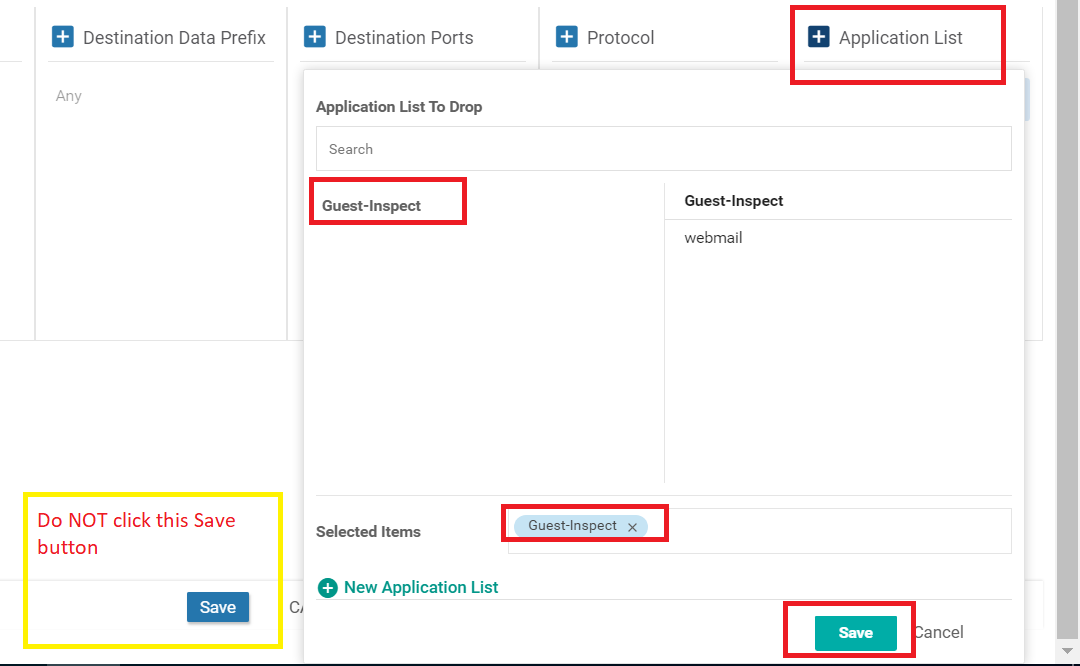
-
Give the Firewall Rule a name of Inspect Web App Guest and set the Action as Inspect. Click on Save (this time, we click the Blue Save button). Ensure that the Source Data Prefix and the Application List is populated

-
Click on Add Rule again and select the Source Data Prefix IPv4 Prefix List as Guest-Site40. Click on the Green Save button
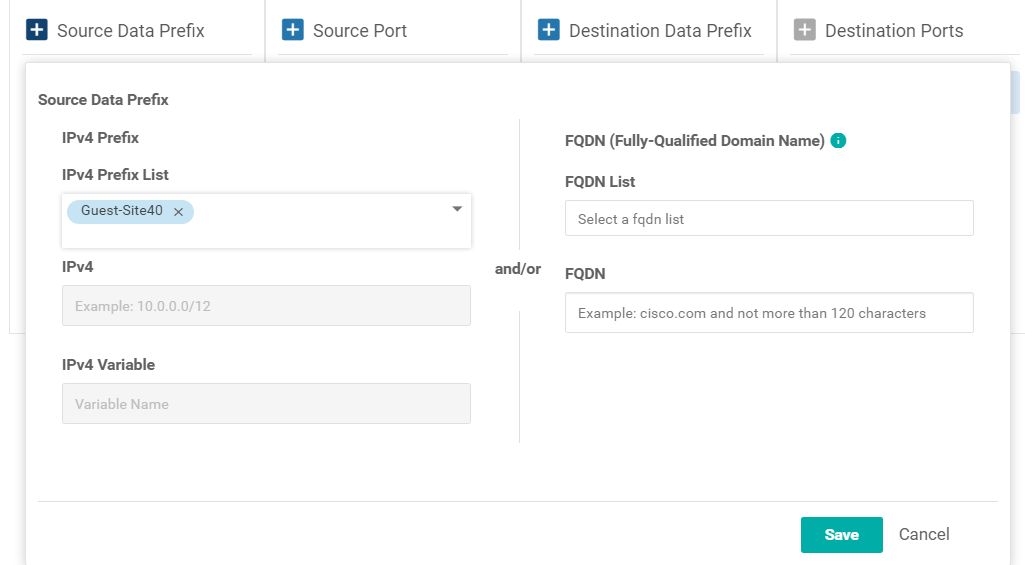
-
Click on Destination Ports and set the Destination Ports as 80 443 (there is a space between the port numbers). Click on the Green Save button
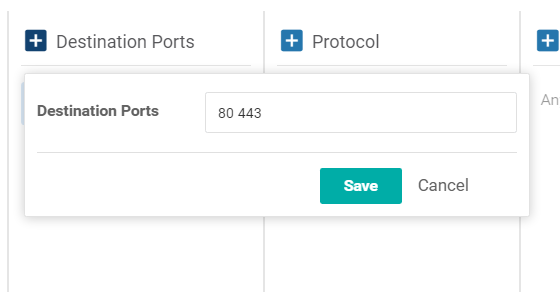
-
Make sure the Firewall Rule looks like the image below and specify a Name of TCP Guest Pass Web. Specify the Action as Pass and put a check mark against Log. Click on the Blue Save button
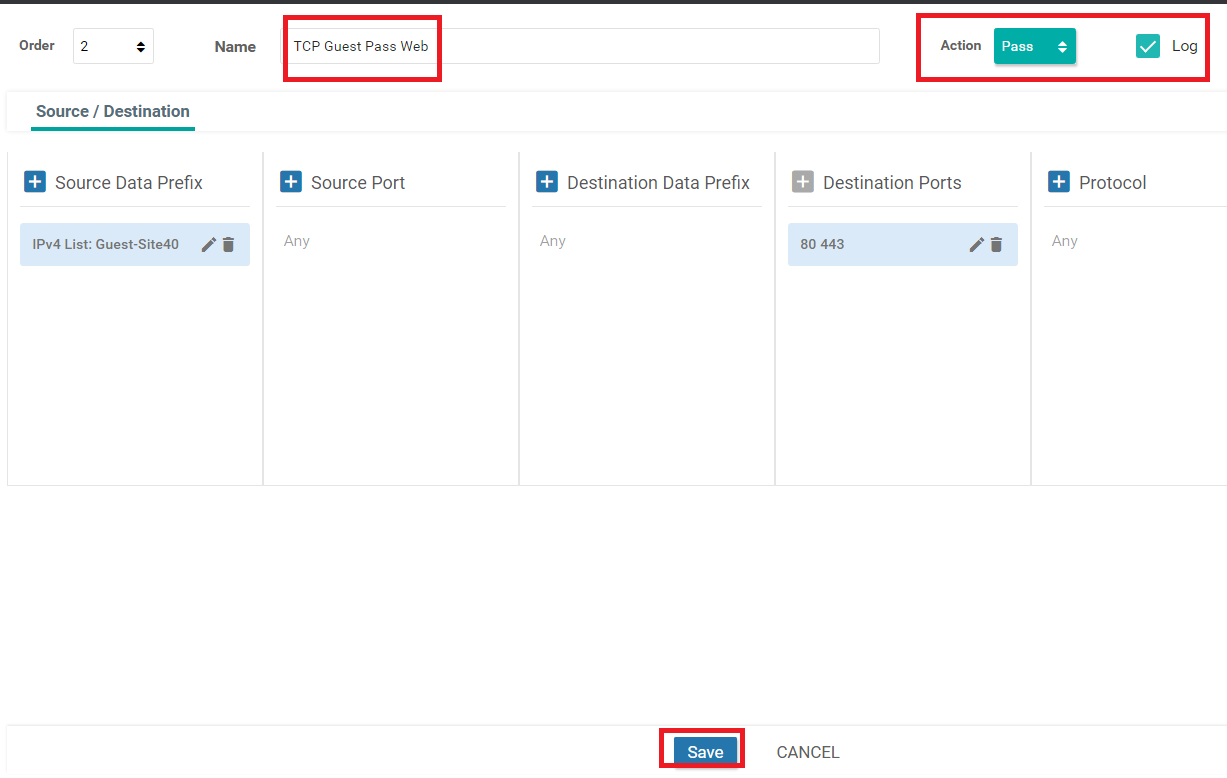
-
Make sure the Firewall Policy looks as below and click on Save Firewall Policy
-
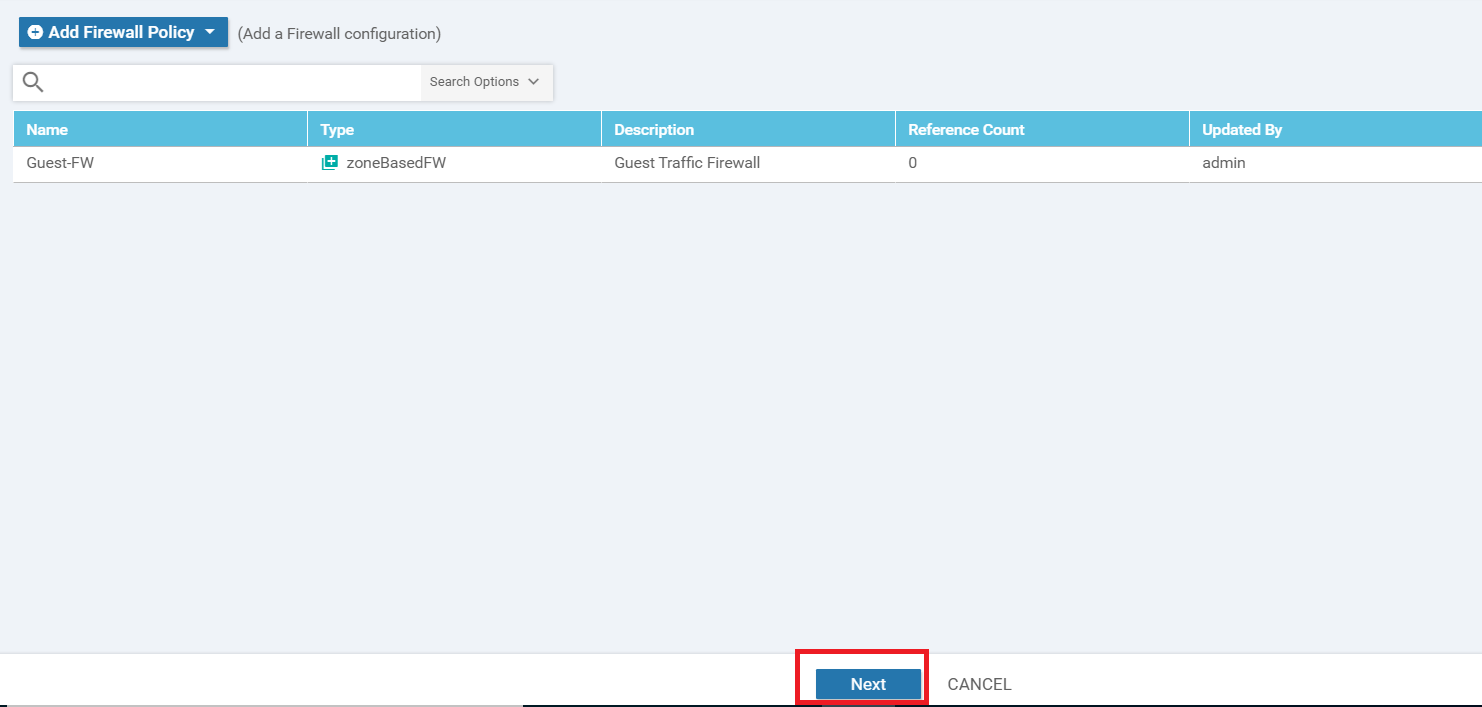
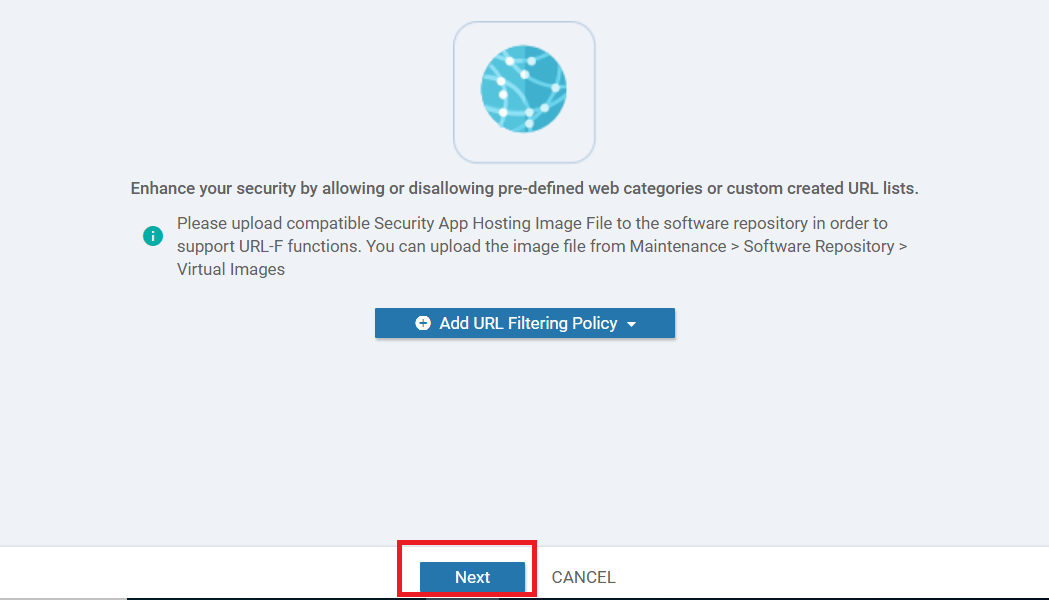
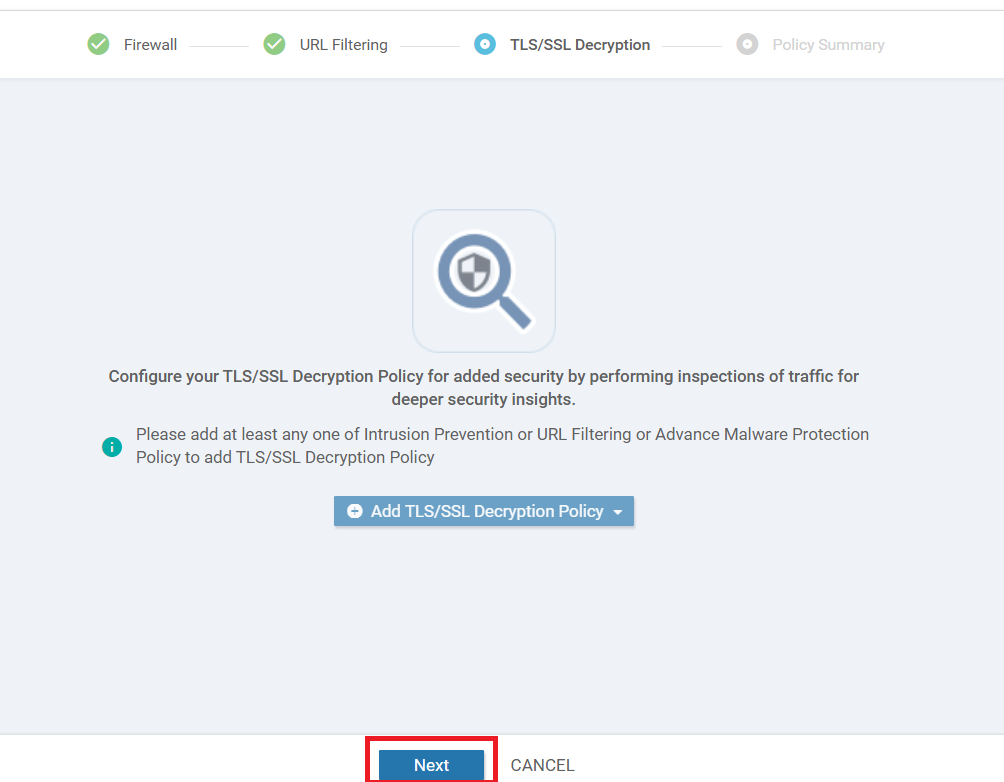
Click on Next and then Next again at the URL Filtering and TLS/SSL Decryption sections
-
At the Policy Summary page, give a Security Policy Name of Site40-Guest-DIA and a Description of Guest Policy for Site 40. Under Additional Policy Settings set the TCP SYN Flood Limit to Enabled and 5000. Enable Audit Trail as well and click on Save Policy
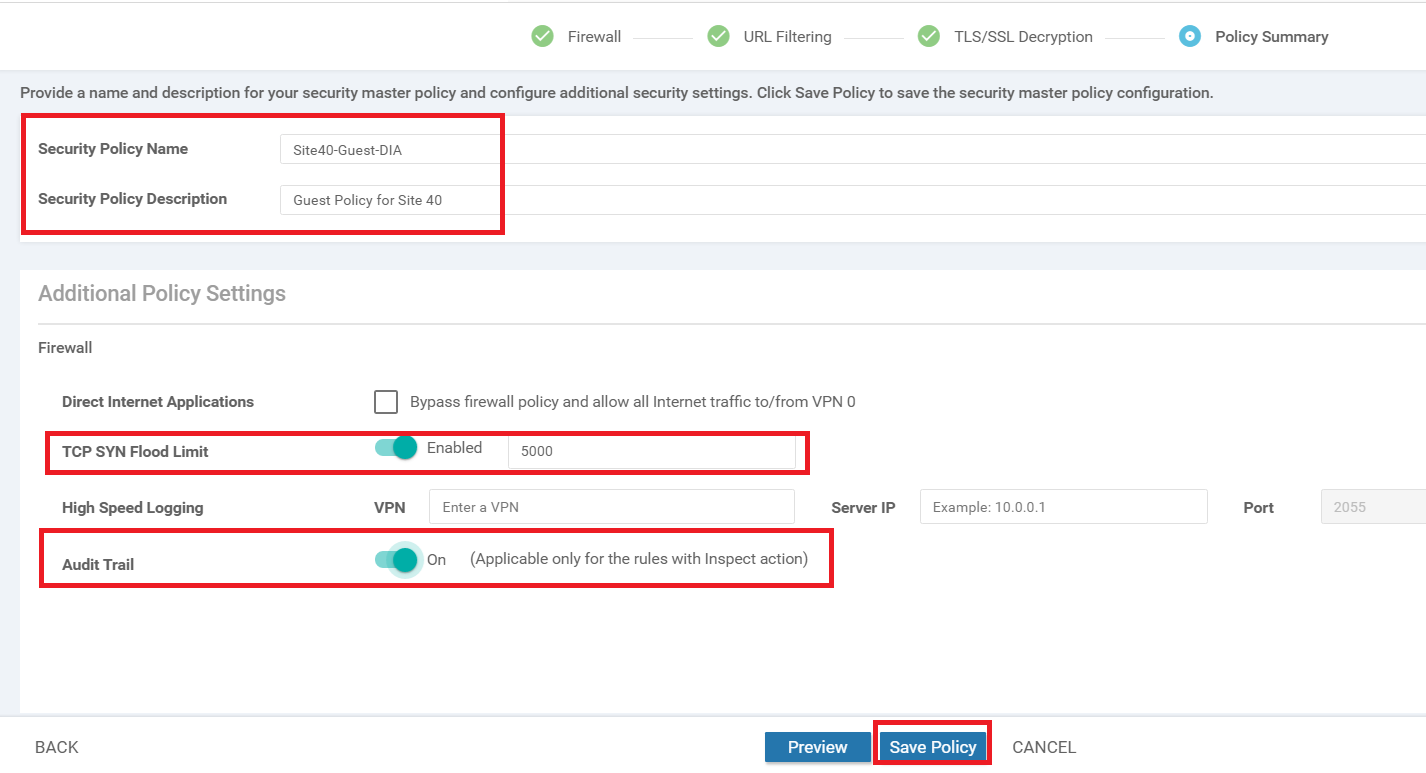
This completes the process of creating the Security Policy.
-
-
-
-
-
- Applying the Policy and Verification
Applying the Policy and Verification
-
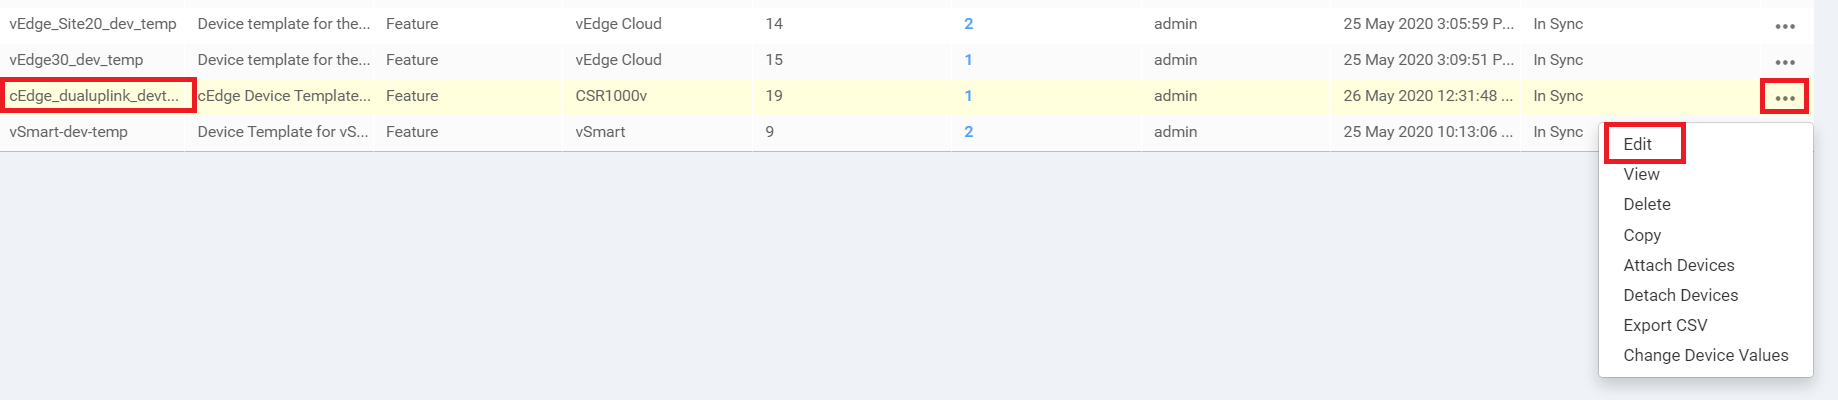
Go to Configuration => Templates and click on the three dots next to the cEdge_dualuplink_devtemp Device Template. Choose to Edit it
-
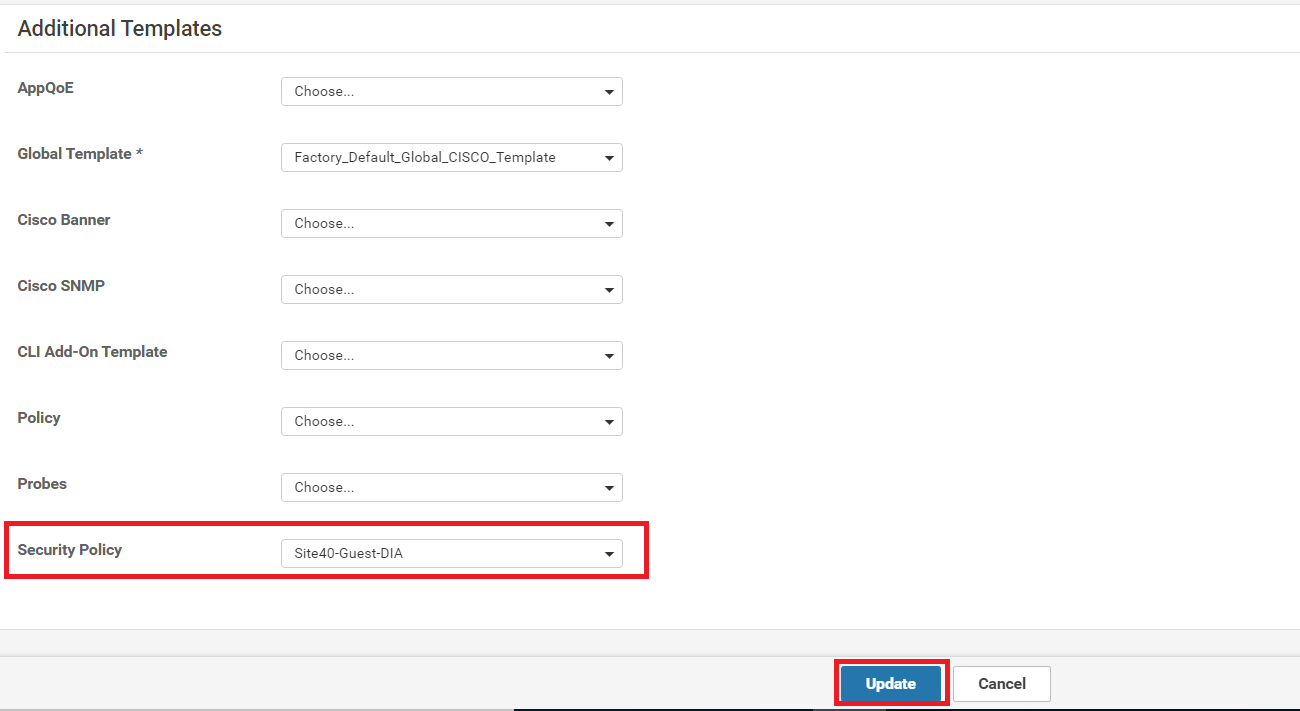
Under the Additional Templates section, populate the Security Policy as Site40-Guest-DIA and click on Update
-
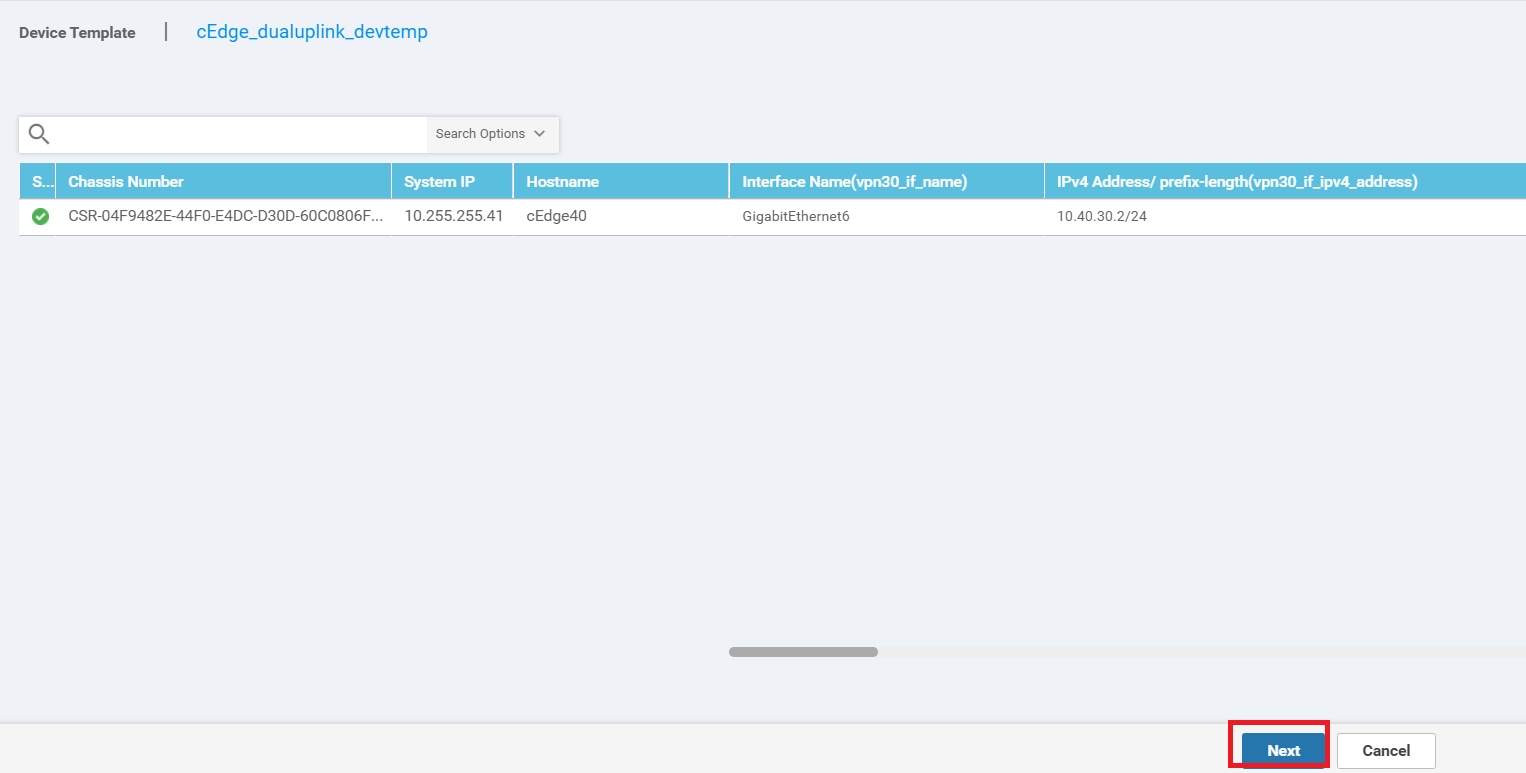
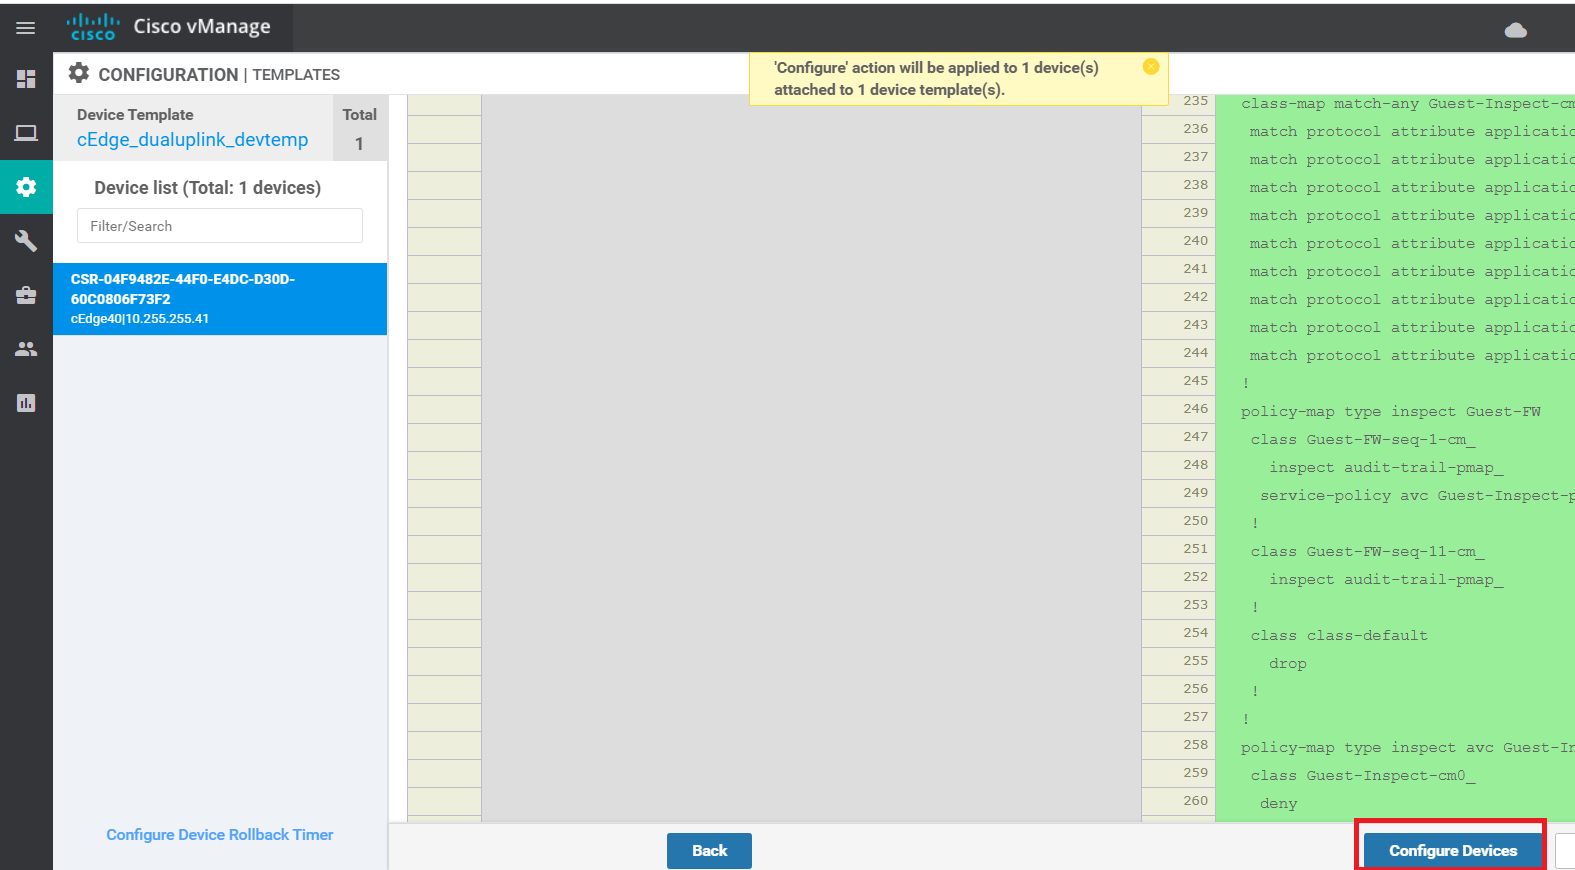
Choose Next and then Configure Devices to push the Security Policy to cEdge40
-
Open the Console session to the Site 40 PC (log in to vCenter => locate the site40pc VM and open the Web Console) and navigate to www.facebook.com. It should work indicating that Web Traffic is allowed. Log in to the cEdge40 CLI via Putty and issue a
show logg. We should see some activity there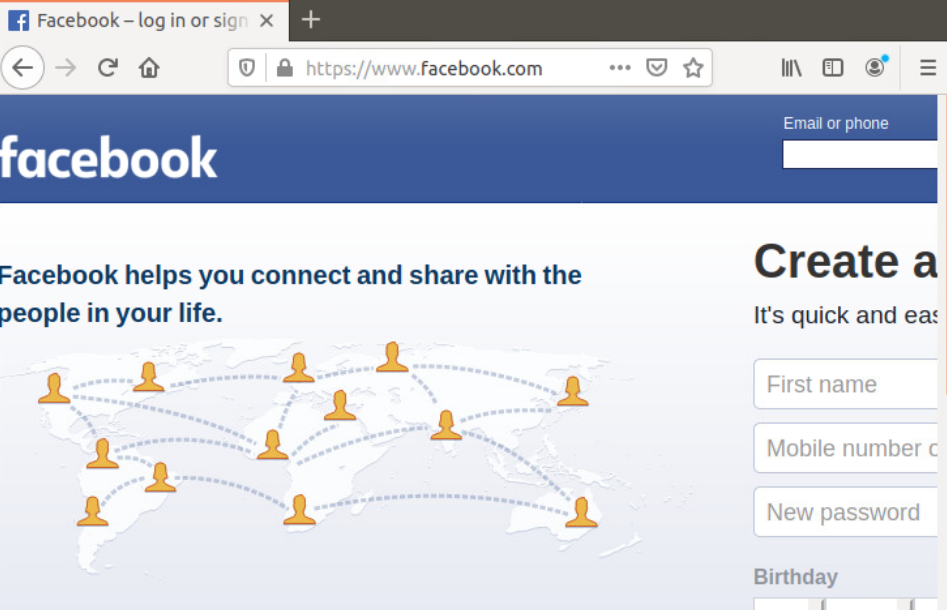

-
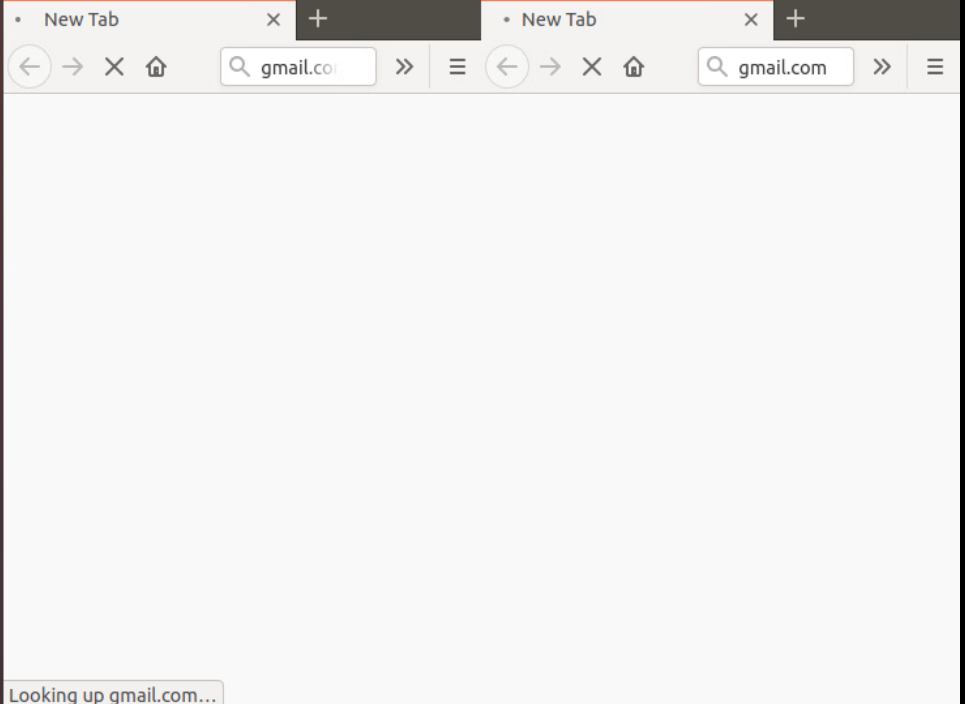
Open up a few tabs on the Site 40 PC (2 to 3 of them) and try to access www.gmail.com on all tabs. This should fail
-
On the vManage GUI, navigate to Dashboard => Security and you should see spikes in the Firewall Enforcement dashlet (continue with the lab and check back after approximately 15 minutes to see this)
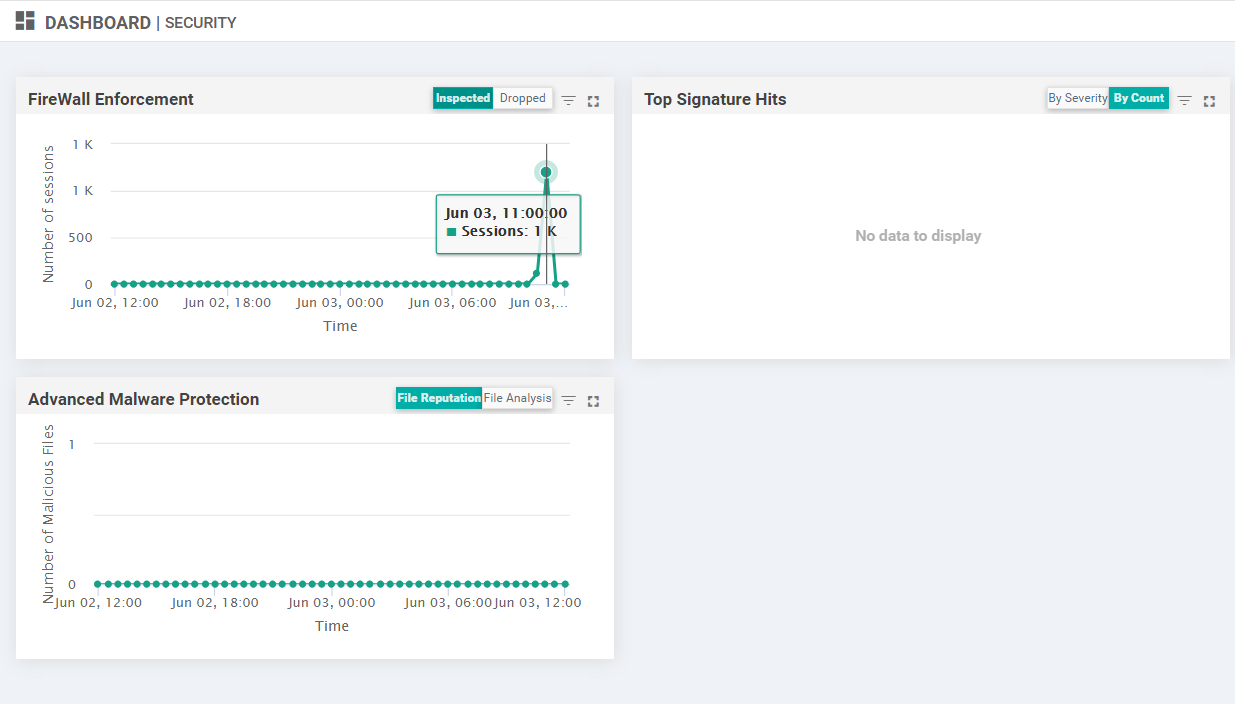
Thus, our ZBF is working as expected, blocking webmail traffic on the Guest VPN while allowing other traffic on ports 80 and 443.