- Creating the Site 30 Feature Templates
- Modifying a Device Template and Attaching Devices
Overview
vEdge30 and the DC-vEdges are quite similar from a configuration standpoint. The templates already created for the DC-vEdges can be re-used for Site 30, but we will be making a copy of those templates and applying the renamed copies to the Device Template for Site 30. This is because DC and Branch sites will generally have some configuration changes down the line which will not apply to both sites. It’s a good practice to keep the number of templates to a minimum, keeping in mind the treatment given to different sites. If Site 30 and the DC Site share the same template, any changes made on one will affect the other.
Creating the Site 30 Feature Templates
We will set up the VPN templates for VPN 0 in Site 30 by making a copy of the DCvEdge-vpn0 Feature Template created before. No other major changes will be made to the template itself
-
From Configuration => Templates => Feature tab search in the search box for dc. We should see a few templates, out of which we will be making copies of DCvEdge-vpn0, DC-vEdge_INET and DC-vEdge_MPLS for use at Site 30
-
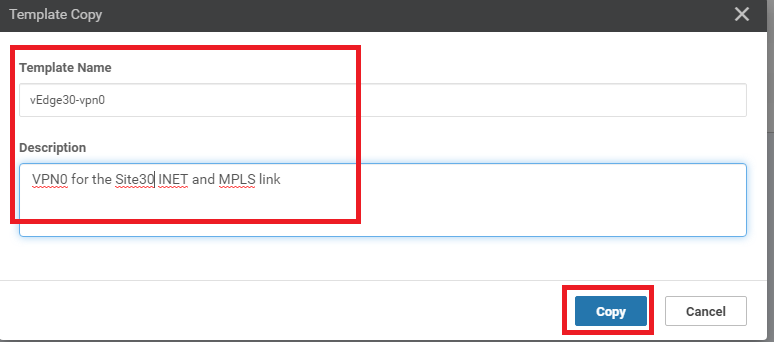
Click on the three dots next to DCvEdge-vpn0 and choose Copy. Rename the template to vEdge30-vpn0 with a description of VPN0 for the Site30 INET and MPLS link. Click on Copy
-
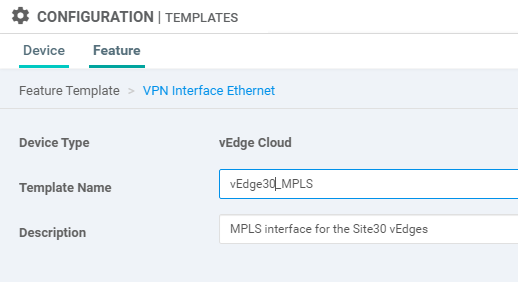
Click on the dots next to the newly created template and choose to Edit. Make sure the Template Name and Description match. Click on Update
-
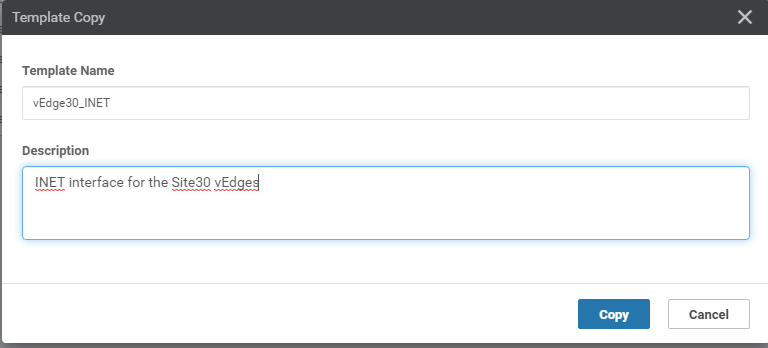
Repeat steps 2 and 3 above, making copies of DC-vEdge_INET and DC-vEdge_MPLS, renaming them to vEdge30_INET and vEdge30_MPLS respectively. Update the descriptions as necessary, while copying the template and (if required - note that the description does not get updated at times while copying) by editing the template and choosing to Update
-
If we go back to the main Configuration => Templates => Feature Tab, and search for vedge30 in the search string, there should be 3 templates visible
Thus, we have simply made copies of the DC-vEdge Feature Templates and updated the name/description so as to apply different configuration to the two Sites (Site 30 and DC) down the line, if required.
-
- Modifying a Device Template and Attaching Devices
Modifying a Device Template and Attaching Devices
-
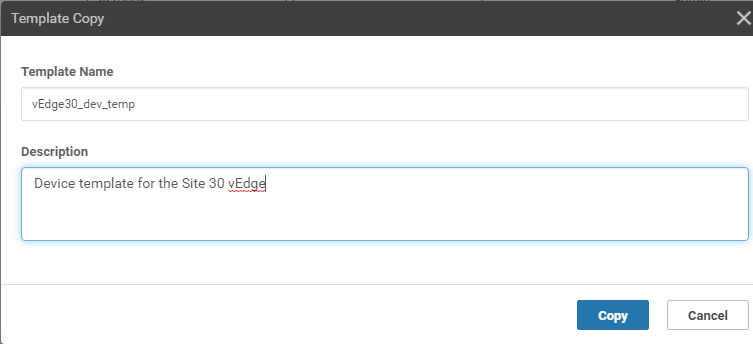
Go to Configuration => Templates and make sure you’re on the Device tab. Click on the three dots next to the DCvEdge_dev_temp. Click on Copy. Rename the Template vEdge30_dev_temp and give it a Description of Device template for the Site 30 vEdge. Click on Copy
-
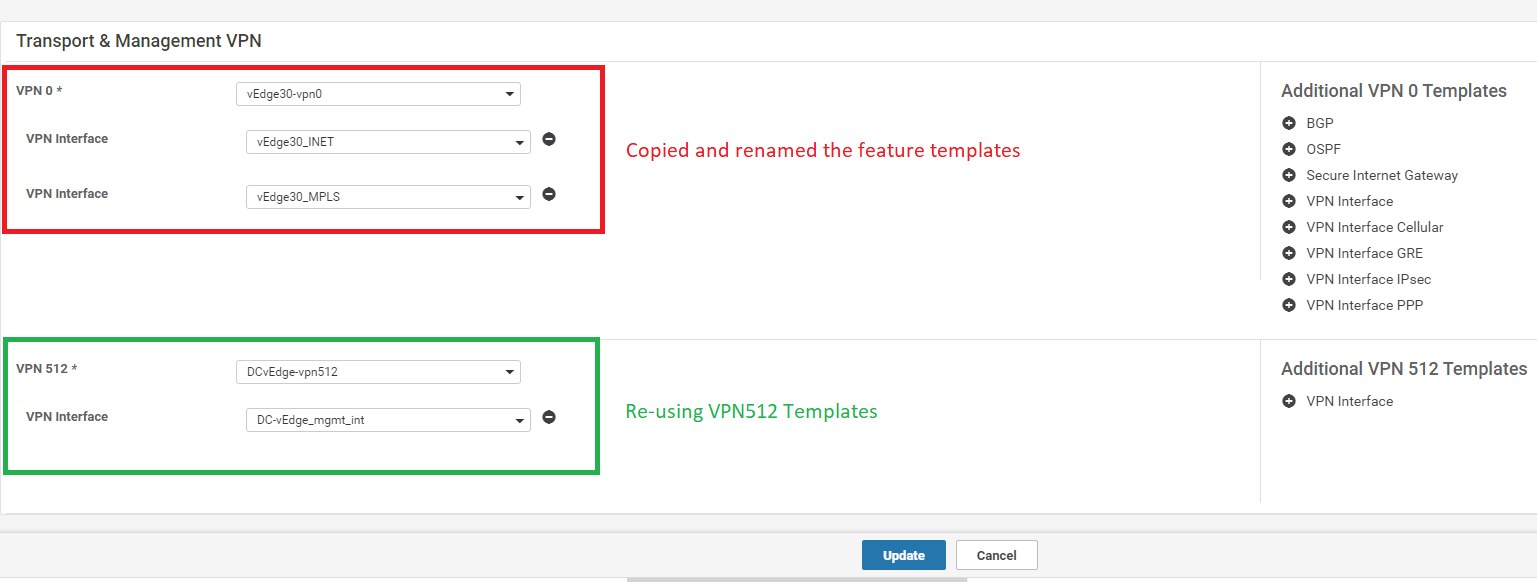
Click on the three dots next to the newly created template and click on Edit. Update the Transport and Management VPN section as per the screenshot below. We will be re-using the VPN 512 Templates created for the DC-vEdges. Click on Update once done.
-
Click on the three dots next to the newly created vEdge30_dev_temp Template and click on Attach Devices
-
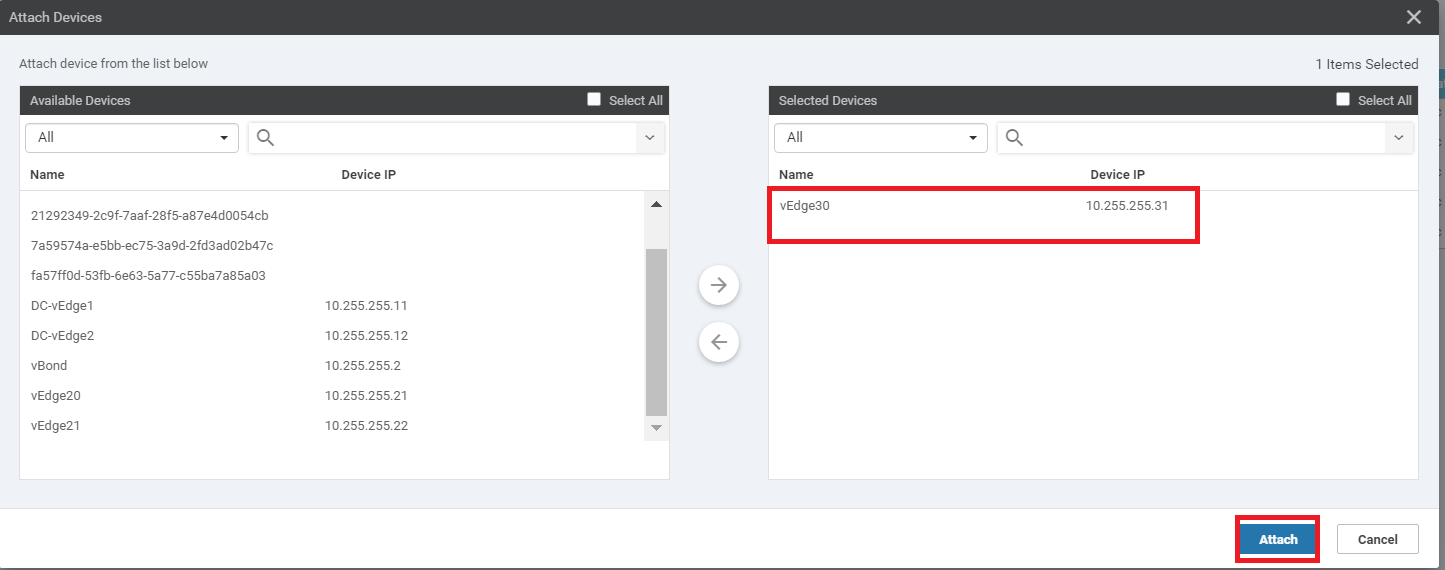
Choose vEdge30 from the list and click on Attach
-
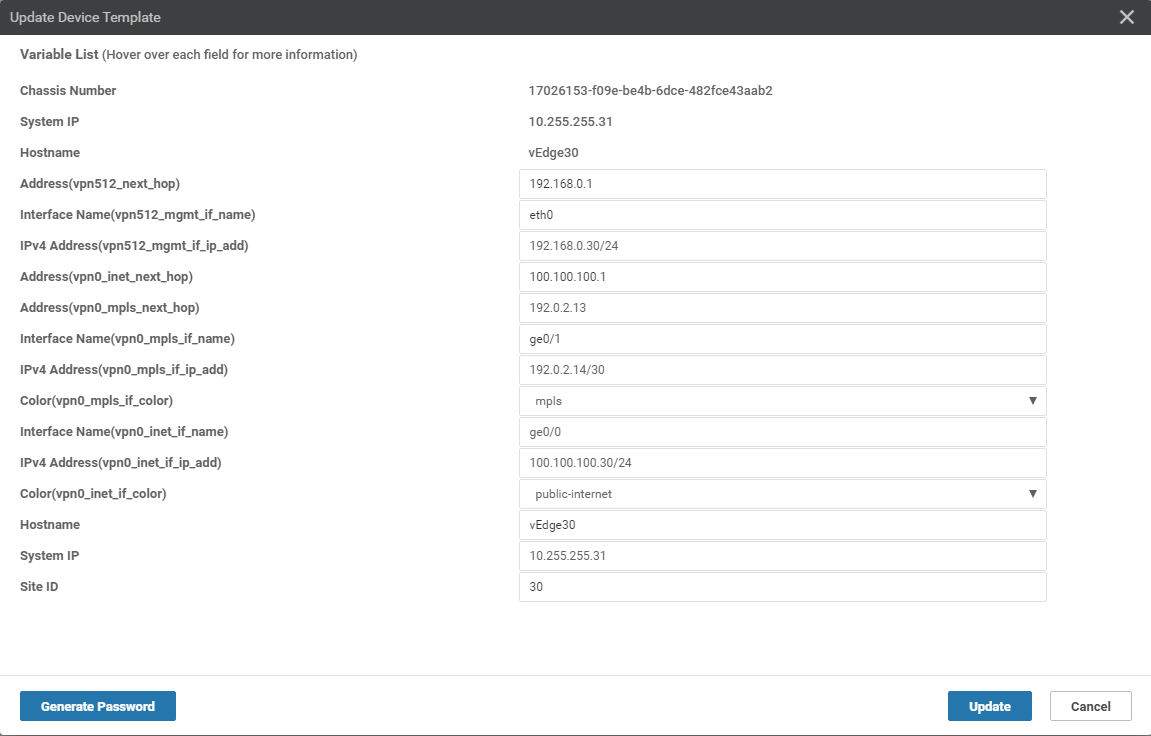
The device should show up in the list. Click on the three dots next to vEdge30 and choose to Edit Device Template. Populate the details as shown below and click on Update
-
DO NOT click on Next or Configure Devices at this point. Log in to the CLI for vEdge30 and issue a
show bfd sessions. -
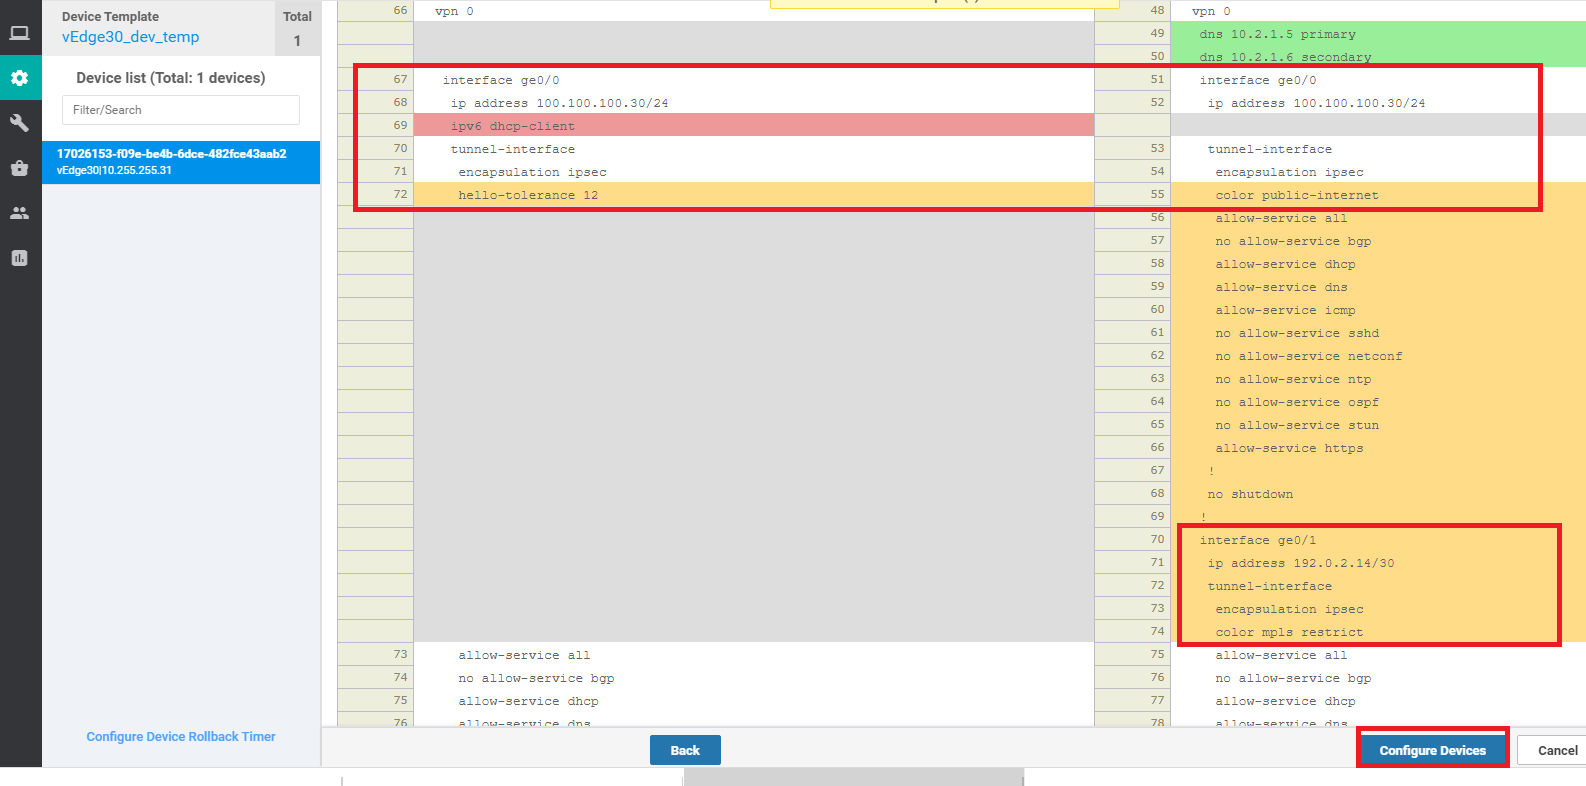
Back at the vManage GUI, click on Next and then Configure Devices. You can view the side-by-side difference, making note of the fact that we are adding an MPLS interface
-
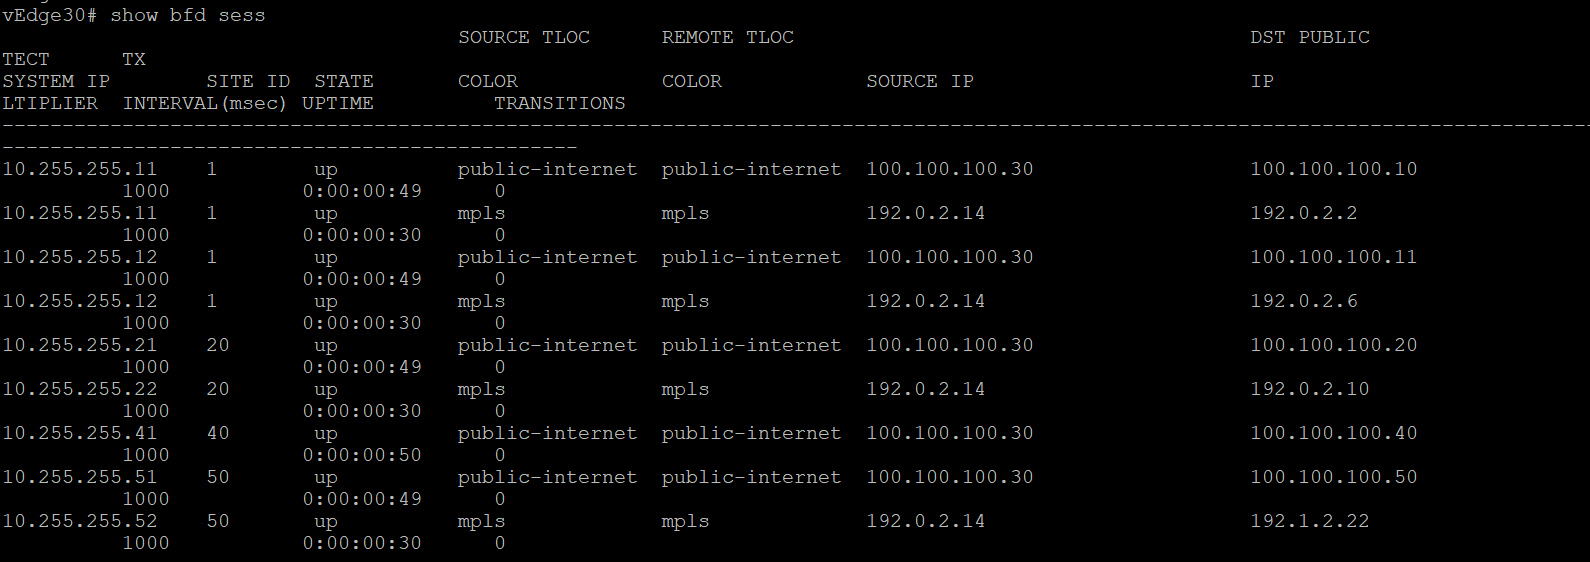
Once the configuration goes through, log back into the CLI of vEdge30 and issue
show bfd sessions. You should see BFD sessions on the mpls TLOC as well -
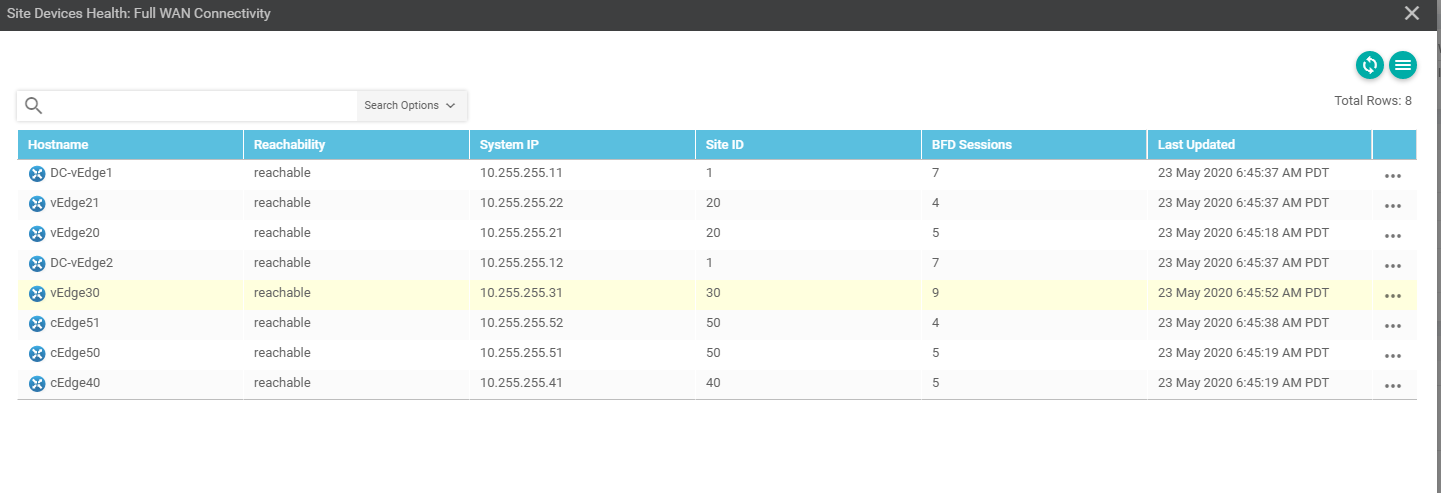
On the vManage GUI, if you click on Full WAN Connectivity on the Main Dashboard, you will see that vEdge30 has a total of 9 BFD sessions
-
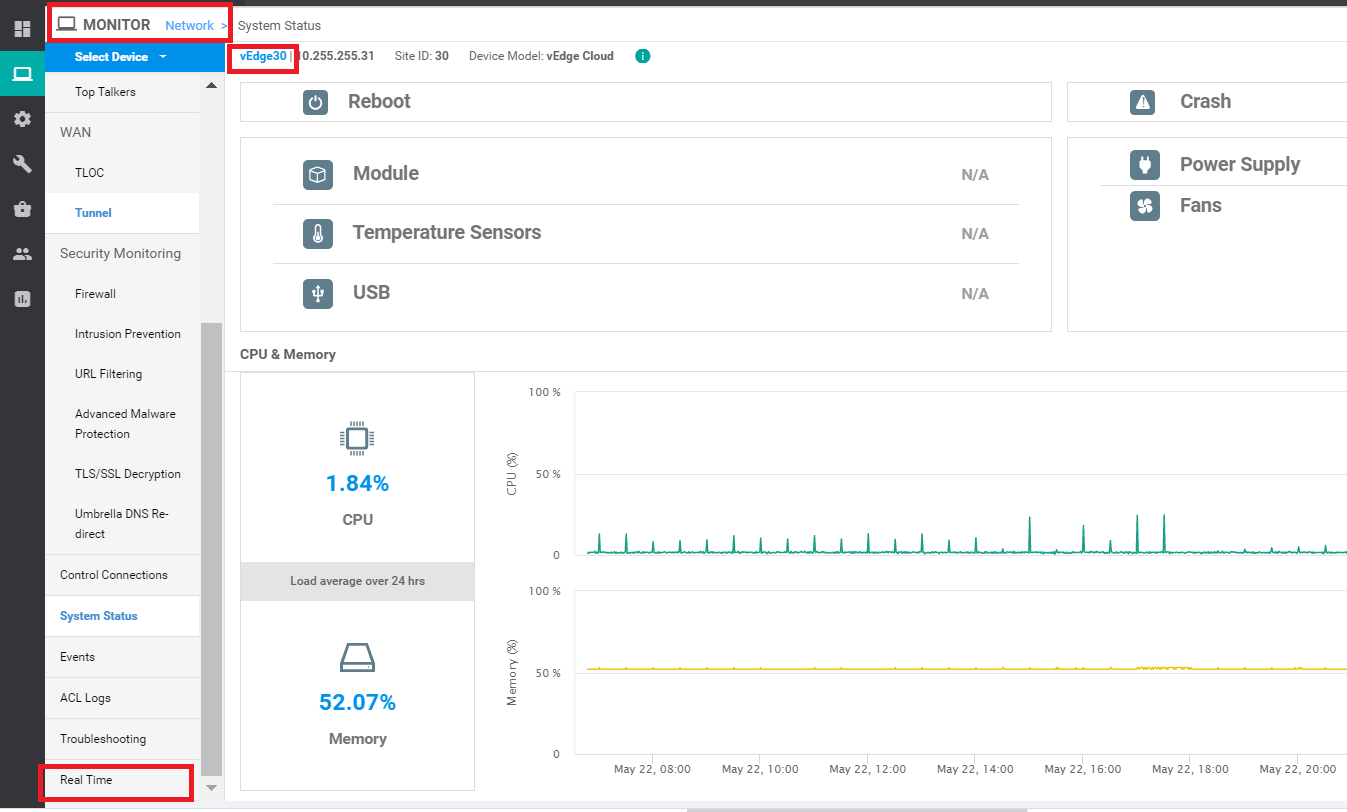
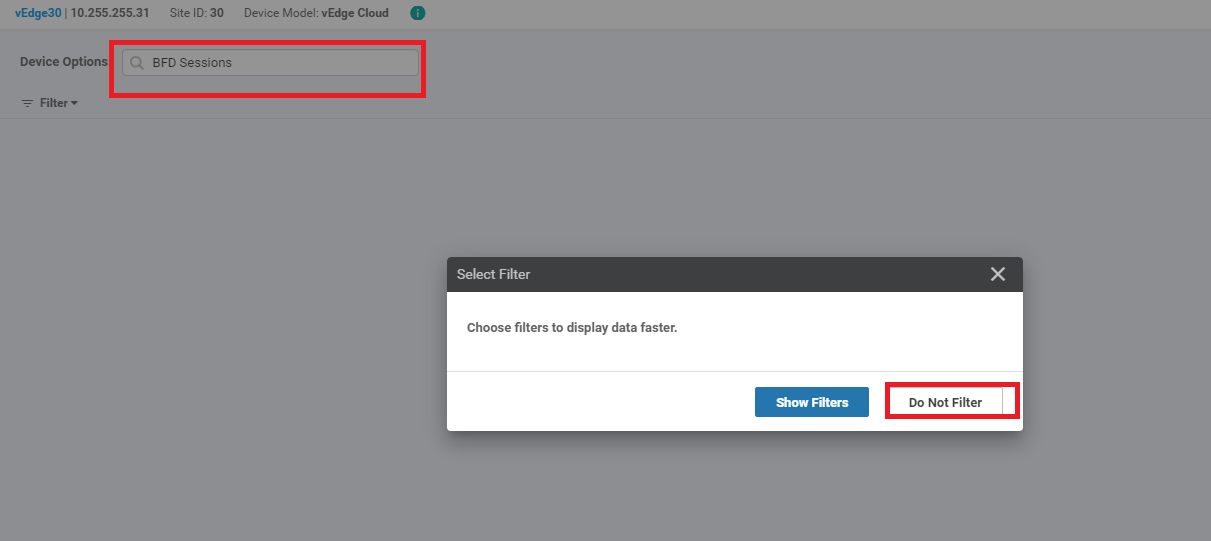
To see the BFD sessions, we can also go to Monitor => Network, click on vEdge30. Choose Real-Time from the left hand side and put BFD Sessions in the Device Options. Choose Do Not Filter
-
We will see the same information as what was visible on the CLI in Step 8. Note that Site40 is missing from this list. That is because we haven’t added the MPLS configuration to Site 40 yet. This will be done in the next section.
-
Navigate to Configuration => Devices and you will see that all devices are now in vManage mode
This completes our Configuration for bringing Site 30 under the control of vManage.

