- Editing Templates to support VRRP
- Verification and Testing
Editing Templates to support VRRP
-
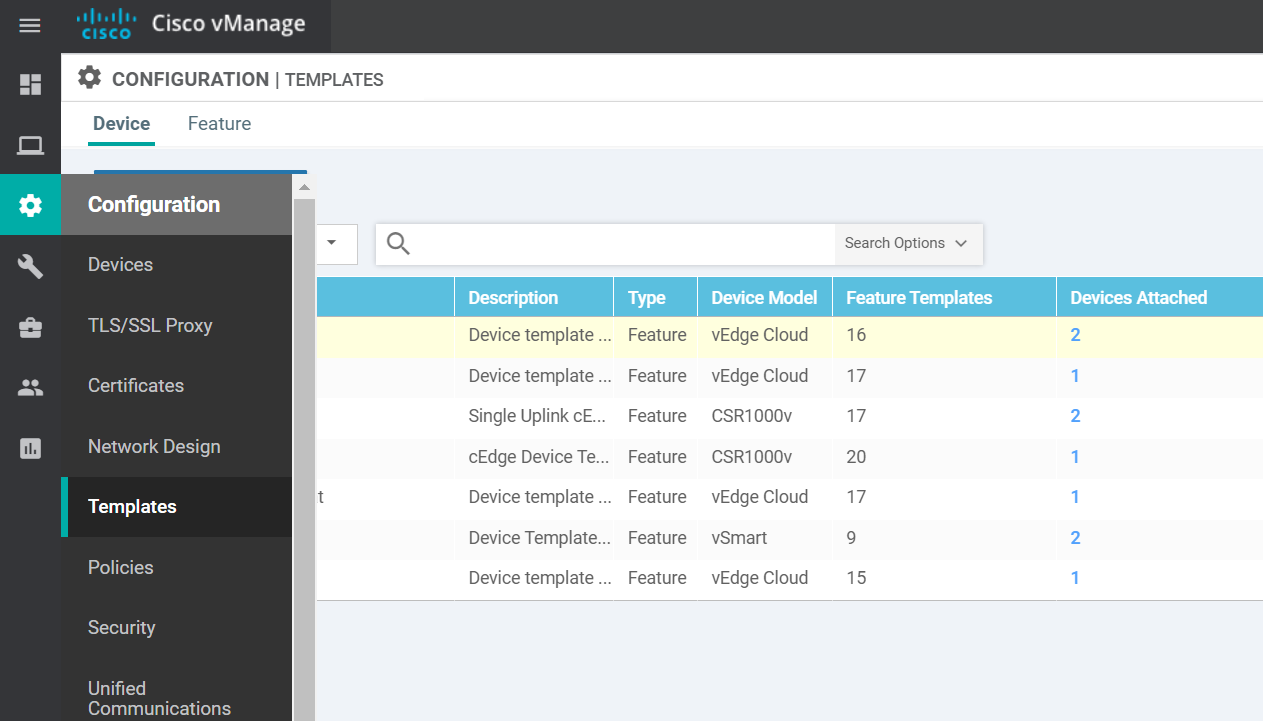
On the vManage GUI, navigate to Configuration => Templates => Feature Tab
-
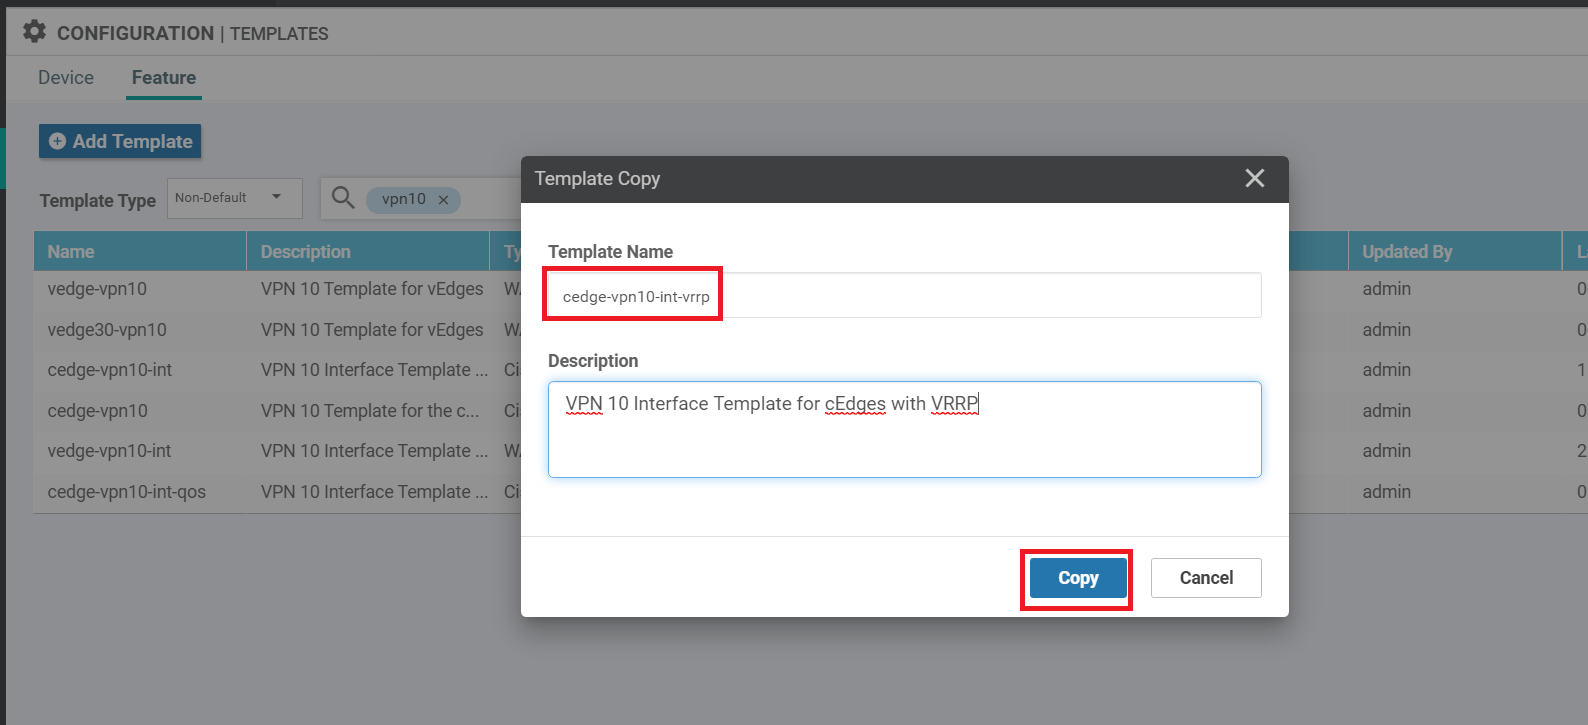
Locate the cedge-vpn10-int template and click on the three dots next to it. Choose to Copy and name the copied template cedge-vpn10-int-vrrp. Enter a Description of VPN 10 Interface Template for cEdges with VRRP. Click on Copy
-
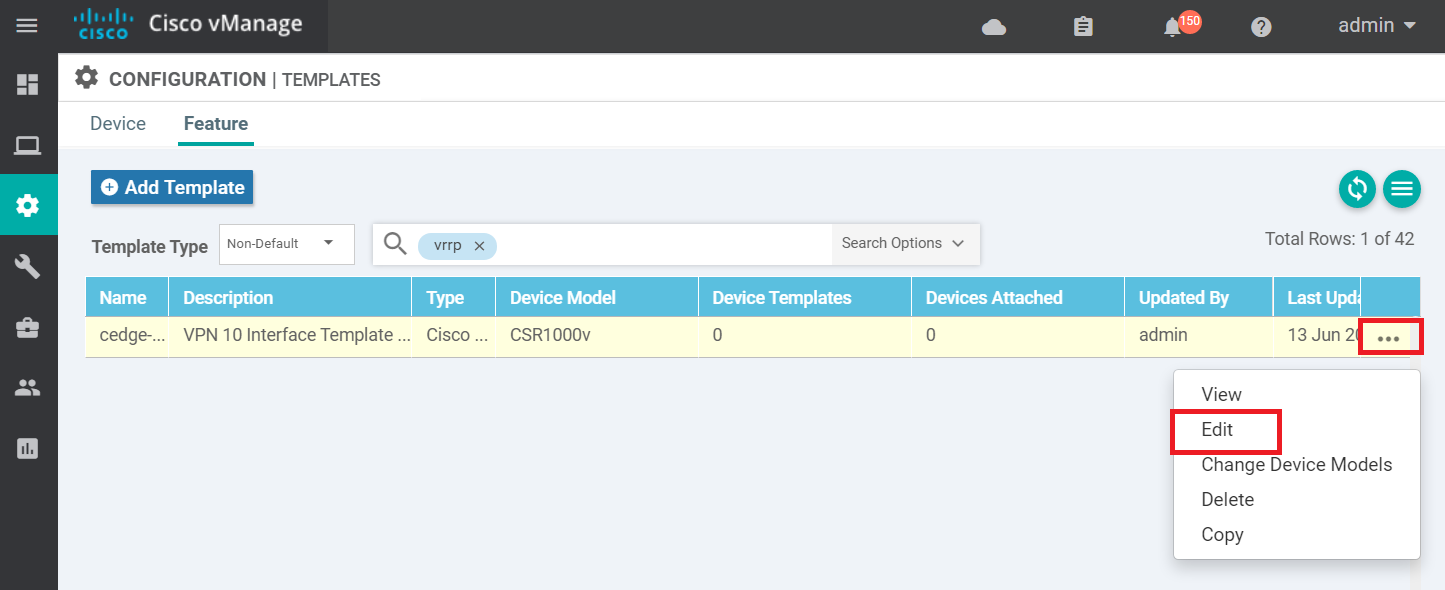
Click on the three dots next to the newly copied template and click on Edit
-
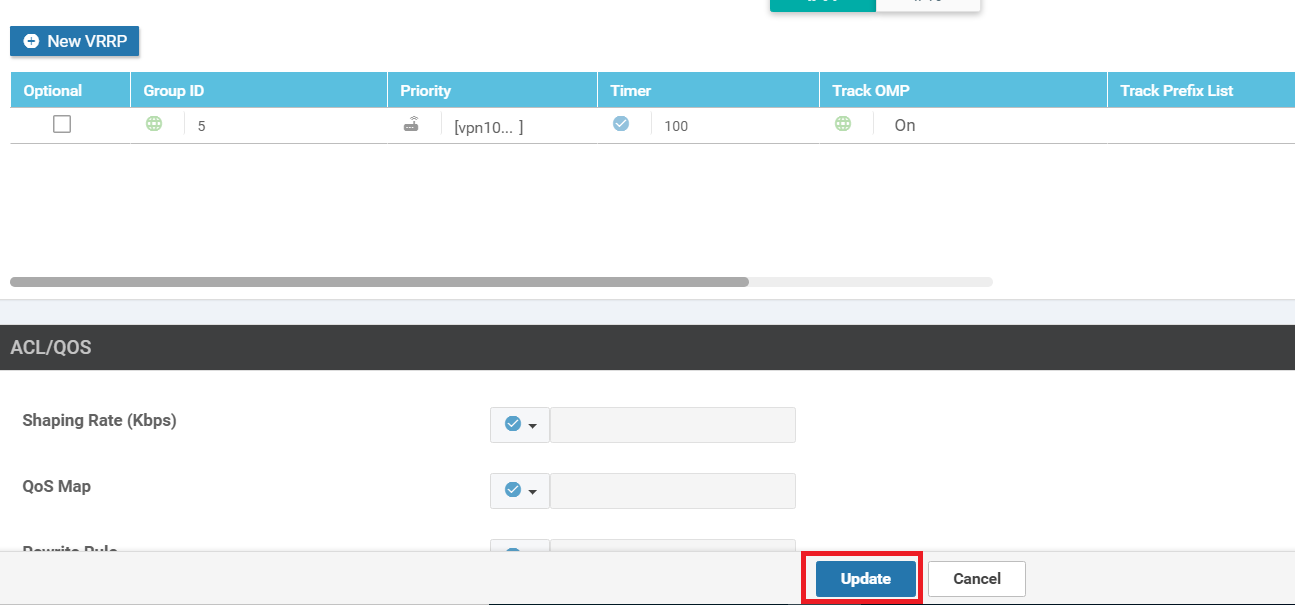
Navigate to the VRRP section and click on New VRRP. Update the parameters as shown in the table below, using the image for reference. click on Add
Field Global or Device Specific (Drop Down) Value Group ID Global 5 Priority Device Specific vpn10_if_vrrp_priority Track OMP Global On IP Address Global 10.50.10.100 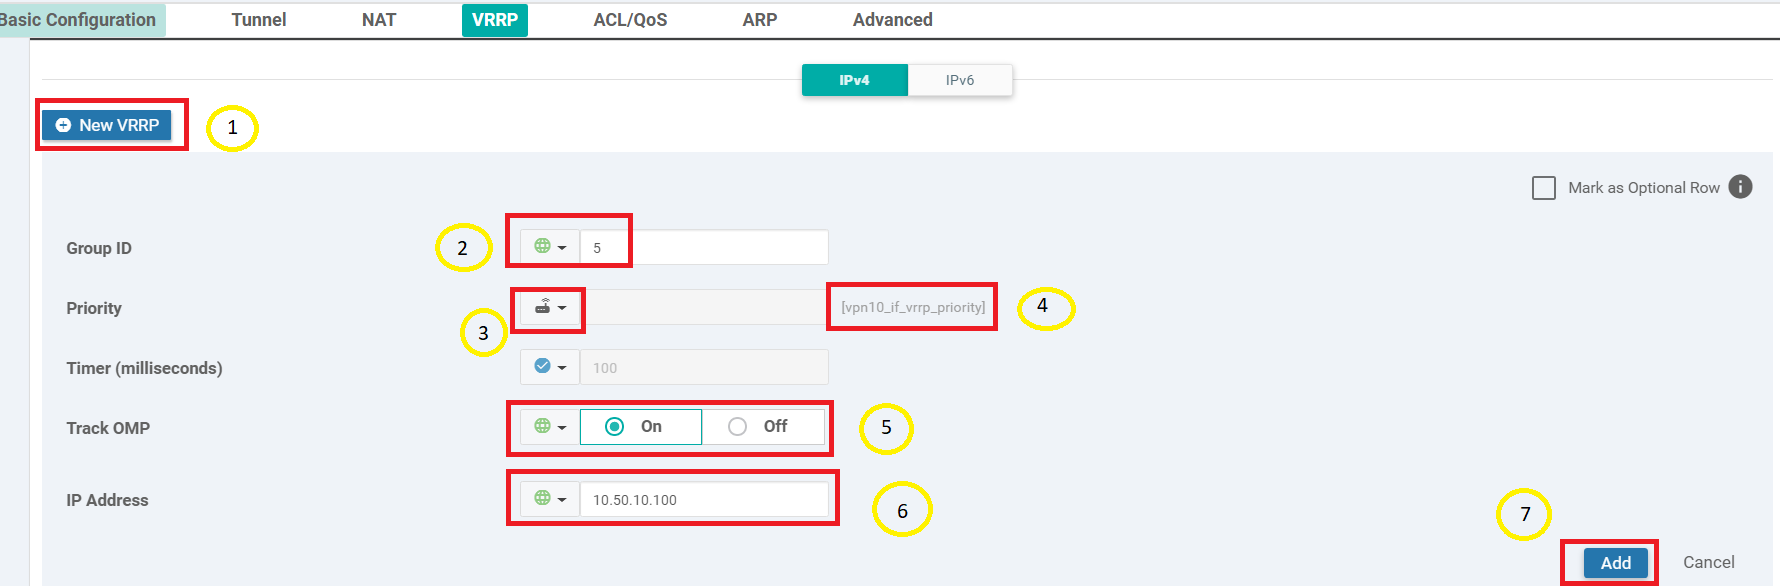
-
Click on Update
-
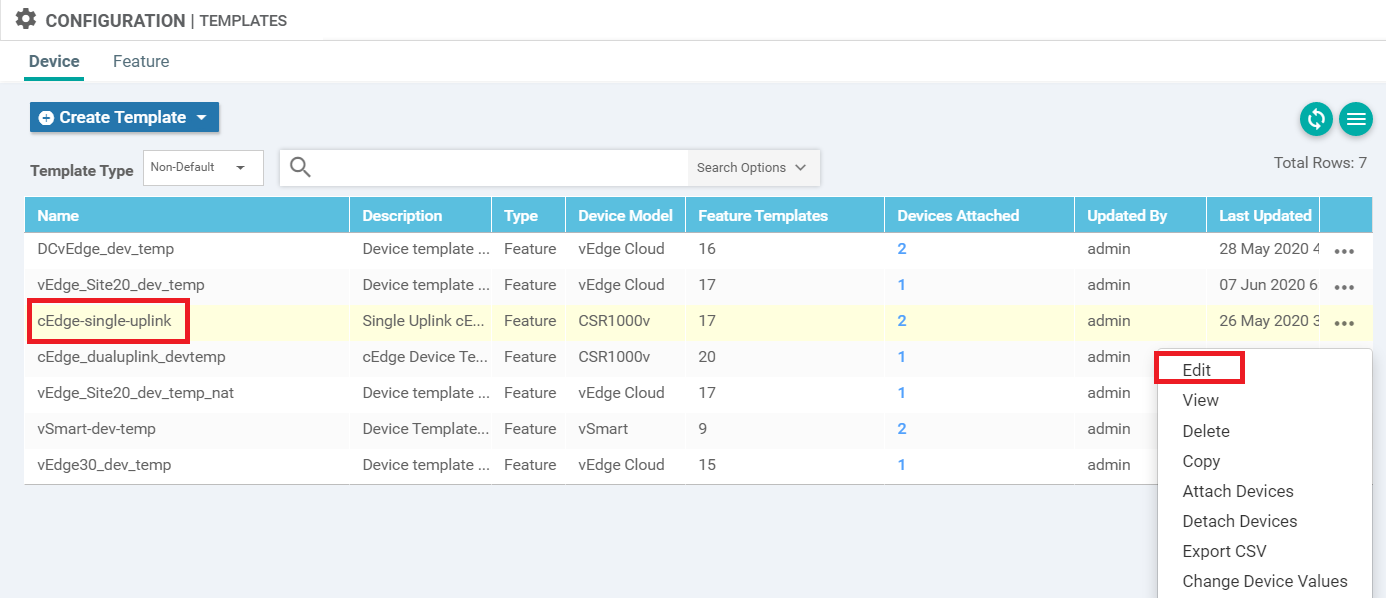
Go to the Device tab in Configuration => Templates and locate the cEdge-single-uplink Device Template. Click on the three dots next to it and click Edit
-
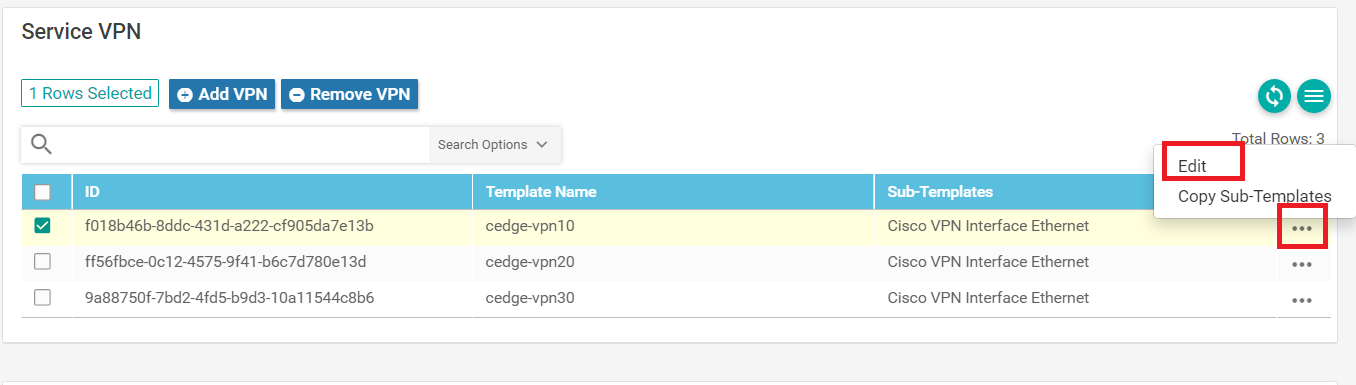
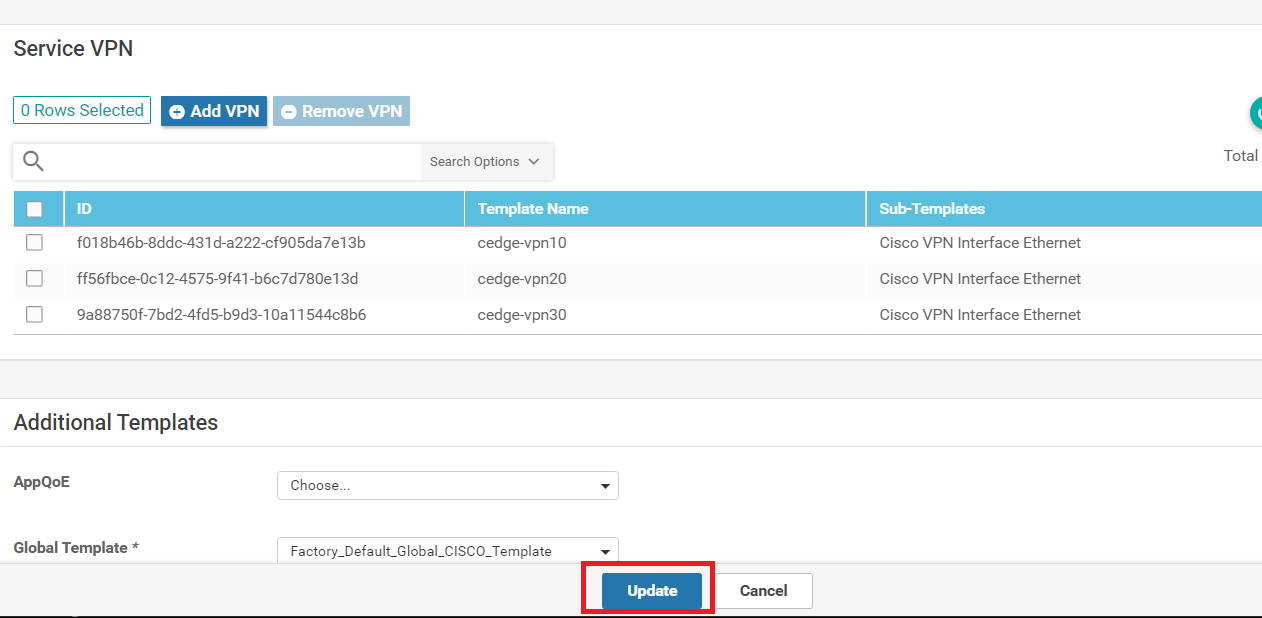
Scroll down to the Service VPN section and click on the three dots next to cedge-vpn10. Choose to Edit
-
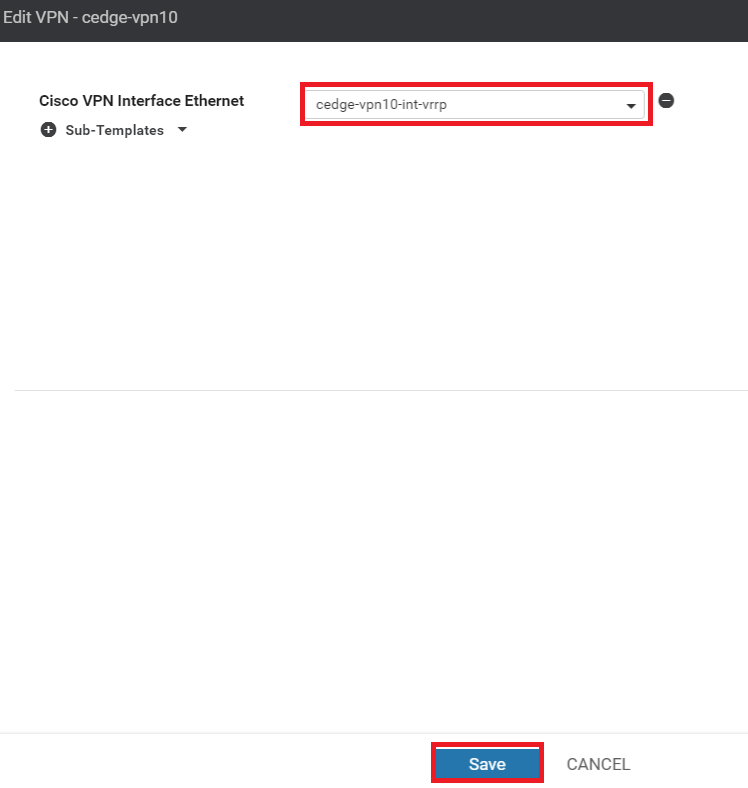
Populate cedge-vpn10-int-vrrp for the Cisco VPN Interface Ethernet and click on Save
-
Back at the main Device Template screen, click on Update
-
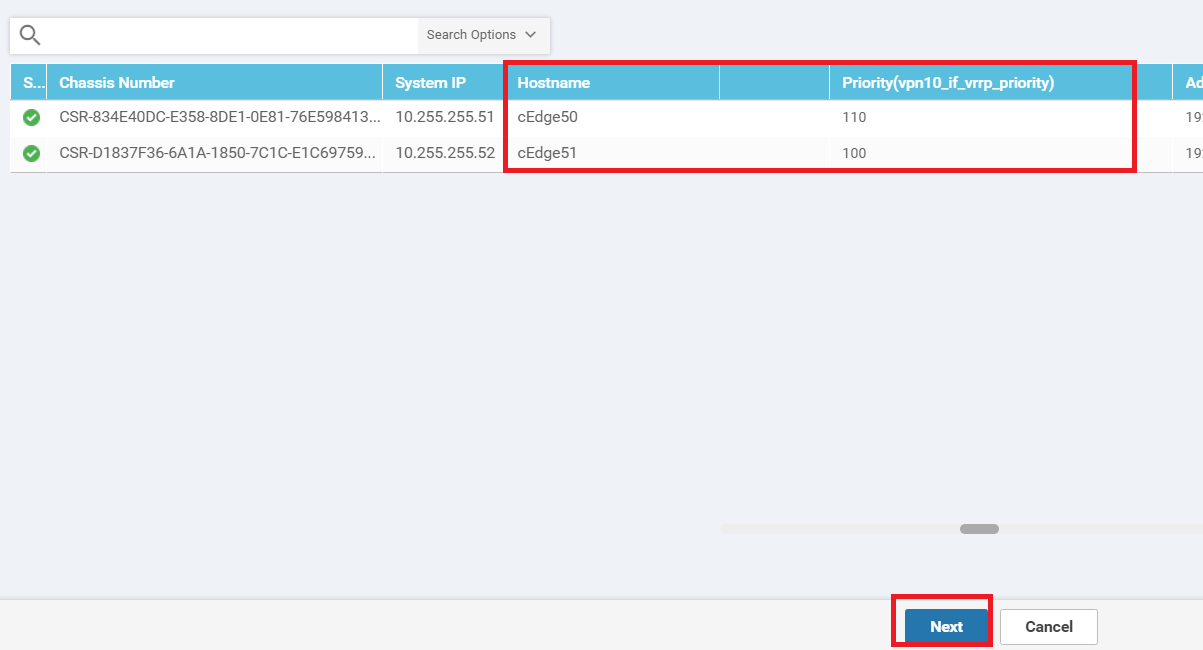
Enter a Priority of 110 for cEdge50 and a priority of 100 for cEdge51. This will ensure that cEdge50 becomes the MASTER, if available. Click on Next
-
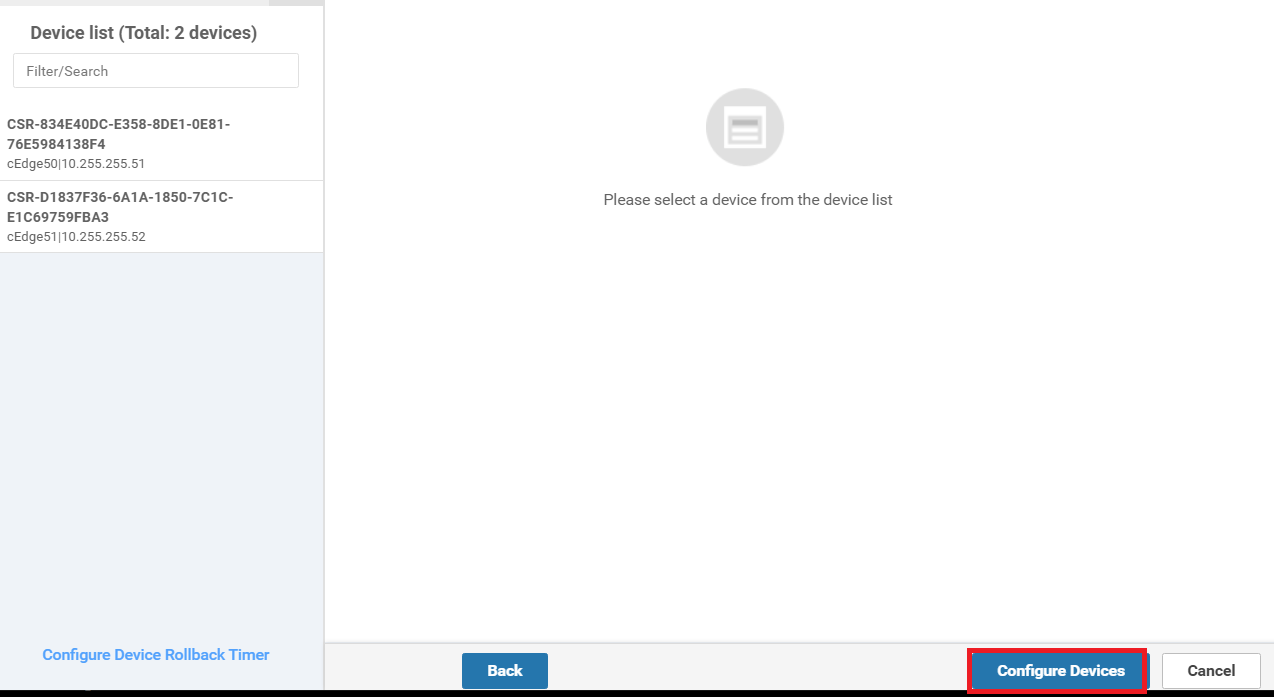
Click on Configure Devices
-
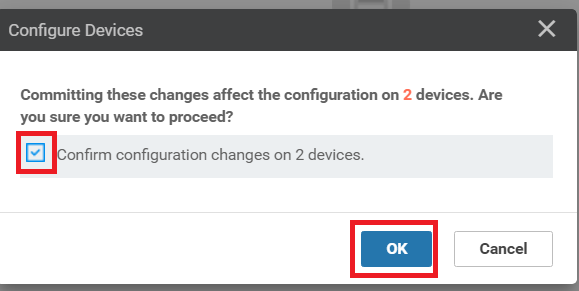
Confirm the configuration change and click on OK
-
Once the configuration change goes through, log in to the CLI of cEdge50 and cEdge51 via Putty and enter the command
show vrrp 5 Gig3on both. We should see that cEdge50 is the MASTER and cEdge51 is the BACKUP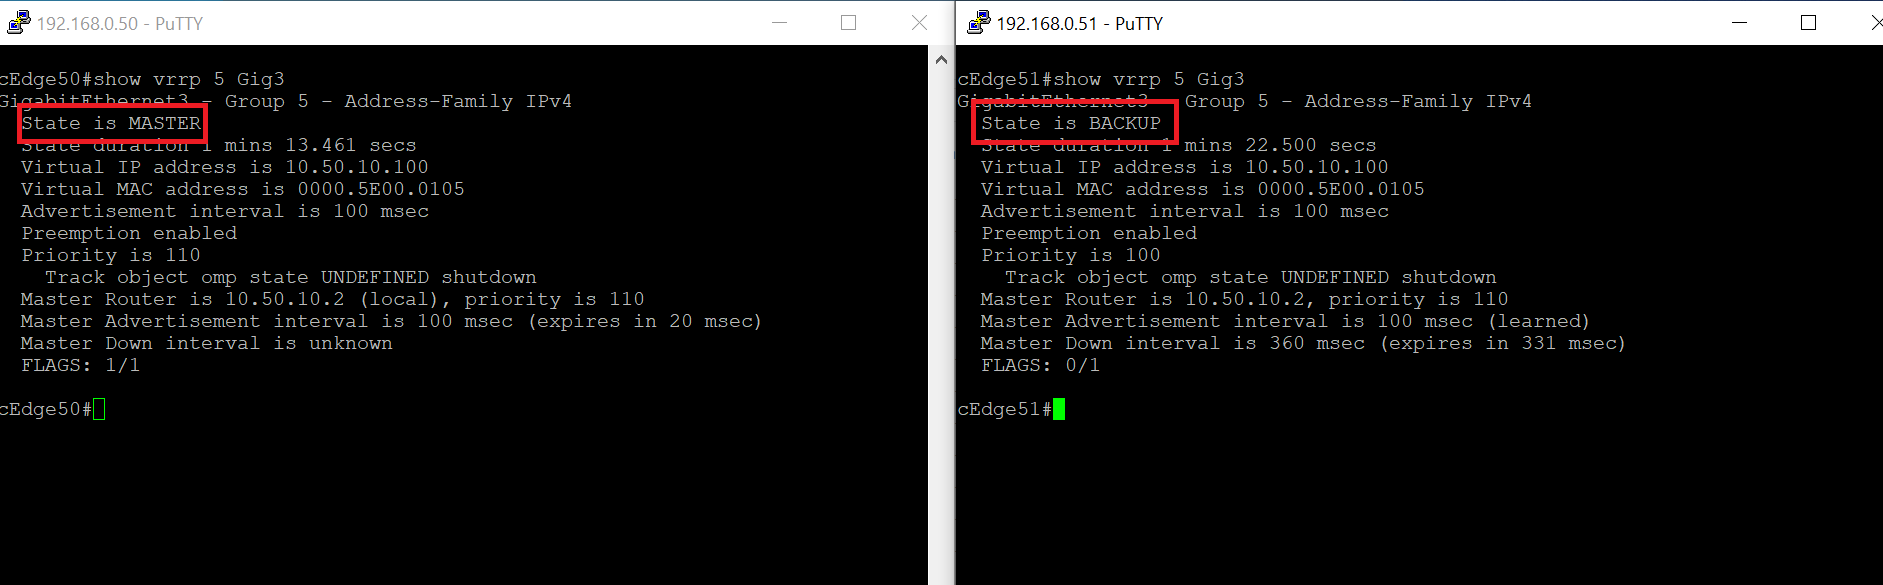
Verification and Testing
-
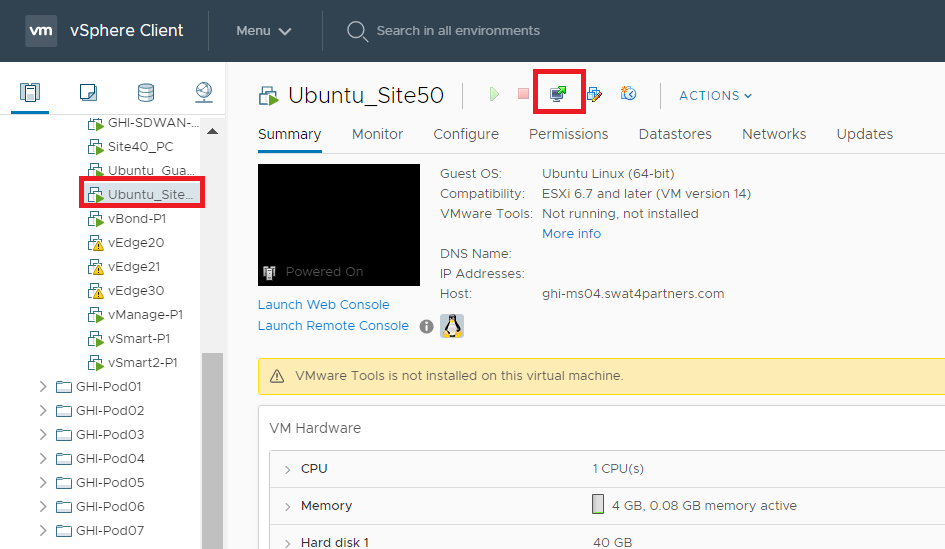
Log in to vCenter via the Bookmark in Chrome (or go to the URL 10.2.1.50/ui if connected to the GHI DC and 10.1.1.50/ui if connected to the SJC DC). Use the credentials provided to you for your POD. Locate the sdwan-sjc/ghi-site50pc-podX VM (in the image it is named Ubuntu_Site50) and click on the Console icon. Choose Web Console, if prompted
-
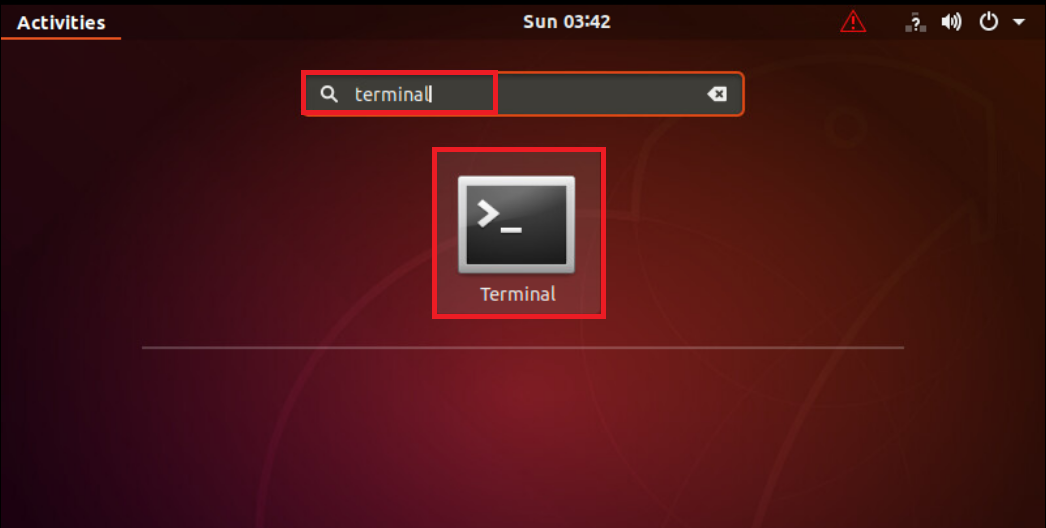
Log in to the Site50 PC (if the VM hangs after entering the credentials, please reboot the VM for your POD and try again) and click on the Start button equivalent on Ubuntu. Search for terminal and click on the icon to open Terminal
-
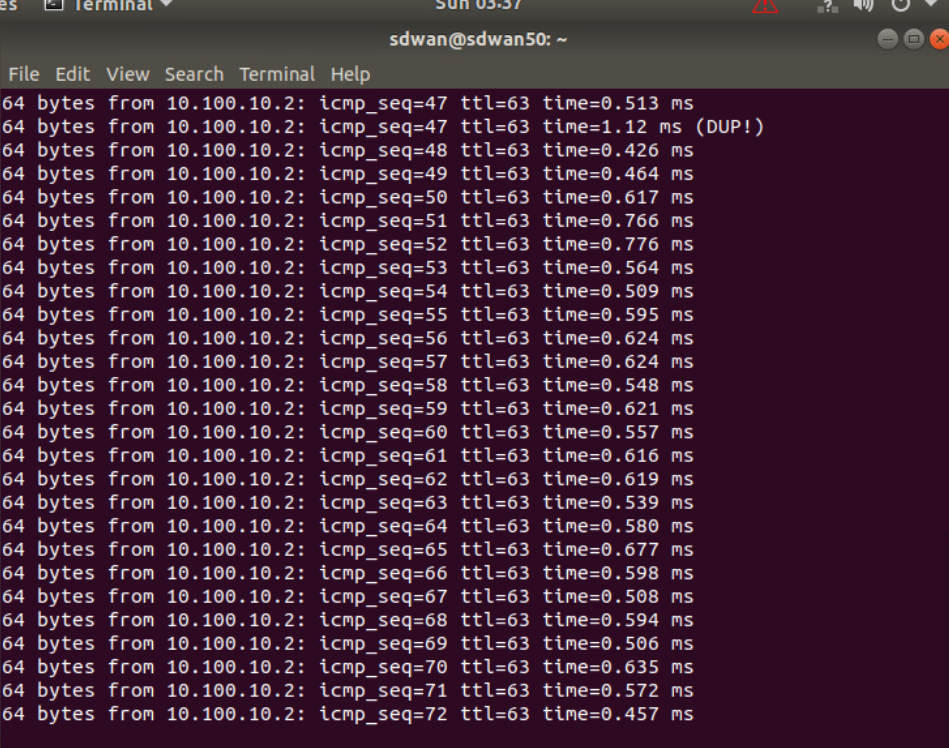
Enter
ping 10.100.10.2. The pings should be successful. Let the pings run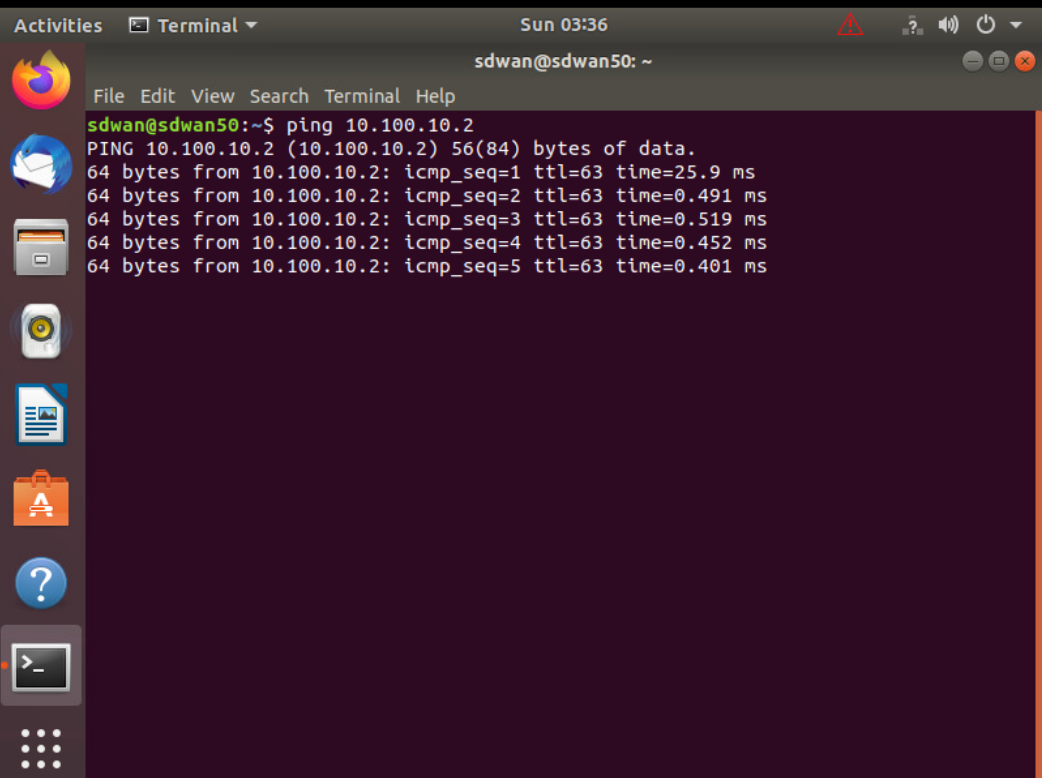
-
Back at the CLI for cEdge50, enter the commands to reload this Router. In privilege mode, type
reloadand confirm. You will notice Duplicate (DUP!) ping packets on the Terminal screen. This is happening since there is a short while when both Routers respond to the pings (since we’ve done a soft reboot of the router)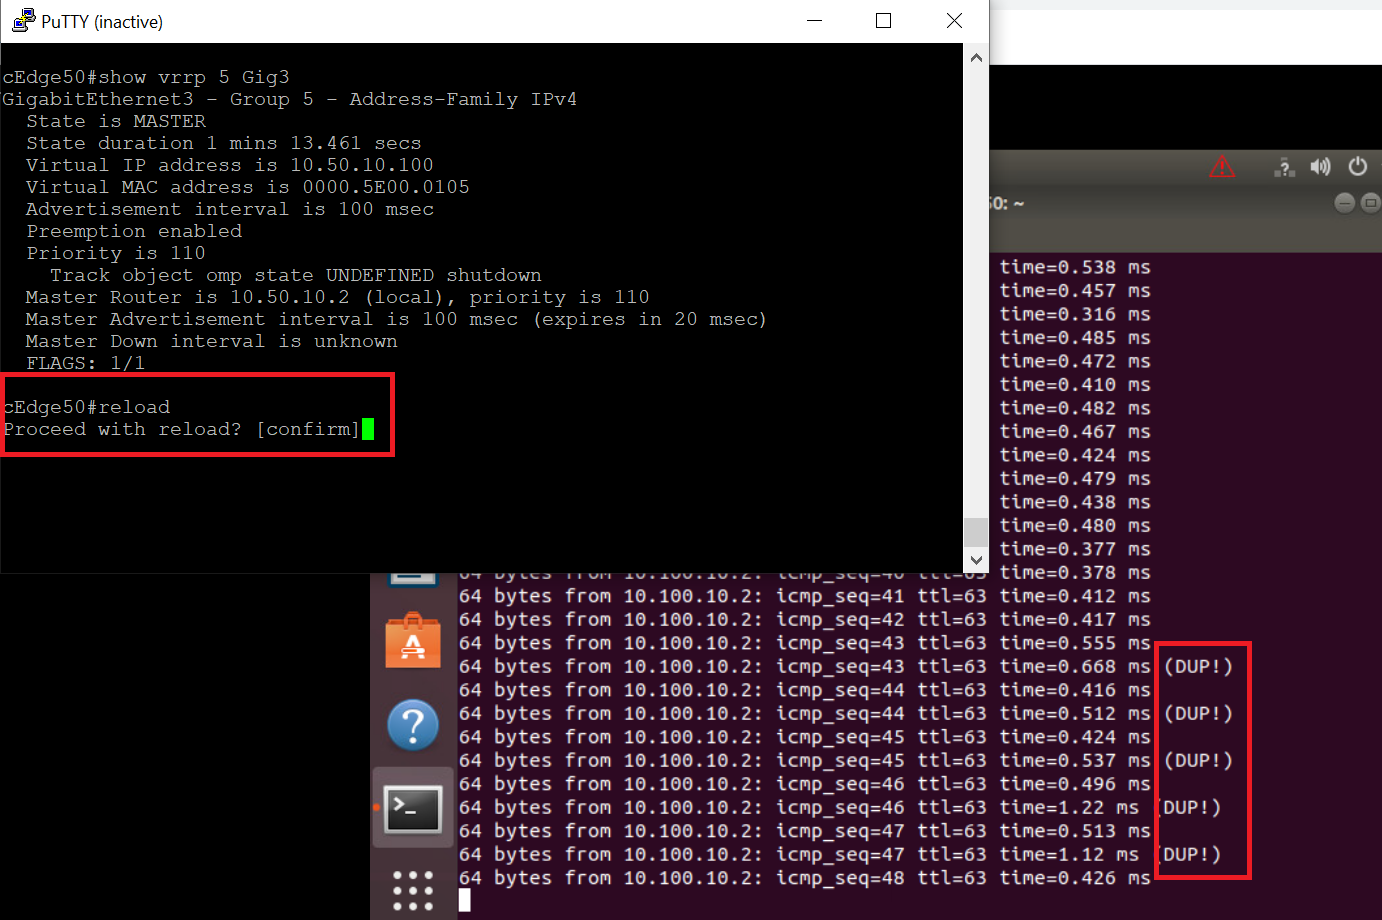
-
After a few seconds, the pings should stabilise and we’ll receive a response from just cEdge51
-
Issue
show vrrp 5 Gig3on the CLI of cEdge51 and you will notice that it is now the MASTER. Also, the priority of cEdge51 has been set to 100 - this will play a role once cEdge50 comes up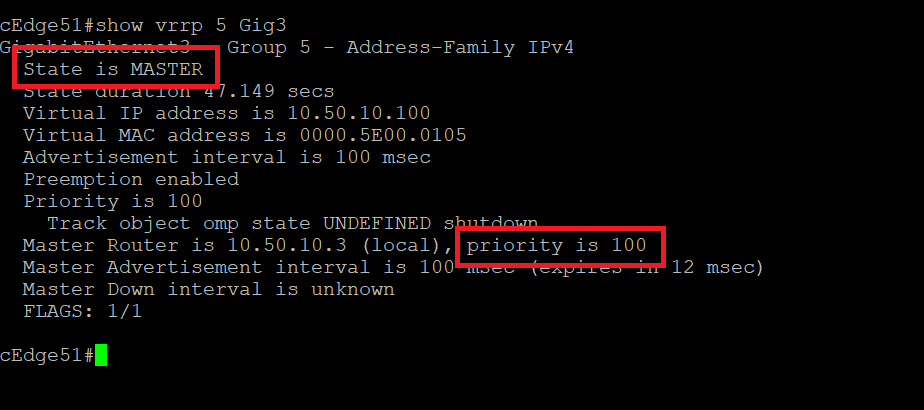
-
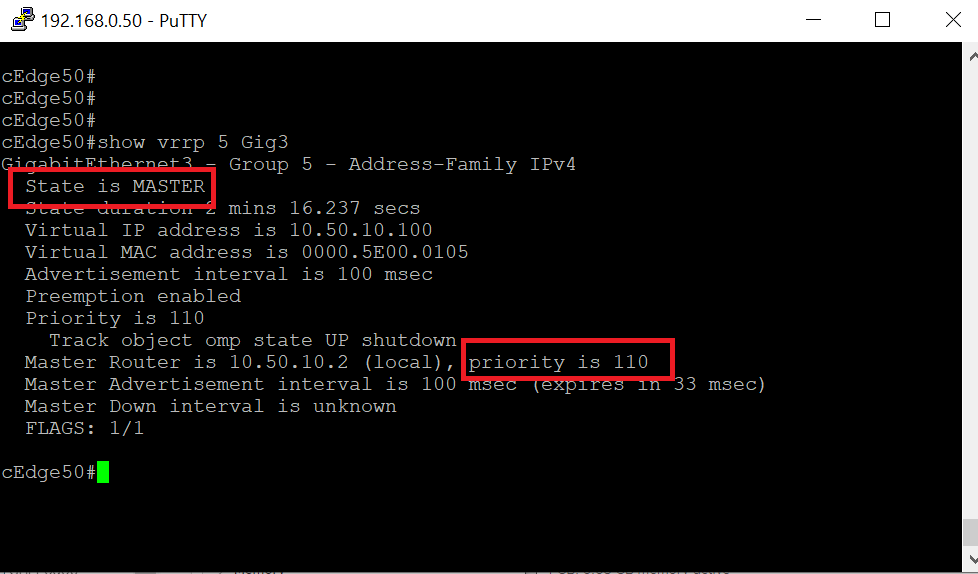
Wait for cEdge50 to come up (approx. 5 minutes). Once you’re able to SSH to it, issue
show vrrp 5 Gig3- you will notice it has taken the role of MASTER (look at the priority - it’s 110, meaning cEdge50 will always be the MASTER if available). Had we left both the devices at the default priority of 100, cEdge51 would have continued being the MASTER even after cEdge50 came back up.Changing the priority of cEdge50 to a higher value and forcing it to be the MASTER might cause issues since it’s possible that the LAN/VRRP side of the Router comes up post a reboot before the WAN/OMP side is ready. This might lead to a few dropped packets
Thus, we have set up a First Hop Redundancy Protocol at Site 50. This completes our Verification and Testing.